Classic Canadian Butter Tarts Recipe: Sweet & Simple Treat
Sweet memories of grandma’s kitchen come flooding back with these classic Canadian butter tarts that dance between gooey and crisp.
Maple-scented whispers echo through generations of home cooks perfecting this beloved dessert.
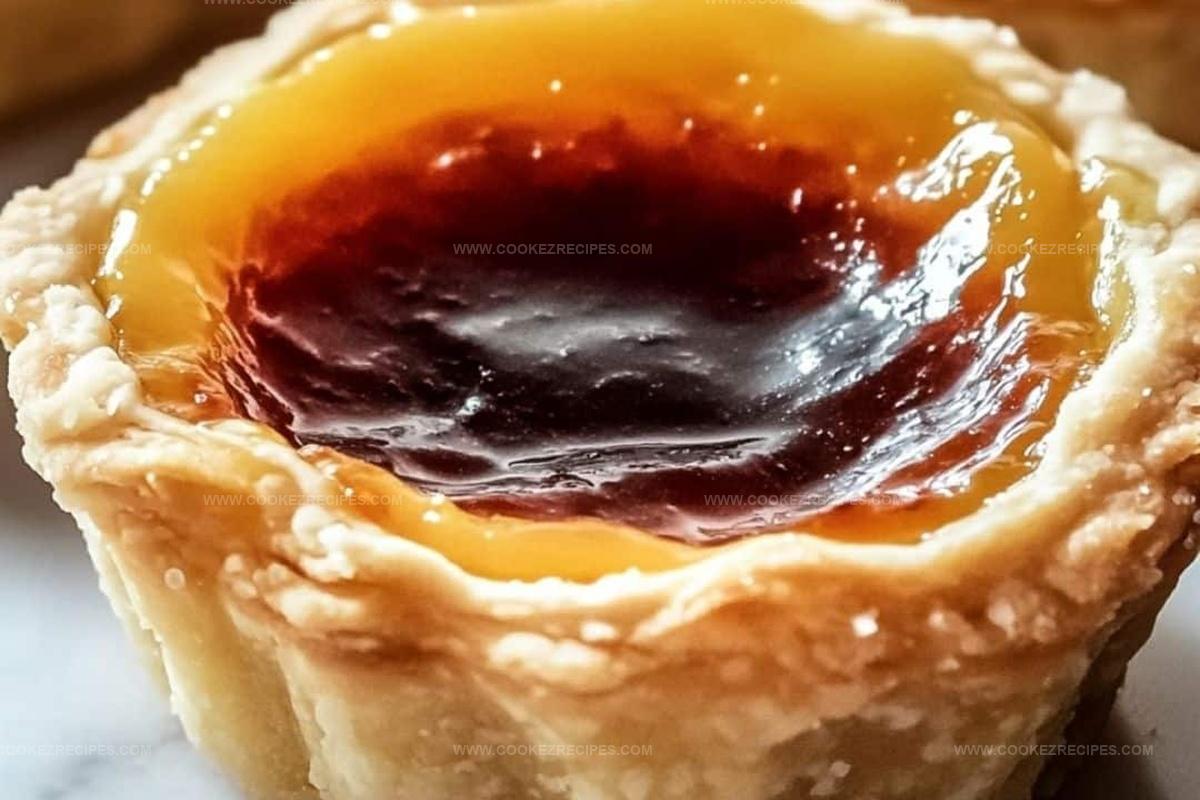
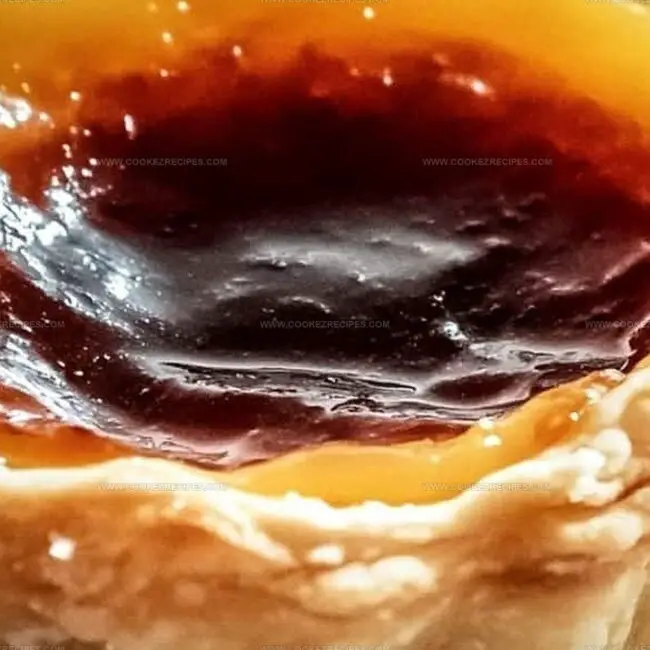
Crisp pastry shells cradle a rich, caramelized filling that melts softly on your tongue.
Generations of Canadian families have treasured this simple yet magical treat passed down through cherished recipe cards.
Rustic and comforting, these tarts speak to the heart of traditional Canadian baking.
Warm ovens and sweet anticipation await as you embark on creating this iconic dessert that promises pure deliciousness.
Prepare to fall in love with a taste of Canadian culinary heritage.
Classic Canadian Butter Tarts Offer Gooey, Buttery Perfection
Quick Kitchen Magic: Effortless Butter Tart Creation
Canadian Butter Tarts Ingredient Set
Pastry Base:Filling Ingredients:Optional Add-Ins:Canadian Butter Tarts Classic Baking Tips

Step 1: Create Flaky Pastry Dough
Blend flour and salt in a large mixing bowl.
Use a pastry cutter or cold butter knife to slice cold butter into the flour mixture until it looks like rough breadcrumbs.
Slowly pour in ice water, gently mixing until the dough forms a cohesive ball.
Shape the dough into a flat disk, wrap securely with plastic wrap, and refrigerate for half an hour to firm up.
Step 2: Roll and Mold Pastry Shells
Dust a clean countertop with flour.
Roll out the chilled dough to a thin, even layer.
Use a round cookie cutter or drinking glass to cut perfect circles.
Carefully press each pastry circle into a greased muffin tin, ensuring even coverage.
Return the prepared tin to the refrigerator while preparing the filling.
Step 3: Craft Decadent Butter Tart Filling
Whisk together these ingredients until silky smooth:Optional mix-ins:Step 4: Bake Golden Butter Tarts
Preheat the oven to 375°F.
Fill each pastry shell two-thirds full with the prepared mixture.
Bake for 18-22 minutes until the edges turn golden brown and the centers look slightly jiggly but set.
Step 5: Cool and Serve Delightful Tarts
Allow the tarts to rest in the pan for a few minutes.
Carefully transfer to a wire cooling rack.
Serve warm or at room temperature for the most authentic Canadian experience.
Smart Baking Advice for Classic Canadian Butter Tarts
Tips for Canadian Butter Tarts Storage
Butter Tarts Pair Beautifully With These
Butter Tart Styles Made Easy
FAQs
Canadian butter tarts are uniquely sweet with a gooey, runny filling that’s distinctly different from traditional European-style tarts. They’re a beloved Canadian dessert with a rich, sugary center that can be either firm or liquid.
Yes, you can substitute corn syrup with maple syrup, which is actually more traditional in Canadian cuisine. The maple syrup will give a slightly different flavor but maintain the classic sweetness and texture of the tart.
A standard muffin tin works perfectly for butter tarts. No specialized equipment is required, making them relatively easy for home bakers to prepare. Just ensure you have basic baking tools like a rolling pin and mixing bowls.
Raisins and pecans are the most traditional add-ins. Some bakers prefer one or the other, while others might include both. These ingredients add texture and extra flavor to the sweet, buttery filling.
Print
Best Classic Canadian Butter Tarts Recipe
- Total Time: 40 minutes
- Yield: 12 1x
Description
Sweet Canadian tradition shines through these butter tarts, blending rich buttery pastry with a caramel-like filling that dances between crisp and gooey. Maple-kissed and irresistibly delicious, you’ll savor each bite of this beloved national dessert.
Ingredients
Main Ingredients:
- 2 cups all-purpose flour
- 1 cup unsalted butter, cold and cubed
- 1 cup brown sugar
- 2 large eggs
- 1/2 cup corn syrup (or maple syrup)
Pastry Components:
- 1/2 teaspoon salt
- 1/4 cup ice water
- 1/2 cup unsalted butter, melted
Flavor Enhancers:
- 1 teaspoon vanilla extract
- 1/4 teaspoon salt
- 1/2 cup raisins or chopped pecans (optional)
Instructions
- Craft a tender, flaky pastry by combining flour and salt, then methodically incorporate cold butter until the texture mimics coarse, crumbly terrain. Gradually introduce ice water, gently binding the mixture into a cohesive dough.
- Shape the dough into a compact disk, envelop in plastic wrap, and refrigerate for half an hour to allow the gluten to relax and butter to solidify.
- On a generously floured surface, roll the chilled dough to an even thickness. Use a circular cutter to create precise pastry shells that perfectly nestle into muffin tin cavities.
- Delicately press the pastry circles into each cup, ensuring smooth, even coverage. Return the prepared tin to the refrigerator while constructing the filling.
- Create a luxurious filling by whisking melted butter with brown sugar, creating a rich, caramel-like base. Introduce corn syrup or maple syrup for depth of sweetness.
- Integrate eggs, vanilla extract, and a pinch of salt into the mixture, stirring until completely homogeneous. Fold in raisins or pecans for added texture and complexity.
- Preheat the oven to 375°F (190°C), establishing the ideal environment for transforming raw ingredients into golden, bubbling tarts.
- Fill each pastry shell approximately two-thirds full, allowing room for the filling to expand and caramelize during baking.
- Bake for 18-22 minutes, watching for golden-brown edges and slightly wobbling centers – the hallmark of perfectly executed butter tarts.
- Allow the tarts to rest in the pan momentarily, then carefully transfer to a wire rack. Serve warm to showcase their gooey, decadent interior, or enjoy at room temperature for a classic Canadian treat.
Notes
- Achieve flaky pastry by keeping ingredients ice-cold and handling dough minimally to prevent gluten development.
- Prevent soggy bottoms by preheating the muffin tin and using a light dusting of flour before placing pastry shells.
- Customize filling texture by adjusting corn syrup amount: more for gooier center, less for firmer consistency.
- Accommodate dietary needs with gluten-free flour blend or substitute maple syrup for corn syrup in filling for natural sweetness.
- Prep Time: 20 minutes
- Cook Time: 20 minutes
- Category: Desserts
- Method: Baking
- Cuisine: Canadian
Nutrition
- Serving Size: 12
- Calories: 289
- Sugar: 22 g
- Sodium: 120 mg
- Fat: 17 g
- Saturated Fat: 10 g
- Unsaturated Fat: 5 g
- Trans Fat: 0 g
- Carbohydrates: 31 g
- Fiber: 1 g
- Protein: 3 g
- Cholesterol: 62 mg
Katherine Pierce
Recipe Curator & Food Educator
Expertise
Education
Boston University Metropolitan College
Certificate Program in the Culinary Arts
Focus: French and international cuisine techniques, Hands-on culinary training with industry professionals, Food industry insights and operations
Katherine grew up believing every dish has a story. She studied the art of food at Boston University and explored the history behind it. She loves pulling easy recipes from every corner of the world and putting them at your fingertips.
When Katherine’s not writing or testing new flavors, she’s teaching cooking classes, baking colorful mooncakes, or dreaming up new ways to mix old favorites with new twists.