Fluffy Bunny Buns for Easter Recipe: A Charming Holiday Treat
Soft, fluffy bunny buns hop into your Easter celebration with playful charm.
Marshmallow ears and chocolate chip eyes make these treats irresistibly cute.
Sweet dough becomes a canvas for adorable bunny-shaped delights that sparkle with childhood memories.
Families gather around the kitchen, whispering and giggling as they shape each delicate creature.
Kneading and rolling become a delightful adventure of creativity and love.
Your little helpers will squeal with joy as cottontail shapes emerge from the oven.
These bunny buns promise to be the most magical centerpiece of your holiday table.
Bunny Buns Make Easter Extra Adorable
Bunny Buns for Easter Ingredient List
Yeast and Liquid Base:Dry Ingredients:Fat and Binding Ingredients:Optional Decorative Ingredients:Easter Bunny Buns Baking Guide
Step 1: Awaken the Yeast
Grab your warm milk and sprinkle sugar into it.
Gently dust yeast over the liquid and let it sit peacefully.
Watch as tiny bubbles start to dance and foam develops, signaling your yeast is ready for action.
Step 2: Create the Dough Base
In a spacious mixing bowl, combine:Pour in the bubbly yeast mixture, followed by:Stir everything together until a soft, pillowy dough emerges.
Step 3: Knead with Love
Transfer your dough onto a lightly floured surface.
Using the heel of your hand, push and fold the dough repeatedly.
Continue kneading for about 8 minutes until the texture becomes smooth and stretchy.
Step 4: First Magical Rise
Coat a large bowl with vegetable oil.
Nestle your dough inside and drape a clean kitchen towel over it.
Find a cozy, warm spot in your kitchen and let the dough rest and expand for approximately one hour.
Step 5: Shape Playful Bunny Friends
Gently deflate the risen dough and divide it into 12 equal portions.
Roll each piece into an oval shape representing a bunny body.
Using kitchen scissors, carefully snip two small ears at the top.
Add personality by pressing:as adorable bunny eyes.
Step 6: Second Rise
Arrange your bunny-shaped dough on a lined baking sheet.
Cover loosely and allow them to puff up for another 30 minutes.
Step 7: Prepare and Bake
Preheat your oven to 350°F.
Lovingly brush each bunny with egg wash.
Slide the baking sheet into the oven and bake until they turn a gorgeous golden brown, about 15-18 minutes.
Step 8: Serve with Joy
Transfer your cute bunny buns to a wire rack.
Let them cool slightly.
Serve warm with:Enjoy your delightful Easter treat!
Easter Baking Tips for Cute Bunny Buns
Easter Bunny Buns Storage Ideas
Sweet Matches for Bunny Buns
Crafting Perfect Pairings for Bunny Buns
Bunny Buns with Holiday Mix-Ins
FAQs
They add a cute and playful touch to make the bunny buns look more realistic and adorable, giving each bun a unique character and expression.
It’s quite simple – just gently snip two small V-shaped cuts at the top of each dough piece to create ears. Even beginners can easily achieve this cute bunny shape with a little practice.
Absolutely! Kids can help with mixing ingredients, kneading dough, and especially creating the bunny shapes. It’s a fun family activity that teaches baking skills and creates delightful Easter memories.
The two rising periods allow the yeast to develop, creating a light, airy texture. Kneading the dough thoroughly and using warm milk also contributes to the soft, tender bread.
Print
Bunny Buns for Easter Recipe
- Total Time: 1 hour 45 minutes
- Yield: 12 1x
Description
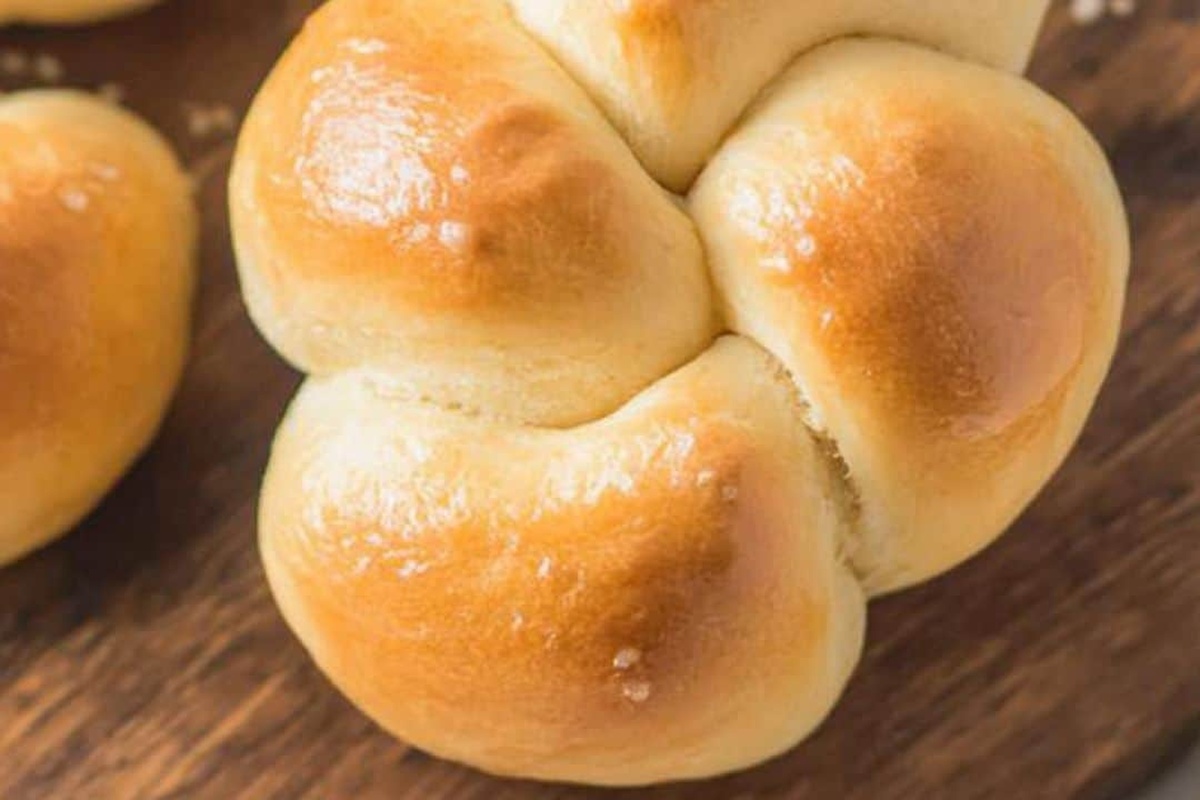
Delightful “bunny buns” bring springtime cheer to Easter tables with adorable rabbit-shaped pastries. Sweet dough crafted into whimsical shapes promises a playful treat you’ll savor with family and friends.
Ingredients
Bunny Buns for Easter
Main Ingredients:
- 3 1/2 cups (875 milliliters) all-purpose flour
- 1 egg
- 3/4 cup (180 milliliters) warm milk
- 1/4 cup (60 milliliters) unsalted butter, melted
Leavening and Sweetening Ingredients:
- 2 1/4 teaspoons (1 packet) active dry yeast
- 1/4 cup (50 grams) granulated sugar
- 1 teaspoon salt
Finishing and Decoration Ingredients:
- 1 teaspoon vanilla extract
- 1 tablespoon vegetable oil
- 1 egg yolk
- 1 tablespoon milk
- Black sesame seeds or mini chocolate chips
Instructions
- Awaken the yeast by gently stirring warm milk with sugar, then sprinkle yeast across the surface. Allow the mixture to transform and become frothy for 5-10 minutes.
- Craft the dough foundation by combining flour and salt in a spacious mixing vessel. Introduce the activated yeast, luxurious melted butter, whisked egg, and fragrant vanilla extract. Blend ingredients until a cohesive dough emerges.
- Transfer the nascent dough onto a flour-dusted work surface. Knead rhythmically for approximately 8 minutes, developing a smooth, resilient texture that springs back when touched.
- Anoint a generous bowl with vegetable oil, nestle the dough inside, and drape with a pristine cloth. Position in a nurturing warm environment to expand and rise, approximately one hour, until volume doubles.
- Deconstruct the risen dough into 12 symmetrical portions. Mold each segment into an elongated oval representing the bunny’s body. Utilize kitchen scissors to delicately carve distinctive ear shapes at the top. Strategically embed sesame seeds or chocolate chips as charming eye accents.
- Arrange the whimsical bunny shapes onto a parchment-lined baking sheet. Loosely cover and permit a secondary rising period of 30 minutes.
- Ignite the oven to 350°F (175°C). Tenderly brush each bunny with egg wash, ensuring a lustrous golden finish. Bake until the surfaces transform into a rich, amber hue, roughly 15-18 minutes.
- Liberate the baked bunnies onto a wire cooling rack. Serve slightly warm, accompanied by lavish spreads like butter, fruity jam, or golden honey.
Notes
- Always use fresh, active dry yeast to ensure the buns rise properly and develop a soft, fluffy texture.
- Warm milk should be around 110°F (43°C) – too hot will kill the yeast, too cold won’t activate it.
- Knead the dough thoroughly to develop gluten, creating a stretchy and smooth bunny-shaped bun.
- For gluten-free variation, substitute all-purpose flour with a gluten-free blend and add xanthan gum for better structure.
- Create cute variations by adding food coloring to the dough or using different toppings like colored sprinkles or edible flowers.
- Brush buns with honey or maple syrup instead of egg wash for a vegan alternative that adds beautiful golden shine.
- Prep Time: 15 minutes
- Cook Time: 1 hour 30 minutes
- Category: Snacks, Desserts
- Method: Baking
- Cuisine: American
Nutrition
- Serving Size: 12
- Calories: 180
- Sugar: 4 g
- Sodium: 150 mg
- Fat: 6 g
- Saturated Fat: 3 g
- Unsaturated Fat: 2 g
- Trans Fat: 0 g
- Carbohydrates: 27 g
- Fiber: 1 g
- Protein: 4 g
- Cholesterol: 30 mg
Katherine Pierce
Recipe Curator & Food Educator
Expertise
Education
Boston University Metropolitan College
Certificate Program in the Culinary Arts
Focus: French and international cuisine techniques, Hands-on culinary training with industry professionals, Food industry insights and operations
Katherine grew up believing every dish has a story. She studied the art of food at Boston University and explored the history behind it. She loves pulling easy recipes from every corner of the world and putting them at your fingertips.
When Katherine’s not writing or testing new flavors, she’s teaching cooking classes, baking colorful mooncakes, or dreaming up new ways to mix old favorites with new twists.