Cozy Autumn Delight: A Rustic Pumpkin Pie Crisp Recipe
Crafting the perfect pumpkin pie crisp brings pure autumn magic right to your kitchen table.
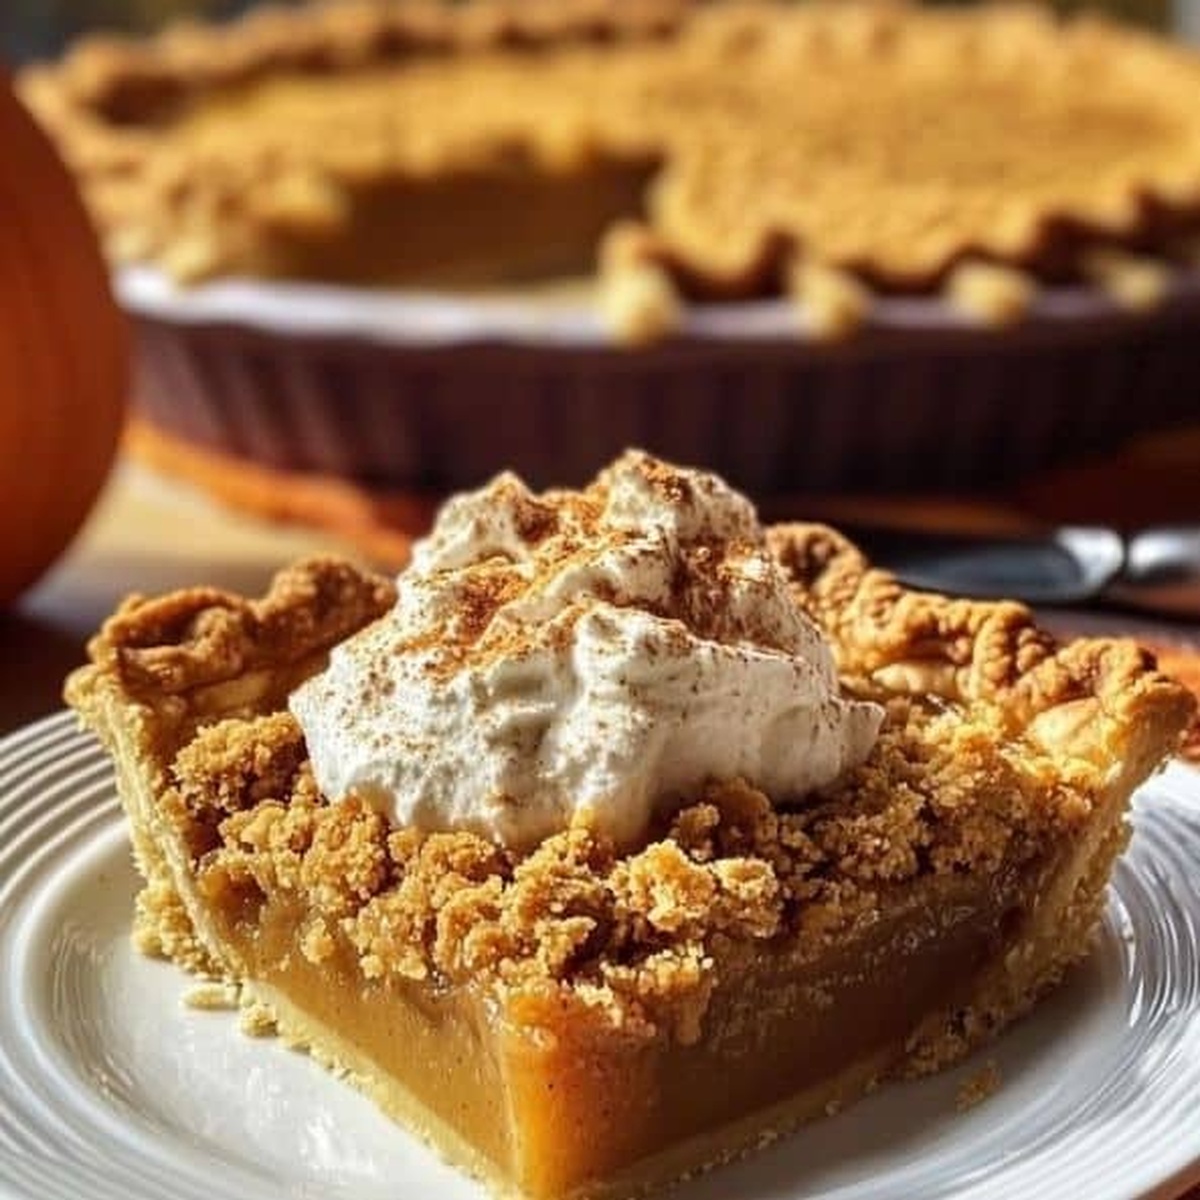
Layers of sweet, spiced filling nestle beneath a crunchy, golden topping that promises delightful textures in every bite.
Warm cinnamon and nutmeg dance through this classic dessert, creating memories of cozy gatherings and seasonal celebrations.
Comfort and nostalgia blend seamlessly in this simple yet irresistible treat.
Baking becomes an art form when you transform humble ingredients into something extraordinary.
Warm ovens and the scent of baked pumpkin will draw everyone close, eager to savor this delectable creation.
Why Pumpkin Pie Crisp Is a Classic You’ll Love

Ingredients for Traditional Pumpkin Pie Crisp
Main Ingredients:
Pumpkin Base:Spice Blend:Crisp Topping:How to Create the Perfect Pumpkin Pie Crisp
Step 1: Warm Up The Oven
Set your oven to 350F and lightly grease a 9×13-inch baking dish. Make sure the rack is positioned in the center for even heating.
Step 2: Create Luscious Pumpkin Base
Whisk together in a large mixing bowl:Blend until the mixture becomes silky smooth and free of lumps. Pour the creamy mixture into the prepared baking dish.
Step 3: Mix Crunchy Crisp Topping
In a separate bowl, combine:Pour melted butter over the dry ingredients and stir until the mixture transforms into delightful crumbly clusters.
Step 4: Layer And Bake
Sprinkle the crisp topping generously and evenly across the pumpkin filling. Slide the dish into the preheated oven and bake for 40-45 minutes. The topping should turn golden brown and the filling will set perfectly. Allow the dessert to cool slightly before serving to let the flavors meld together.
Tips to Perfect Your Pumpkin Pie Crisp Every Time
Flavorful Variations for Pumpkin Pie Crisp
Pairing Ideas That Elevate Pumpkin Pie Crisp
How to Store Pumpkin Pie Crisp for Maximum Freshness
FAQs About Pumpkin Pie Crisp Demystified
The key difference is the crunchy oat and brown sugar topping, which adds texture and a deeper caramelized flavor compared to a classic smooth pie crust.
While canned pumpkin provides consistent results, you can use fresh roasted and pureed pumpkin. Just ensure it’s well-drained and smooth to prevent excess moisture.
Look for a golden brown crisp topping and a set filling that doesn’t wiggle when gently shaken. A knife inserted near the center should come out clean.
Print
Cinnamon Pumpkin Pie Crisp Recipe
- Total Time: 55-60 minutes
- Yield: 8 1x
Description
Pumpkin pie crisp elevates classic dessert with irresistible layers of buttery crumble and silky pumpkin filling. Warm spices and crunchy topping create a nostalgic autumn experience you’ll crave long after the last delightful bite.
Ingredients
Main Ingredients:
- 1 (15 ounces / 425 grams) can pumpkin puree
- 2 large eggs
- 1 (12 ounces / 340 grams) can evaporated milk
Sugars:
- 1 cup granulated sugar
- 1 cup brown sugar
Spices:
- 1 teaspoon ground cinnamon
- 1/2 teaspoon ground nutmeg
- 1/2 teaspoon ground cloves
- 1/2 teaspoon ground ginger
Instructions
- Prepare the oven environment by heating to 350°F (175°C) and thoroughly coating a 9×13-inch baking dish with cooking spray or butter.
- Create a silky pumpkin base by vigorously whisking pumpkin puree with sugars, warm spices, eggs, and evaporated milk until achieving a completely smooth consistency without lumps.
- Transfer the liquid pumpkin mixture into the prepared baking dish, ensuring an even distribution across the surface.
- Craft the crisp topping by combining dry ingredients like flour, oats, brown sugar, and cinnamon in a separate mixing bowl.
- Introduce melted butter to the dry mixture, gently folding until the texture transforms into a loose, crumbly composition.
- Generously scatter the crisp topping across the pumpkin layer, covering the entire surface with an even layer of crumbs.
- Position the baking dish in the preheated oven and bake for 40-45 minutes, watching for a golden-brown topping and a firm, set pumpkin filling.
- Remove from oven and allow the dessert to cool for 15-20 minutes, which helps the filling set and makes serving easier.
Notes
- Create a silky-smooth pumpkin filling by whisking ingredients thoroughly, ensuring no lumps remain for a perfectly creamy texture.
- Swap out traditional butter with coconut oil for a dairy-free version that maintains the crisp’s rich, golden-brown topping.
- Add chopped pecans or walnuts to the crisp topping for extra crunch and a nutty depth of flavor that complements the warm pumpkin spices.
- Store leftovers in the refrigerator and gently reheat in the oven to preserve the topping’s crispy texture and prevent sogginess.
- Prep Time: 15 minutes
- Cook Time: 40-45 minutes
- Category: Desserts
- Method: Baking
- Cuisine: American
Nutrition
- Serving Size: 8
- Calories: 257 kcal
- Sugar: 35 g
- Sodium: 90 mg
- Fat: 6 g
- Saturated Fat: 2 g
- Unsaturated Fat: 3 g
- Trans Fat: 0 g
- Carbohydrates: 46 g
- Fiber: 2 g
- Protein: 5 g
- Cholesterol: 75 mg
Katherine Pierce
Recipe Curator & Food Educator
Expertise
Education
Boston University Metropolitan College
Certificate Program in the Culinary Arts
Focus: French and international cuisine techniques, Hands-on culinary training with industry professionals, Food industry insights and operations
Katherine grew up believing every dish has a story. She studied the art of food at Boston University and explored the history behind it. She loves pulling easy recipes from every corner of the world and putting them at your fingertips.
When Katherine’s not writing or testing new flavors, she’s teaching cooking classes, baking colorful mooncakes, or dreaming up new ways to mix old favorites with new twists.