Cuban Sliders Recipe for Flavor-Packed Gatherings
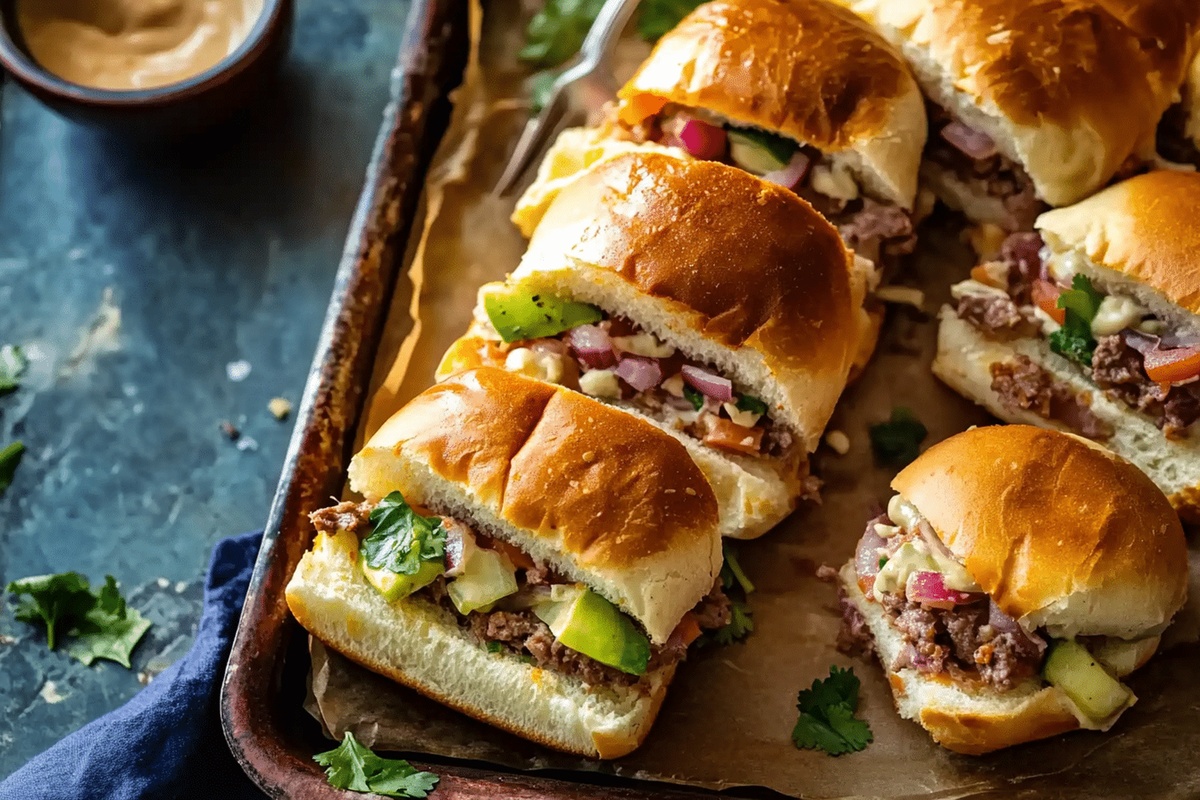
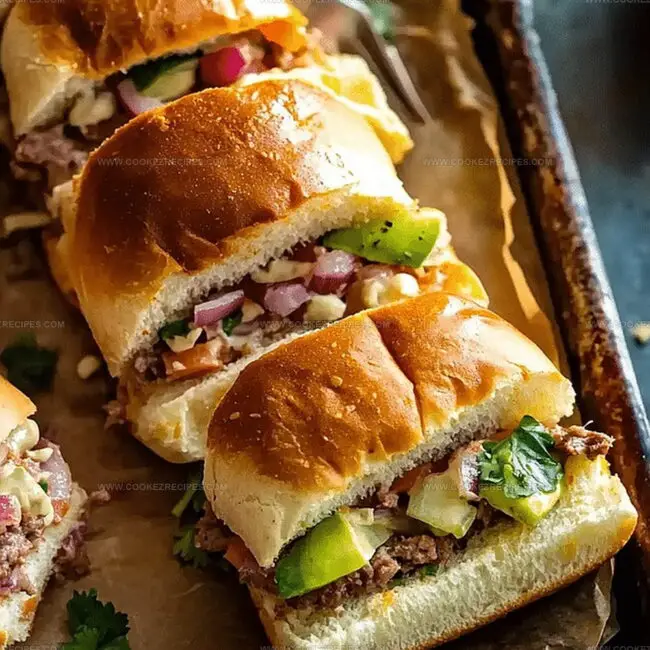
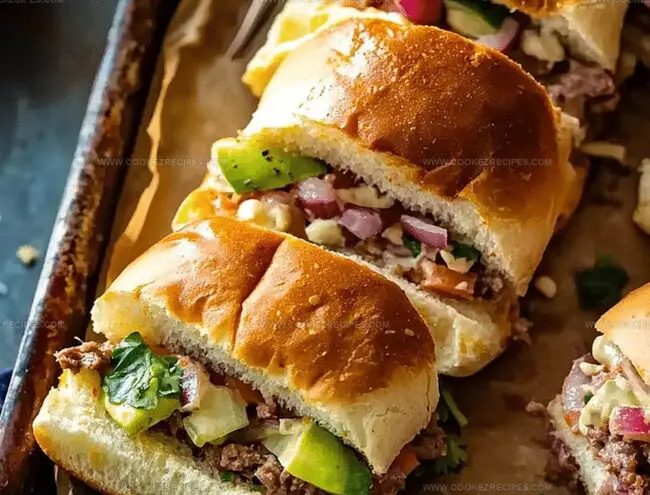
Crispy golden buns nestled with succulent cuban sliders beckon from a rustic wooden board.
Layers of tender roasted pork and tangy pickles create an irresistible flavor explosion.
Melted swiss cheese drapes over each miniature sandwich, promising pure deliciousness.
Fragrant herbs and zesty mustard whisper of havana’s vibrant culinary traditions.
Salt-crusted ham adds a robust dimension to these compact flavor bombs.
Compact yet powerful, these sliders pack an incredible punch of taste.
Grab some napkins and settle in for a mouthwatering adventure that will transport you straight to the caribbean.
Cuban Sliders Full Of Bold Flavor In Every Bite
What’s Layered in Cuban Sliders
Main Components:Flavor Enhancers:Cuban Sliders Assembly Instructions
Step 1: Warm Up The Oven
Preheat the oven to 325°F, creating the perfect cooking environment for these delectable sliders.
Step 2: Prepare Baking Surface
Generously coat a 9×13 baking pan with cooking spray or butter to prevent sticking and ensure easy removal.
Step 3: Craft The Slider Foundation
Step 4: Build Flavor Layers
Layer these ingredients evenly across the roll bottoms, creating a mouthwatering base.
Step 5: Crown The Sliders
Place the top half of the rolls over the layered ingredients, completing the slider structure.
Step 6: Create Zesty Spread
Whisk these ingredients together until well combined, creating a flavorful coating.
Step 7: Brush And Prepare
Generously brush the spread over the top of the slider rolls, ensuring even coverage.
Step 8: Initial Baking
Cover the pan with aluminum foil and bake for 20 minutes, allowing the flavors to meld together.
Step 9: Final Golden Touch
Remove the foil and return to the oven for an additional 5 minutes until the tops turn golden brown and crispy.
Step 10: Slice And Serve
Cut the sliders into individual portions and serve immediately while warm and deliciously inviting.
Slider Assembly & Pressing Techniques
Keep Cuban Sliders Tasty for Round Two
Zesty Add-Ons For Cuban Sliders
Cuban Slider Layer Options
FAQs
Yes, provolone or mozzarella work great as alternatives to Swiss cheese. Choose a cheese that melts well and complements the savory flavors.
Absolutely! You can assemble the sliders ahead of time and refrigerate. Just bake when ready to serve, making it perfect for busy weeknights or game day.
While the recipe suggests salami or chicken, you can also use ham, pulled pork, or roast beef. Choose a protein that you enjoy and pairs well with the other ingredients.
Add some pepper jack cheese, sprinkle red pepper flakes on top, or include a few dashes of hot sauce in the butter mixture to give the sliders an extra kick.
Print
Cuban Sliders Recipe
- Total Time: 30 minutes
- Yield: 24 1x
Description
Cuban sliders bring mouthwatering Caribbean flavors to classic mini sandwiches, combining tender pulled pork, tangy pickles, and melted Swiss cheese. Rich with zesty mustard and pressed between buttery rolls, these bite-sized delights will transport your taste buds straight to Havana’s culinary heart.
Ingredients
Main Proteins:
- 1 package sliced salami or cooked shredded chicken
- 8 slices Swiss cheese
Bread and Accompaniments:
- 24 pack Hawaiian rolls
- Dill pickles
Dijon Spread:
- 2 tablespoons (30 milliliters) minced onion
- 1/2 cup (120 milliliters) butter, melted
- 2 tablespoons (30 milliliters) Dijon mustard
Instructions
- Preheat the oven to a moderate temperature of 325°F, ensuring the rack is positioned in the center.
- Generously coat a 9×13 inch baking dish with cooking spray or butter to prevent sticking.
- Carefully slice the Hawaiian rolls horizontally, creating a top and bottom section while keeping them connected.
- Arrange the bottom half of the rolls in the prepared baking dish, creating a unified base for the sliders.
- Layer the first protein component – either salami or chicken – evenly across the roll base, ensuring complete coverage.
- Add a generous layer of Swiss cheese over the protein, allowing it to slightly overlap the edges.
- Strategically place dill pickle slices across the cheese layer, distributing them for consistent flavor.
- Gently position the top half of the rolls over the assembled ingredients.
- In a small mixing bowl, whisk together melted butter, Dijon mustard, and finely minced onion until well combined.
- Brush the prepared butter mixture generously over the top of the slider rolls, ensuring even distribution.
- Cover the baking dish with aluminum foil, creating a sealed environment for initial baking.
- Bake the covered sliders for 20 minutes, allowing the ingredients to heat through and flavors to meld.
- Remove the foil and return the sliders to the oven for an additional 5 minutes to achieve a golden, crispy top.
- Once baked, remove from the oven and let rest for a few minutes before slicing into individual servings.
- Serve immediately while warm, enjoying the melted cheese and perfectly blended flavors.
Notes
- Meat Flexibility: Swap salami or chicken with pulled pork, ham, or roast beef for varied flavor profiles and dietary preferences.
- Cheese Alternatives: Use dairy-free cheese for lactose-intolerant guests or try provolone, cheddar, or pepper jack for different taste experiences.
- Gluten-Free Adaptation: Replace Hawaiian rolls with gluten-free dinner rolls or lettuce wraps to accommodate wheat-sensitive diners.
- Spice Boost: Add a dash of sriracha or crushed red pepper flakes in the butter mixture for those craving extra heat and complexity.
- Prep Time: 5 minutes
- Cook Time: 25 minutes
- Category: Lunch, Dinner, Appetizer
- Method: Baking
- Cuisine: Cuban
Nutrition
- Serving Size: 24
- Calories: 230
- Sugar: 1g
- Sodium: 600mg
- Fat: 15g
- Saturated Fat: 8g
- Unsaturated Fat: 5g
- Trans Fat: 0g
- Carbohydrates: 16g
- Fiber: 1g
- Protein: 6g
- Cholesterol: 30mg
Daniel Bruns
Founder & Culinary Innovator
Expertise
Recipe development for home cooks, Nutritional analysis and meal planning, Culinary education and food writing
Education
Auguste Escoffier School of Culinary Arts
Diploma in Culinary Arts and Operations
Focus: Classical and contemporary cooking techniques, Culinary entrepreneurship and kitchen management, Menu development and food cost analysis
Daniel’s story started with flour on his face and a pie in the oven at his grandma’s house. He later sharpened his skills at the Auguste Escoffier School of Culinary Arts.
His goal? Recipes so simple you’ll want to cook every night. When he’s not whipping up one-pan wonders, Daniel’s outside picking herbs, hosting neighborhood cook-offs, or baking chocolate cakes with his kids, messy, sweet, and unforgettable.