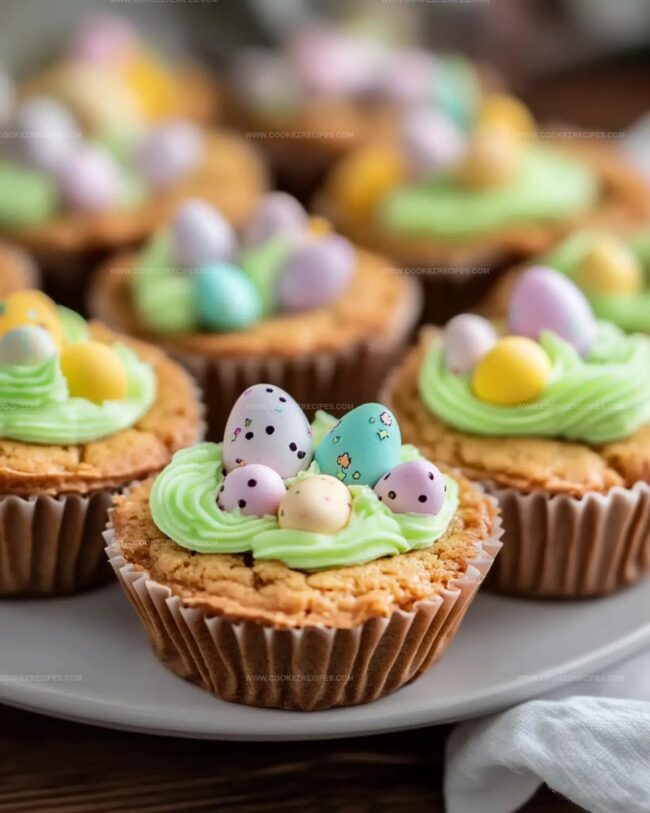
Perfect Easter Basket Cookie Cups Recipe for Spring Joy
Cookie cups have become my latest passion for creating delightful easter basket treats that spark joy in every bite.
Sweet memories of childhood celebrations dance through my mind when I craft these adorable desserts.
Miniature edible baskets emerge from crisp cookie dough, waiting to be filled with colorful candies and pastel-hued surprises.
Each little cup transforms into a whimsical canvas for edible creativity.
Soft chocolate chips and creamy frosting blend seamlessly to craft these charming miniature desserts.
Small hands will eagerly reach for these playful confections that capture the essence of springtime cheer.
These adorable cookie cups promise to bring smiles and delight to your easter gathering.
Easter Cookie Cups That Hold A Sweet Surprise
What Fills Easter Basket Cookie Cups
Base Ingredients:Leavening and Seasoning:Frosting and Decoration:Easter Basket Cookie Cups – Instructions for Assembly
Step 1: Warm Up the Oven
Preheat the oven to 350°F.
Grab a mini muffin pan and give it a light spray with baking spray to prevent sticking.
Step 2: Mix the Cookie Dough
Grab a large mixing bowl and combine:Beat these ingredients until they become light and fluffy.
Add in the egg and vanilla extract, mixing until everything blends smoothly.
Slowly incorporate the flour, baking powder, and salt.
Mix on low speed until the dough just comes together.
Step 3: Shape and Bake the Cookie Cups
Use a small cookie scoop to divide the dough into the mini muffin pan cavities.
Slide the pan into the preheated oven and bake for 12 minutes.
Once out of the oven, while the cookies are still warm, gently press down the center of each cup using a measuring teaspoon.
This creates a perfect little nest for your frosting.
Step 4: Whip Up the Buttercream
In a clean bowl, beat the butter until it becomes creamy.
Slowly add powdered sugar, mixing thoroughly.
Pour in milk, vanilla extract, and a few drops of green food coloring.
Continue beating until the frosting is smooth and spreadable.
Adjust the consistency by adding more powdered sugar or milk as needed.
Step 5: Decorate Your Easter Basket Cookies
Once the cookie cups have cooled completely, pipe or spoon the green buttercream into each cup.
Top with mini chocolate eggs to create adorable Easter basket-inspired treats that will delight both kids and adults.
Cookie Cup Tips With Basket Style
Cookie Cups Stay Crisp and Festive in Storage
Snack Picks For Cookie Cups
Easter Basket Cookie Cups Versions
FAQs
Yes, you can prepare the cookie cups a day in advance. Store them unfrosted in an airtight container at room temperature, and frost them just before serving to maintain their fresh texture.
Absolutely! Kids will love helping press the dough into mini muffin tins and decorating with colorful mini eggs. It’s a fun baking activity that allows children to get creative in the kitchen.
Chocolate mini eggs work perfectly. Brands like Cadbury or Robin’s Eggs are great choices. They add a colorful and festive touch to the Easter basket cookie cups and provide a delicious chocolate crunch.
Certainly! While green is traditional for an Easter basket look, you can use pastel colors like pink, blue, or purple to match your Easter theme. Gel food coloring works best for creating vibrant, consistent colors.
Print
Easter Basket Cookie Cups Recipe
- Total Time: 40 minutes
- Yield: 12 1x
Description
Sweet chocolate cookie cups cradle a delightful Easter surprise in this charming dessert. Creamy filling and festive decorations make these treats perfect for spring celebrations you’ll adore serving to family and friends.
Ingredients
Main Ingredients:
- 1/2 cup (113 grams) unsalted butter, at room temperature
- 1 large egg, at room temperature
- 1 1/4 cups (150 grams) all-purpose flour
- 1/2 cup (100 grams) granulated sugar
- 1/4 cup (50 grams) light brown sugar
Binding and Flavor Enhancers:
- 1/2 teaspoon baking powder
- 1/2 teaspoon salt
- 1 teaspoon pure vanilla extract
Frosting and Decoration:
- 1/2 cup (113 grams) unsalted butter, at room temperature
- 3 cups powdered sugar
- 2 tablespoons milk or heavy cream
- 1 teaspoon pure vanilla extract
- Green food coloring (optional)
- 1 cup Cadbury mini eggs or M&M eggs
Instructions
- Prepare the baking environment by heating the oven to 350°F and coating a mini muffin pan with non-stick spray.
- Create the cookie base by thoroughly creaming butter with both sugars until fluffy, ensuring a smooth texture.
- Incorporate egg and vanilla into the butter mixture, blending until fully integrated and uniform.
- Gently fold in dry ingredients, mixing on low speed to prevent overworking the dough and maintain a tender consistency.
- Portion the dough evenly into mini muffin cavities using a small scoop for consistent sizing.
- Bake the cookie cups until edges are lightly golden, approximately 12 minutes.
- Immediately after removing from oven, delicately indent the center of each warm cookie cup to create a basket-like shape.
- Whip butter until exceptionally creamy for the frosting base.
- Gradually incorporate powdered sugar, creating a smooth and silky buttercream.
- Enhance the frosting with milk, vanilla, and green food coloring, adjusting consistency as needed.
- Once cookie cups are completely cooled, pipe or spread the verdant buttercream to resemble grass.
- Garnish each cookie cup with mini chocolate eggs, transforming them into charming Easter basket-inspired treats.
Notes
- Make ahead the cookie dough and chill for firmer cups that hold shape better during baking.
- For gluten-free option, swap regular flour with a cup-for-cup gluten-free blend to maintain texture.
- Create uniform cookie cups by using a small ice cream scoop or measuring spoon for consistent sizing.
- Prevent overbaking by checking cookies at 10 minutes and removing when edges are lightly golden.
- Prep Time: 25 minutes
- Cook Time: 15 minutes
- Category: Desserts, Snacks
- Method: Baking
- Cuisine: American
Nutrition
- Serving Size: 12
- Calories: 280
- Sugar: 22g
- Sodium: 120mg
- Fat: 14g
- Saturated Fat: 8g
- Unsaturated Fat: 6g
- Trans Fat: 0g
- Carbohydrates: 36g
- Fiber: 0g
- Protein: 2g
- Cholesterol: 40mg


Daniel Bruns
Founder & Culinary Innovator
Expertise
Recipe development for home cooks, Nutritional analysis and meal planning, Culinary education and food writing
Education
Auguste Escoffier School of Culinary Arts
Diploma in Culinary Arts and Operations
Focus: Classical and contemporary cooking techniques, Culinary entrepreneurship and kitchen management, Menu development and food cost analysis
Daniel’s story started with flour on his face and a pie in the oven at his grandma’s house. He later sharpened his skills at the Auguste Escoffier School of Culinary Arts.
His goal? Recipes so simple you’ll want to cook every night. When he’s not whipping up one-pan wonders, Daniel’s outside picking herbs, hosting neighborhood cook-offs, or baking chocolate cakes with his kids, messy, sweet, and unforgettable.