Sweet & Festive Easter Cake Pops Recipe for Spring Joy
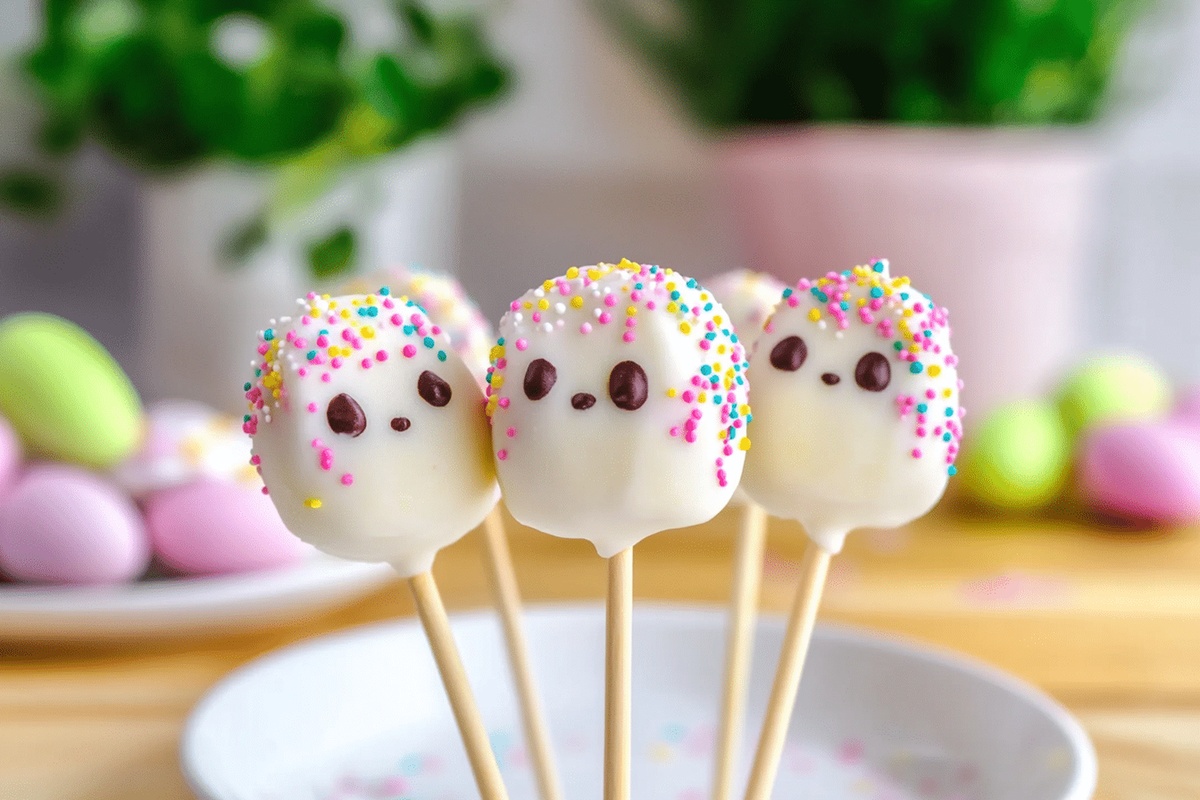
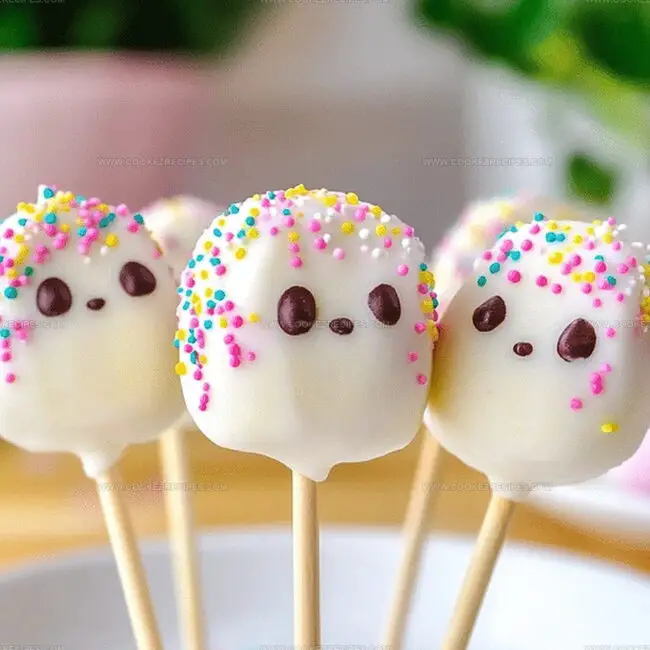
Sweet memories of childhood spring celebrations come alive with these delightful easter cake pops that spark joy in every colorful bite.
Pastel-hued confections dance with sprinkles and delicate designs, promising a festive treat for all ages.
Soft cake crumbles blended with creamy frosting create the perfect base for these whimsical desserts.
Decorating becomes an adventure, mixing playful creativity with simple techniques that anyone can master.
Kids and adults alike will adore crafting these adorable treats that shine with cheerful Easter spirit.
Minimal ingredients and straightforward steps make these cake pops an irresistible project for your next family gathering.
Gather your supplies and let the Easter magic begin – these delectable bites will definitely become your new seasonal favorite!
Cake Pops That Are Full Of Easter Joy
Cake Pop Ingredients for Easter Designs
Cake Base Ingredients:Cake Pop Binding Ingredients:Coating and Decoration Ingredients:Easter Cake Pops Recipe – Making and Coating Steps

Step 1: Bake Delightful Cake Base
Warm up your oven to a cozy 350°F.
Grab an 8-inch round pan and line it with parchment paper.
In your mixer, whip butter until silky smooth.
Pour in sugar and beat until the mixture looks light and dreamy.
Splash in vanilla and crack eggs one by one, mixing gently.
In another bowl, blend:Slowly marry the dry ingredients with the wet mixture.
Pour the batter into the pan and bake for 25 minutes.
Check doneness by inserting a toothpick – it should come out clean.
Let the cake cool down completely for about 40 minutes.
Step 2: Create Cake Pop Mixture
Crumble the cooled cake into super fine crumbs using your food processor or hands.
Mix in cream cheese frosting until the mixture holds together perfectly.
Scoop out uniform portions and roll into adorable round balls.
For bunny ears, shape small pieces into cute elongated shapes and attach them to the cake balls.
Pop the cake pops into the freezer for a quick 15-minute chill.
Step 3: Chocolate Coating Magic
Melt white candy melts in the microwave, stirring every 20 seconds until smooth and glossy.
Grab cake pops from the refrigerator, working with one at a time.
Dip a lollipop stick into melted chocolate, then insert it into the cake pop’s base.
Submerge the entire pop into chocolate, making sure every inch gets covered.
Let excess chocolate drip off and stand them in a foam block to set.
Step 4: Adorable Bunny Decorations
Transform your cake pops into cute bunnies with these finishing touches:Allow decorations to set completely before serving these charming Easter treats.
Cake Pop Tips For Festive Treats

Easter Cake Pops Store Upright and Sweet
Treat Pairings For Cake Pops
Pairing Delights for Easter Cake Pops:Easter Cake Pops Recipe Variants
FAQs
This recipe requires intermediate baking skills. While not extremely complex, it involves multiple steps like cake baking, forming cake balls, dipping in chocolate, and detailed decorating which might challenge first-time bakers.
You’ll need a stand mixer, lollipop sticks, food processor, foam block for drying, piping bag, edible ink marker, and a medium cookie scoop. These tools help create precise and professional-looking bunny cake pops.
Yes, you can prepare cake pops 2-3 days in advance. After decorating, store them in an airtight container in the refrigerator. This makes them perfect for Easter party planning or advance preparation.
Ensure cake balls are well-chilled before dipping, use cream cheese frosting to bind cake crumbs tightly, and dip quickly in smooth, slightly cooled candy melts to maintain structural integrity.
Print
Easter Cake Pops Recipe
- Total Time: 1 hour 30 minutes
- Yield: 12 1x
Description
Sweet Easter cake pops bring whimsical springtime charm to festive celebrations. Pastel-colored chocolate-dipped treats with sprinkled decorations delight guests and create memorable moments you’ll treasure.
Ingredients
Cake Ingredients:
- 1 cup all-purpose flour
- 2 eggs
- 3/4 cup granulated sugar
- 1/2 cup unsalted butter, room temperature
- 1 teaspoon baking powder
- 1/2 teaspoon salt
- 2 teaspoons vanilla extract
Cake Pop Binding Ingredient:
- 1/4 cup cream cheese frosting, whipped
Decorating Ingredients:
- 14 ounces (396 grams) white candy melts
- Pink sanding sugar
- Mini marshmallows (pink and white)
- Edible ink marker
Instructions
- Meticulously craft the cake foundation by warming the oven to 350°F and preparing a parchment-lined cake pan.
- Cream butter with sugar until the mixture transforms into a light, airy texture, incorporating vanilla and eggs methodically.
- Carefully fold dry ingredients into the wet mixture, ensuring smooth, consistent integration without overmixing.
- Bake the cake for approximately 25 minutes, verifying doneness with a toothpick test, then allow a thorough cooling period.
- Pulverize the cooled cake into delicate crumbs using a food processor or manual technique.
- Incorporate cream cheese frosting, blending until the mixture achieves a cohesive, moldable consistency.
- Sculpt the mixture into uniform spherical shapes, crafting distinctive bunny ear extensions with precision.
- Rapidly chill the formed cake pop structures in the freezer to stabilize their shape.
- Gently melt white candy coating, maintaining a smooth, consistent temperature during the dipping process.
- Strategically insert lollipop sticks into each cake pop, creating a secure base for coating.
- Submerge each pop completely in the melted coating, allowing excess to elegantly drip away.
- Embellish the bunny pops with delicate details: pink sanding sugar on ears, piped chocolate feet, and marshmallow accents.
- Apply edible ink facial features, creating charming bunny expressions.
- Allow the decorated cake pops to solidify completely before presenting these whimsical Easter treats.
Notes
- Chill the cake completely before crumbling to ensure easier handling and prevent crumbly texture.
- Use room temperature cream cheese frosting for smoother binding of cake crumbs.
- Adjust cake pop consistency by adding frosting gradually to prevent over-moistening.
- Maintain consistent cake pop size by using a cookie scoop for uniform shapes.
- Work in a cool kitchen environment to prevent chocolate coating from melting quickly.
- Keep candy melts at perfect dripping consistency by reheating briefly if they start to thicken.
- For gluten-free version, substitute regular flour with gluten-free all-purpose flour blend.
- Create dairy-free alternative using coconut cream frosting and dairy-free candy melts.
- Experiment with natural food coloring for pastel-colored chocolate coatings.
- Store cake pops in refrigerator for up to 3 days in an airtight container.
- Prep Time: 1 hour 5 minutes
- Cook Time: 25 minutes
- Category: Desserts, Snacks
- Method: Baking
- Cuisine: American
Nutrition
- Serving Size: 12
- Calories: 180
- Sugar: 12 g
- Sodium: 75 mg
- Fat: 7 g
- Saturated Fat: 4 g
- Unsaturated Fat: 2 g
- Trans Fat: 0 g
- Carbohydrates: 25 g
- Fiber: 0 g
- Protein: 2 g
- Cholesterol: 40 mg
Daniel Bruns
Founder & Culinary Innovator
Expertise
Recipe development for home cooks, Nutritional analysis and meal planning, Culinary education and food writing
Education
Auguste Escoffier School of Culinary Arts
Diploma in Culinary Arts and Operations
Focus: Classical and contemporary cooking techniques, Culinary entrepreneurship and kitchen management, Menu development and food cost analysis
Daniel’s story started with flour on his face and a pie in the oven at his grandma’s house. He later sharpened his skills at the Auguste Escoffier School of Culinary Arts.
His goal? Recipes so simple you’ll want to cook every night. When he’s not whipping up one-pan wonders, Daniel’s outside picking herbs, hosting neighborhood cook-offs, or baking chocolate cakes with his kids, messy, sweet, and unforgettable.