Easter Egg Brownies Recipe for a Fun Spring Dessert
Chocolate lovers often discover unexpectedly delightful easter egg brownies that spark pure joy in every bite.
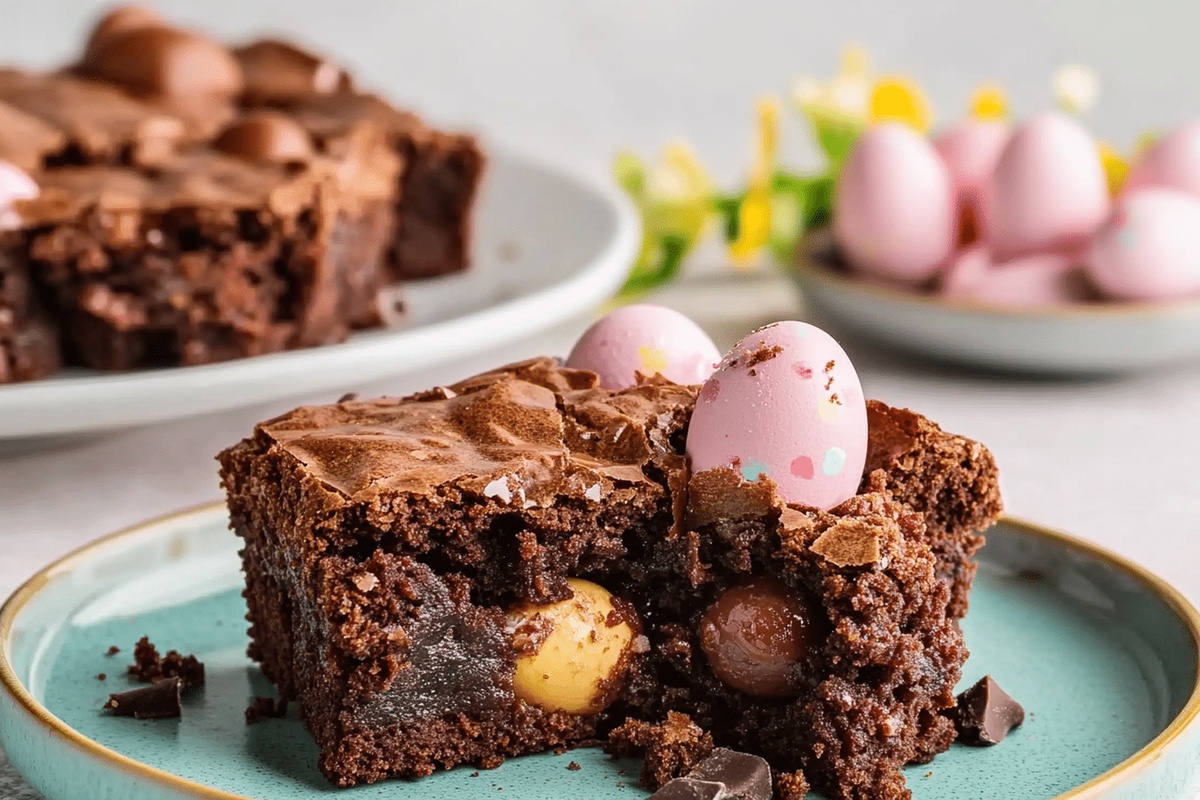
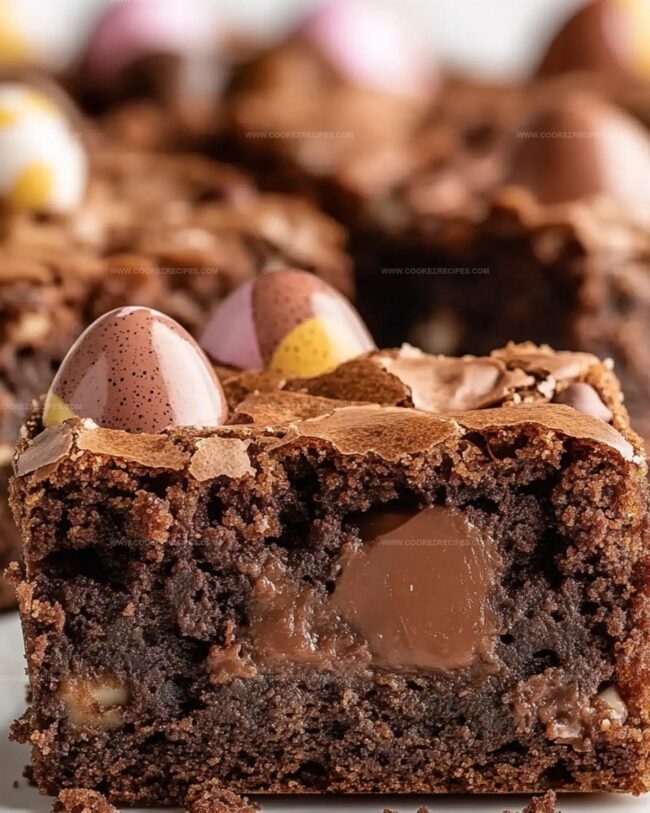
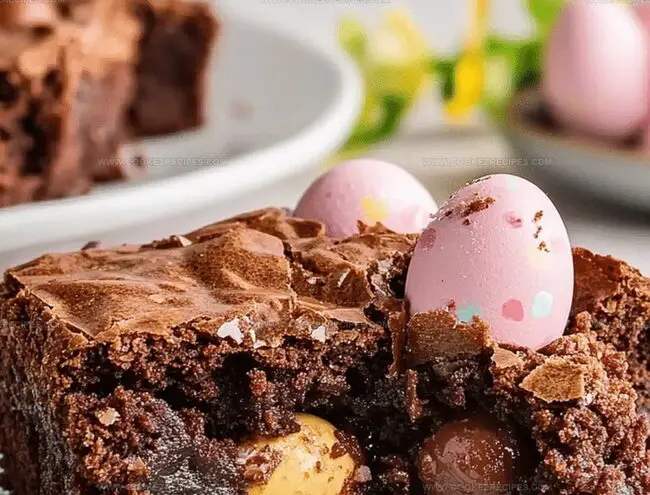
Decadent swirls of rich cocoa mingle with colorful candy pieces scattered across a fudgy landscape.
Sweet surprises peek through dense, moist layers of brownie goodness.
Crisp edges crackle with intense chocolate intensity, promising a memorable dessert experience.
Each square tells a playful story of indulgence and childhood memories.
Our simple recipe invites you to create something magical that will make everyone smile.
Dive into this delectable treat and let the chocolate magic begin.
Easter Egg Brownies That Feel Like A Hidden Treasure

Cadbury Egg Brownie Mix
Base Ingredients:Dry Ingredients:Liquid and Binding Ingredients:Decorative Ingredients:Easter Egg Brownies – Baking Method
Step 1: Warm Up The Oven
Crank the oven to a toasty 350°F.
Grab your favorite baking pan (9-inch or 8-inch square works perfectly) and give it a quick spray or butter rub to prevent sticking.
Step 2: Melt Chocolate And Butter
Combine chocolate and butter in a saucepan.
Gently heat on low, stirring constantly until everything transforms into a silky smooth mixture.
Let it rest for 5 minutes after removing from heat.
Step 3: Whip Up Sugar Mixture
Grab your electric mixer and beat together:Blend on medium-high speed until the mixture looks super smooth and creamy (about 2 minutes).
Step 4: Blend Chocolate Into Mixture
Pour the melted chocolate into your sugar mixture.
Mix on low speed until everything combines perfectly.
Step 5: Fold In Flour
Softly stir flour into the batter until everything blends smoothly.
Don’t overmix – just combine gently.
Step 6: Prepare Brownie Base
Transfer the entire brownie batter into your prepared pan.
Spread evenly across the surface.
Step 7: Decorate With Easter Eggs
Gently press colorful Easter eggs into the batter.
Use the back of a spoon to slightly embed them so they peek through.
Step 8: Bake To Perfection
Slide the pan into the oven and bake for 40 minutes.
Check doneness by inserting a toothpick – it should come out with just a few crumbs.
Step 9: Cool And Set
Allow brownies to cool completely on a wire rack.
This might take around 2 hours, but patience creates deliciousness!
Step 10: Slice And Serve
Cut into beautiful squares and enjoy your festive chocolate treat!
Brownie Tips With Easter Egg Fill
Easter Egg Brownies Stay Fudgy After a Chill
Flavor Combos For Egg Brownies
Easter Egg Brownies Versions
FAQs
Yes, you can use milk chocolate, dark chocolate, or even filled Easter eggs for variety. Just make sure they are similar in size and can withstand baking temperatures.
Gently press the eggs about halfway into the batter so they are partially embedded but still visible on top. This ensures they don’t sink completely during baking.
A rectangular baking pan will work fine. Just adjust the baking time slightly and watch the brownies to prevent overcooking. The key is to maintain a similar batter depth.
Absolutely! You can prepare the brownies a day before serving. Simply cover them and store at room temperature. They’ll stay moist and delicious for 2-3 days.
Print
Easter Egg Brownies Recipe
- Total Time: 1 hour
- Yield: 12 1x
Description
Chocolate-loving bakers unite for these delightful easter egg brownies that blend rich cocoa with festive charm. Sweet morsels nestled in fudgy layers promise a delectable treat you’ll savor with pure delight.
Ingredients
Main Ingredients:
- 5 ounces (142 grams) unsweetened baking chocolate, cut into chunks
- 3 large eggs
- 1 cup (240 milliliters) all-purpose flour
Liquid and Fat Ingredients:
- 2/3 cup (160 milliliters) salted butter
- 1 3/4 cup (420 milliliters) sugar
- 2 teaspoons vanilla extract
Decorative Ingredients:
- 9 Cadbury Easter Eggs (in your choice of flavors)
Instructions
- Warm the oven to 350°F and lightly coat a square baking dish with oil or butter to prevent sticking.
- Gently melt chocolate and butter together in a saucepan over low temperature, stirring continuously until smooth and glossy.
- Allow the chocolate mixture to rest and cool for approximately 5 minutes after removing from heat.
- Whip sugar, eggs, and vanilla extract in a mixing bowl using an electric mixer until the combination becomes light and creamy.
- Incorporate the cooled chocolate mixture into the sugar mixture, blending thoroughly on low speed until completely integrated.
- Carefully fold flour into the batter, ensuring no dry pockets remain and achieving a uniform consistency.
- Transfer the brownie mixture into the prepared baking pan, spreading evenly across the surface.
- Strategically position Easter eggs across the batter, softly pressing them into the surface using a spoon to anchor them slightly.
- Slide the pan into the preheated oven and bake for 40 minutes, checking doneness by inserting a toothpick near the center.
- Remove from oven and allow brownies to cool completely on a wire rack, which helps set the texture.
- Once cooled, slice into square portions and serve.
Notes
- Customize chocolate selection by using dark, milk, or white chocolate for varied flavor profiles.
- Adjust Easter egg placement by pushing them deeper or keeping more surface exposed for visual appeal.
- Create gluten-free version by substituting regular flour with almond or coconut flour for dietary restrictions.
- Enhance moisture by adding a tablespoon of sour cream or Greek yogurt to prevent dry brownies.
- Prep Time: 20 minutes
- Cook Time: 40 minutes
- Category: Desserts, Snacks
- Method: Baking
- Cuisine: American
Nutrition
- Serving Size: 12
- Calories: 305
- Sugar: 23 g
- Sodium: 157 mg
- Fat: 19 g
- Saturated Fat: 11 g
- Unsaturated Fat: 8 g
- Trans Fat: 0 g
- Carbohydrates: 36 g
- Fiber: 1 g
- Protein: 4 g
- Cholesterol: 70 mg
Daniel Bruns
Founder & Culinary Innovator
Expertise
Recipe development for home cooks, Nutritional analysis and meal planning, Culinary education and food writing
Education
Auguste Escoffier School of Culinary Arts
Diploma in Culinary Arts and Operations
Focus: Classical and contemporary cooking techniques, Culinary entrepreneurship and kitchen management, Menu development and food cost analysis
Daniel’s story started with flour on his face and a pie in the oven at his grandma’s house. He later sharpened his skills at the Auguste Escoffier School of Culinary Arts.
His goal? Recipes so simple you’ll want to cook every night. When he’s not whipping up one-pan wonders, Daniel’s outside picking herbs, hosting neighborhood cook-offs, or baking chocolate cakes with his kids, messy, sweet, and unforgettable.