Sweet Easter Pretzel Chicks Recipe: Adorable Spring Treats
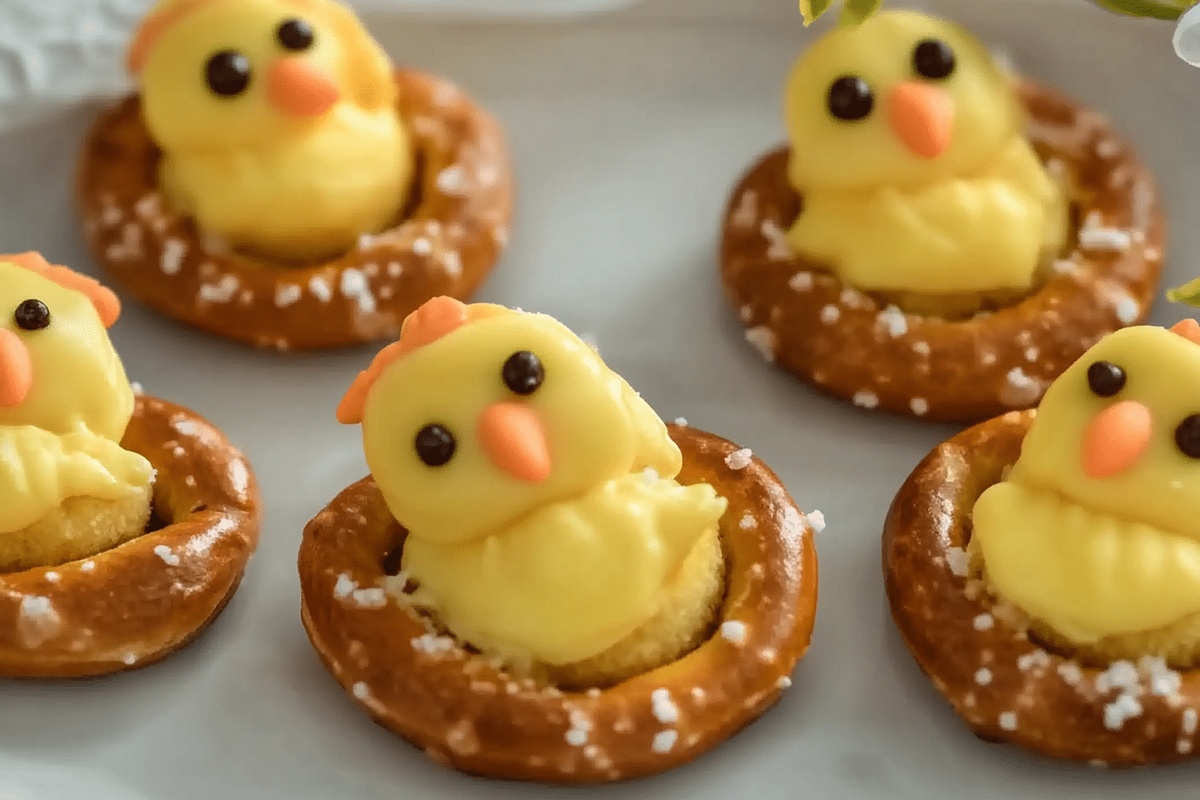
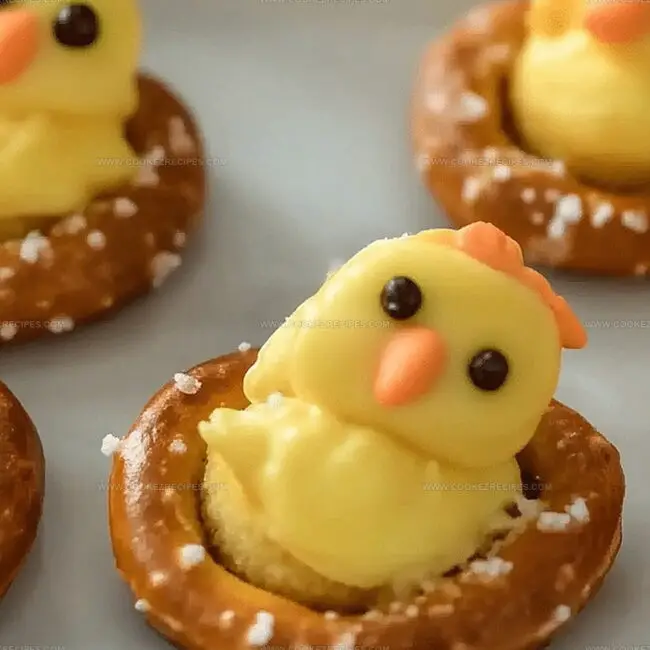
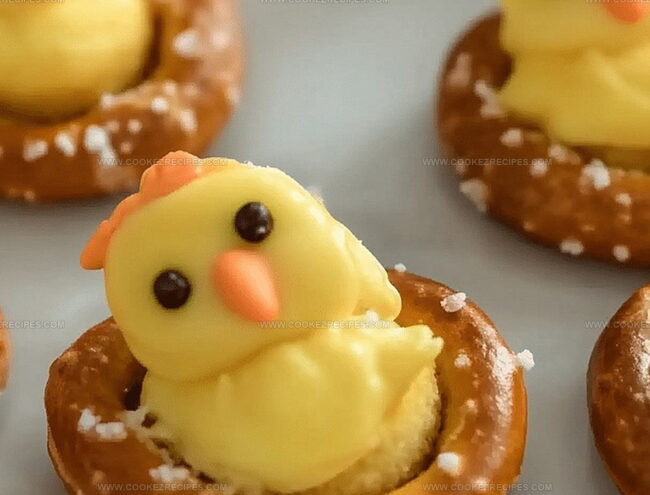
Crafting adorable easter pretzel chicks brings a playful twist to your holiday treats.
Colorful candy melts and sprinkles transform simple pretzels into cheerful little bird characters.
Chocolate drizzles and creative decorating techniques help you connect with festive baking traditions.
Sweet snacks like these spark joy and imagination for children and adults alike.
Pastel colors and whimsical designs make these pretzels irresistibly cute.
Small details turn ordinary ingredients into delightful edible art.
Gather your kitchen supplies and let’s create some seriously charming easter snacks that will make everyone smile.
Easter Pretzel Chicks That Are Fun To Make
What’s Stacked in Easter Pretzel Chicks
Easter Pretzel Chicks Ingredients:
Pretzels:Candy Coating:Decorative Details:Notes for Ingredient Selection:Easter Pretzel Chicks – Making Instructions
Step 1: Prepare Vibrant Beaks
Slice each Starburst into three rectangular sections.
Subdivide these sections into smaller triangular shapes to craft adorable chick beaks.
You’ll want to create precisely shaped triangles that look like tiny beak-like points.
Step 2: Set Up Pretzel Canvas
Spread clean wax paper across a cookie sheet.
Arrange pretzels neatly on the prepared surface, creating a perfect workspace for your chick creations.
Step 3: Transform Candy Melts
Gently warm yellow candy melting chips in the microwave.
Stir frequently to ensure smooth, even melting.
Allow the melted candy to cool slightly to prevent burning.
Step 4: Craft Chick Silhouettes
Transfer melted yellow candy into a zippered bag.
Carefully snip a tiny opening at the corner.
Delicately pipe the candy over pretzel surfaces, creating adorable chick outlines.
Use your fingertip to smooth any uneven areas for a polished look.
Step 5: Add Playful Details
Carefully place mini chocolate chips as sparkling eyes.
Position Starburst triangles as cute beaks.
Each chick should look unique and charming.
Step 6: Solidify Sweet Creation
Slide the cookie sheet into the refrigerator.
Let the chicks chill and harden for about 20 minutes.
The candy will transform from soft to perfectly crisp.
Pretzel Chick Tips For Easter Fun
Chill and Reuse Easter Pretzel Chicks Easily
What Goes With Pretzel Chicks
Easter Pretzel Chicks Versions
FAQs
Yes, you can experiment with various colors like orange, green, or blue to create unique chick designs or match seasonal themes.
No, basic kitchen tools like a microwave, zippered bag, and wax paper are sufficient to create these cute Easter pretzel chicks.
Absolutely! Children can help with tasks like placing chocolate chip eyes and beak triangles, making it a fun family activity.
When stored in an airtight container at room temperature, they’ll remain fresh for about 5-7 days.
Print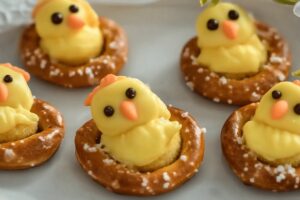
Easter Pretzel Chicks Recipe
- Total Time: 10 minutes
- Yield: 24 1x
Description
Sweet Easter Pretzel Chicks bring adorable springtime charm to your dessert table, combining salty pretzels with smooth candy melts and cute decorative details. Guests will love these playful, bite-sized treats that perfectly capture festive holiday whimsy.
Ingredients
Main Ingredients:
- 24 mini pretzels
- 1 cup (237 ml) yellow candy melting chips
- 24 mini chocolate chips
Decoration Ingredients:
- 2 orange Starbursts
Accent Ingredients:
(None)
Instructions
- Carefully slice each Starburst into precise rectangular strips, then subdivide these strips to create small triangular shapes for delicate chick beaks, ensuring uniformity and precision.
- Cover a baking sheet with wax paper, creating a clean workspace for crafting the decorative chicks.
- Gently warm yellow candy melting chips in the microwave using short intervals, stirring between each heating cycle until the mixture transforms into a smooth, glossy liquid.
- Transfer the melted candy into a zippered bag, making a tiny strategic cut at the corner to create a precise piping tool.
- Carefully pipe the warm yellow candy over each pretzel, tracing a chick-like silhouette with smooth, controlled movements, using fingertips to refine the shape if needed.
- Delicately position mini chocolate chips as expressive eyes and the previously crafted Starburst triangles as tiny, vibrant beaks on each candy pretzel chick.
- Refrigerate the decorated pretzels for approximately 20 minutes, allowing the candy coating to solidify completely and preserve the whimsical chick design.
Notes
- Customize colors by using different candy melts to match seasonal themes or personal preferences.
- Prevent candy from overheating by microwaving in short, controlled bursts and stirring frequently to maintain smooth consistency.
- Create uniform chick shapes by practicing steady piping techniques and using a consistent hand movement when applying melted candy.
- Swap ingredients for dietary restrictions: use gluten-free pretzels for celiac-friendly treats and vegan candy melts for plant-based alternatives.
- Prep Time: 10 minutes
- Cook Time: 0 minutes
- Category: Snacks, Desserts
- Method: None
- Cuisine: American
Nutrition
- Serving Size: 24
- Calories: 130
- Sugar: 8g
- Sodium: 120mg
- Fat: 6g
- Saturated Fat: 3g
- Unsaturated Fat: 2g
- Trans Fat: 0g
- Carbohydrates: 18g
- Fiber: 0g
- Protein: 1g
- Cholesterol: 5mg
Daniel Bruns
Founder & Culinary Innovator
Expertise
Recipe development for home cooks, Nutritional analysis and meal planning, Culinary education and food writing
Education
Auguste Escoffier School of Culinary Arts
Diploma in Culinary Arts and Operations
Focus: Classical and contemporary cooking techniques, Culinary entrepreneurship and kitchen management, Menu development and food cost analysis
Daniel’s story started with flour on his face and a pie in the oven at his grandma’s house. He later sharpened his skills at the Auguste Escoffier School of Culinary Arts.
His goal? Recipes so simple you’ll want to cook every night. When he’s not whipping up one-pan wonders, Daniel’s outside picking herbs, hosting neighborhood cook-offs, or baking chocolate cakes with his kids, messy, sweet, and unforgettable.