Easter Sugar Cookies Recipe with Simple Decorating Joy
Sweet memories often swirl around mom’s legendary easter sugar cookies that transform ordinary moments into delightful celebrations.
Childhood whispers of excitement emerge whenever these delicate treats appear on the kitchen counter.
Soft, buttery dough becomes a canvas for colorful sprinkles and creative designs.
Baking these cookies connects generations through shared traditions and intimate kitchen experiences.
Decorative icing adds whimsical charm to each carefully crafted piece.
Simple ingredients blend into magical memories that spark joy and nostalgia.
Jump into this delightful recipe and create something wonderfully memorable for your loved ones.
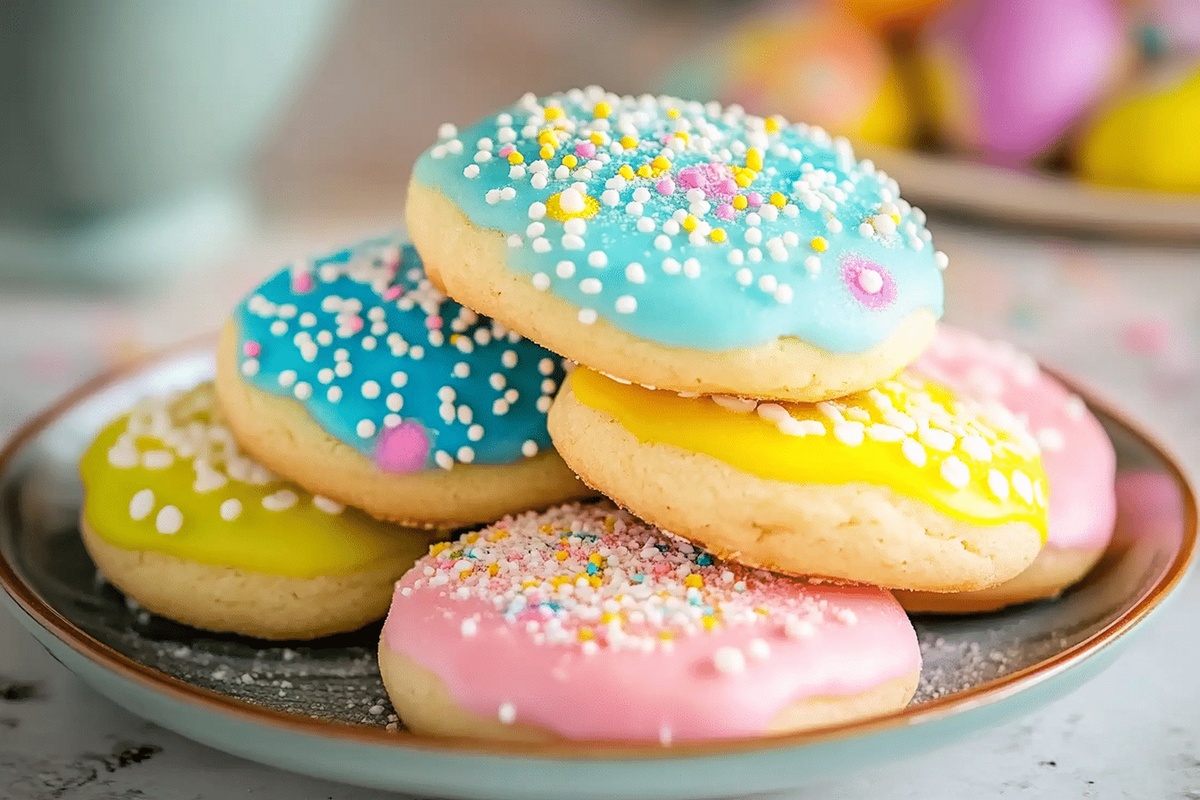
Sugar Cookies That Are All Dressed For Easter
Sugar Cookie Elements for Easter Theme
Cookie Base Ingredients:Leavening and Seasoning Ingredients:Decorative Ingredients:Easter Sugar Cookies – How to Cut and Decorate

Step 1: Warm Up the Oven
Turn your oven to 350°F.
Grab a baking sheet and cover it with parchment paper to prevent sticking.
Step 2: Mix the Cookie Base
Grab your mixing bowl and create a fluffy mixture by blending:Whip in the egg and vanilla extract until everything looks smooth and creamy.
In another bowl, combine:Gently fold the dry ingredients into the wet mixture until a soft dough forms.
Step 3: Shape Adorable Cookies
Dust your work surface with flour.
Roll out the dough to a quarter-inch thickness.
Use playful Easter-themed cookie cutters like bunnies, eggs, and chicks to create cute shapes.
Transfer the cutouts to your prepared baking sheet.
Step 4: Bake to Golden Perfection
Slide the baking sheet into the oven.
Bake for 8-10 minutes until the cookie edges turn a light golden color.
Transfer cookies to a wire rack and let them cool completely.
Step 5: Whip Up Colorful Icing
In a bowl, blend:Stir until the mixture becomes silky smooth.
Divide the icing into smaller bowls and add different food coloring to create a rainbow of festive shades.
Step 6: Decorate with Creativity
Use a spoon or piping bag to add beautiful designs to your cookies.
Sprinkle some extra fun with colorful sprinkles for a festive touch.
Let the icing set and dry completely.
Step 7: Preserve and Enjoy
Store your amazing Easter sugar cookies in an airtight container.
They’ll stay fresh and delicious for up to 5 days – if they last that long!
Sugar Cookie Tips For Holiday Fun
Sugar Cookies from Easter Stay Soft When Covered
Fun Sips With Sugar Cookies
Easter Sugar Cookies Spins
FAQs
You’ll need butter, sugar, egg, vanilla extract, flour, baking powder, salt, powdered sugar, milk, and food coloring. Optional extras include sprinkles for decoration.
Absolutely! Kids can help cut out shapes with cookie cutters, mix ingredients, and decorate with icing. Always supervise children when using kitchen tools and equipment.
Chill the dough for 30 minutes before rolling and cutting. This helps the cookies maintain their shape and prevents excessive spreading during baking.
Let cookies cool completely before decorating. Use a piping bag or spoon for precise icing application. Allow icing to set fully before stacking or storing cookies.
Print
Easter Sugar Cookies Recipe
- Total Time: 30 minutes
- Yield: 24 1x
Description
Festive Easter Sugar Cookies blend nostalgic sweetness with seasonal charm, offering pastel-colored delights that dance between crisp edges and tender centers. Decorated with delicate icing and sprinkled with spring-inspired creativity, these cookies invite celebration and bring joy to family gatherings.
Ingredients
Main Ingredients:
- 2 1/2 cups all-purpose flour
- 1 cup unsalted butter, softened
- 1 cup granulated sugar
- 1 large egg
Sugar and Decoration:
- 2 cups powdered sugar
- 3 tablespoons milk (adjust for consistency)
- Food coloring (pastel colors: pink, yellow, blue, green)
- Easter sprinkles for decoration
Seasoning and Leavening:
- 1/2 teaspoon baking powder
- 1/4 teaspoon salt
- 1 1/2 teaspoons vanilla extract
- 1/2 teaspoon vanilla extract
Instructions
- Prepare the work area by preheating the oven to 350°F and lining a baking sheet with parchment paper, ensuring a clean, ready workspace.
- Create the cookie base by thoroughly creaming butter and sugar until the mixture becomes pale and airy. Incorporate the egg and vanilla extract, blending until completely unified.
- Craft the dry mixture separately by whisking flour, baking powder, and salt, ensuring even distribution of ingredients.
- Merge wet and dry components gradually, mixing until a cohesive, soft dough emerges without overworking the mixture.
- Transform the dough by rolling it out on a lightly floured surface to a uniform 1/4-inch thickness, creating an even canvas for cutting.
- Select Easter-themed cookie cutters and carefully stamp out playful shapes like bunnies, eggs, and chicks, transferring each delicate cutout to the prepared baking sheet.
- Bake the cookies for 8-10 minutes, watching for gentle golden edges that signal perfect doneness. Remove and allow to cool completely on a wire rack.
- Construct the decorative icing by whisking powdered sugar, milk, and vanilla until silky smooth, creating a pristine white base.
- Divide the icing and introduce vibrant food coloring, transforming the mixture into a palette of festive spring hues.
- Embellish the cooled cookies using a spoon or piping bag, applying intricate designs and patterns with precision.
- Enhance the decoration with a sprinkle of colorful embellishments, adding texture and whimsy to each cookie.
- Allow the icing to set and stabilize, creating a beautiful, professional finish.
- Store the decorated cookies in an airtight container, preserving their freshness for up to 5 days of enjoyment.
Notes
- Chill the dough for 30 minutes before rolling to prevent spreading and maintain sharp cookie shapes.
- Use room temperature butter for smoother mixing and better cookie texture.
- Adjust baking time based on cookie thickness – thinner cookies need less time to prevent burning.
- Swap regular flour with gluten-free blend for celiac-friendly version without compromising taste.
- Replace vanilla extract with almond or lemon extract for unique flavor variations.
- Pipe intricate designs by using different piping tip sizes for detailed Easter decorations.
- Prevent icing from running by ensuring it’s thick enough – add more powdered sugar if too thin.
- Store decorated cookies in single layers with parchment paper between to protect delicate designs.
- Prep Time: 20 minutes
- Cook Time: 10 minutes
- Category: Desserts, Snacks
- Method: Baking
- Cuisine: American
Nutrition
- Serving Size: 24
- Calories: 179
- Sugar: 10 g
- Sodium: 38 mg
- Fat: 7 g
- Saturated Fat: 4 g
- Unsaturated Fat: 2 g
- Trans Fat: 0 g
- Carbohydrates: 25 g
- Fiber: 0.5 g
- Protein: 1.5 g
- Cholesterol: 18 mg
Daniel Bruns
Founder & Culinary Innovator
Expertise
Recipe development for home cooks, Nutritional analysis and meal planning, Culinary education and food writing
Education
Auguste Escoffier School of Culinary Arts
Diploma in Culinary Arts and Operations
Focus: Classical and contemporary cooking techniques, Culinary entrepreneurship and kitchen management, Menu development and food cost analysis
Daniel’s story started with flour on his face and a pie in the oven at his grandma’s house. He later sharpened his skills at the Auguste Escoffier School of Culinary Arts.
His goal? Recipes so simple you’ll want to cook every night. When he’s not whipping up one-pan wonders, Daniel’s outside picking herbs, hosting neighborhood cook-offs, or baking chocolate cakes with his kids, messy, sweet, and unforgettable.