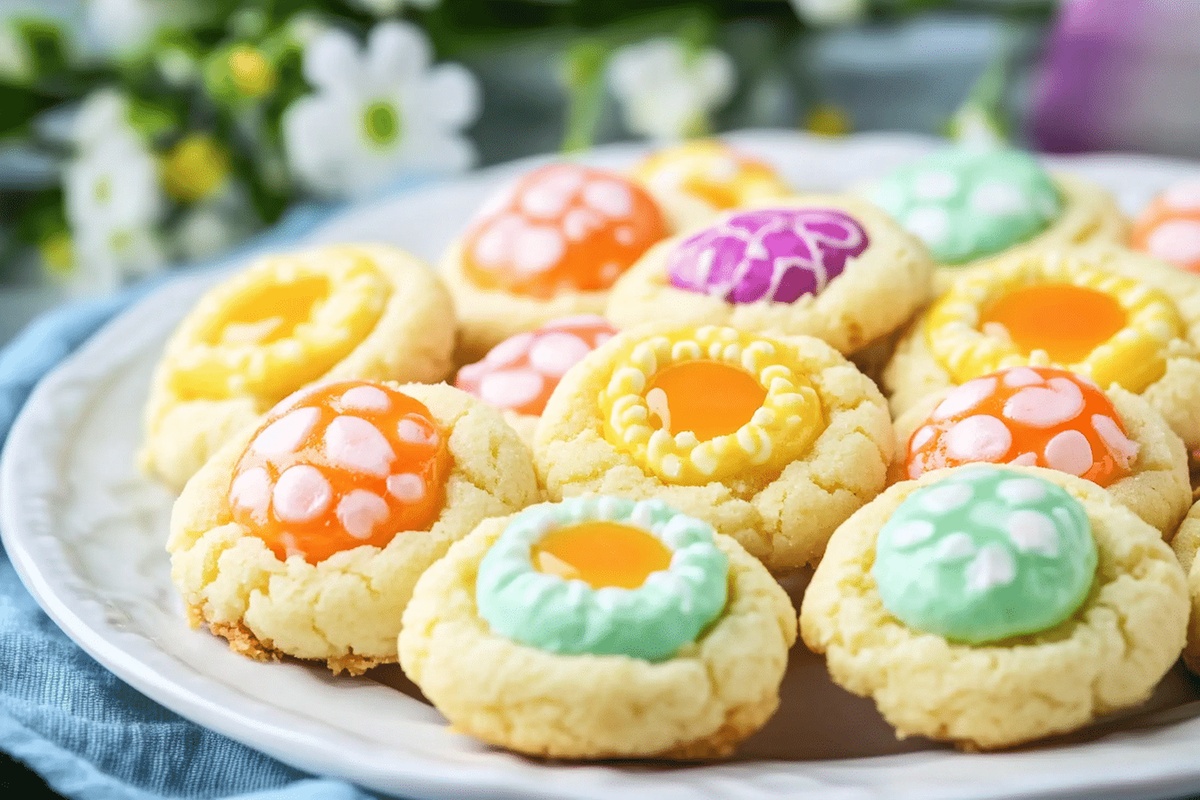
Easter Joy: Colorful Thumbprint Cookies Recipe for Spring Fun
These delightful easter thumbprint cookies represent a whimsical twist on classic holiday treats.
Colorful sprinkles and pastel glazes make each bite feel like a miniature celebration.
Sweet memories of childhood spring gatherings dance across your taste buds with every crumbly morsel.
Soft, buttery dough provides the perfect canvas for vibrant decorative touches.
Simple ingredients come together to create magic in your kitchen.
Kids absolutely adore pressing their tiny thumbs into soft cookie centers.
With minimal effort, you can craft these charming seasonal delicacies that will spark joy and create lasting memories.
Let’s bake something extraordinary that brings smiles to everyone around the table.
FAQs
Gently press your thumb or the back of a spoon into the cookie dough ball before baking. If the indent fills back in during baking, carefully press it again right after removing from the oven while cookies are still warm.
Yes, you can prepare the cookie dough up to 2-3 days in advance. Wrap it tightly in plastic wrap and store in the refrigerator. Let the dough sit at room temperature for 15-20 minutes before shaping to make it easier to work with.
Keep your butter at cool room temperature, not too soft. Chill the shaped cookie dough for 15-20 minutes before baking to help them maintain their shape. Also, use room temperature ingredients and avoid overmixing the dough.
Use the back of a measuring spoon or a small round object with a flat bottom. Press gently and evenly, rotating the tool slightly to create a clean, symmetrical indentation in each cookie.
Thumbprint Cookies That Make A Colorful Spread
Thumbprint Cookie Base and Filling
Base Ingredients:Dry Ingredients:Decoration and Filling Ingredients:Easter Thumbprint Cookies – Baking and Filling Guide
Step 1: Warm Up the Oven
Crank your oven to a cozy 350°F.
Grab a baking sheet and line it with parchment paper to prevent any sticky situations.
Step 2: Whip Up the Cookie Base
In a spacious mixing bowl, cream together butter and sugar until they transform into a light, fluffy cloud.
Gently fold in egg yolks and vanilla, blending until smooth.
Gradually introduce flour and salt, mixing until a soft dough emerges.
Step 3: Shape Your Cookies
Roll the dough into adorable bite-sized balls, about the size of a ping pong ball.
Arrange them on the prepared baking sheet, giving each cookie plenty of personal space.
Use your thumb or the back of a spoon to create a cute little dimple in the center of each cookie.
Step 4: Bake to Golden Perfection
Slide the baking sheet into the oven and let the cookies bake for 12-14 minutes.
Look for lightly golden edges as your cue that they’re almost done.
Once out of the oven, give the centers a gentle press if they’ve puffed up.
Transfer cookies to a wire rack and let them cool completely.
Step 5: Dress Up Your Cookies
Once the cookies have chilled out, it’s time to get creative!
Fill those adorable dimples with:Step 6: Serve and Celebrate
Allow the decorations to set for a few moments.
These Easter-themed treats are now ready to bring joy to your celebration!
Share with friends and family, and watch their faces light up with delight.
Thumbprint Cookie Tips With Easter Flair
Thumbprint Cookies Store Neatly for Later Nibbles
Festive Picks For Thumbprint Cookies
Easter Thumbprint Cookies Tweak Ideas
Print
Easter Thumbprint Cookies Recipe
- Total Time: 30 minutes
- Yield: 24 1x
Description
Delightful Easter Thumbprint Cookies bring festive cheer to spring celebrations with their colorful jelly centers. Sweet almond-infused shortbread provides a delicate base that melts in your palate, offering pure delight for holiday gatherings.
Ingredients
Main Ingredients:
- 2 1/4 cups all-purpose flour
- 1 cup unsalted butter, softened
- 2/3 cup granulated sugar
- 2 large egg yolks
Flavoring and Seasoning:
- 1 teaspoon vanilla extract
- 1/2 teaspoon salt
Decoration and Finishing:
- 1/2 cup powdered sugar (for dusting, optional)
- 1/2 cup pastel-colored frosting or melted white chocolate
- Sprinkles or mini candy eggs for decoration
Instructions
- Prepare the oven environment by setting the temperature to 350°F (175°C) and lining a baking sheet with parchment paper to ensure easy cookie removal.
- Create a smooth, creamy dough by thoroughly blending butter and granulated sugar until the mixture becomes airy and light. Incorporate egg yolks and vanilla extract, mixing until fully integrated.
- Gradually fold in flour and salt, gently working the ingredients until a cohesive dough forms that holds its shape without crumbling.
- Craft uniform cookie rounds by rolling the dough into precise 1-inch spheres, strategically positioning them on the prepared baking sheet with sufficient spacing.
- Delicately create a center depression in each cookie using your thumb or the curved back of a spoon, forming a gentle indentation for future filling.
- Transfer the cookie-laden sheet into the preheated oven, allowing the treats to bake for 12-14 minutes until the edges develop a soft golden hue.
- Upon removing from the oven, softly reinforce the center indentations if they’ve slightly puffed during baking, then transfer cookies to a wire cooling rack.
- Once the cookies have completely cooled, artfully fill the center wells with pastel-tinted frosting or smoothly melted white chocolate.
- Embellish the filled cookies with whimsical sprinkles or diminutive candy eggs, adding a playful festive touch to these delicate Easter treats.
- Allow the decorative elements to set completely before serving, ensuring a picture-perfect presentation of these delightful seasonal cookies.
Notes
- Softening butter at room temperature ensures smooth, creamy dough that blends perfectly without lumps.
- Chilling the dough for 30 minutes before shaping helps prevent spreading and maintains cookie structure during baking.
- Use a small measuring spoon or the back of a rounded teaspoon to create consistent, uniform indentations in cookie centers.
- Gluten-free bakers can substitute all-purpose flour with a 1:1 gluten-free flour blend for a celiac-friendly version of these cookies.
- Prep Time: 15 minutes
- Cook Time: 15 minutes
- Category: Desserts, Snacks
- Method: Baking
- Cuisine: American
Nutrition
- Serving Size: 24
- Calories: 130
- Sugar: 5 g
- Sodium: 50 mg
- Fat: 7 g
- Saturated Fat: 4 g
- Unsaturated Fat: 3 g
- Trans Fat: 0 g
- Carbohydrates: 16 g
- Fiber: 0.5 g
- Protein: 1.5 g
- Cholesterol: 30 mg


Daniel Bruns
Founder & Culinary Innovator
Expertise
Recipe development for home cooks, Nutritional analysis and meal planning, Culinary education and food writing
Education
Auguste Escoffier School of Culinary Arts
Diploma in Culinary Arts and Operations
Focus: Classical and contemporary cooking techniques, Culinary entrepreneurship and kitchen management, Menu development and food cost analysis
Daniel’s story started with flour on his face and a pie in the oven at his grandma’s house. He later sharpened his skills at the Auguste Escoffier School of Culinary Arts.
His goal? Recipes so simple you’ll want to cook every night. When he’s not whipping up one-pan wonders, Daniel’s outside picking herbs, hosting neighborhood cook-offs, or baking chocolate cakes with his kids, messy, sweet, and unforgettable.