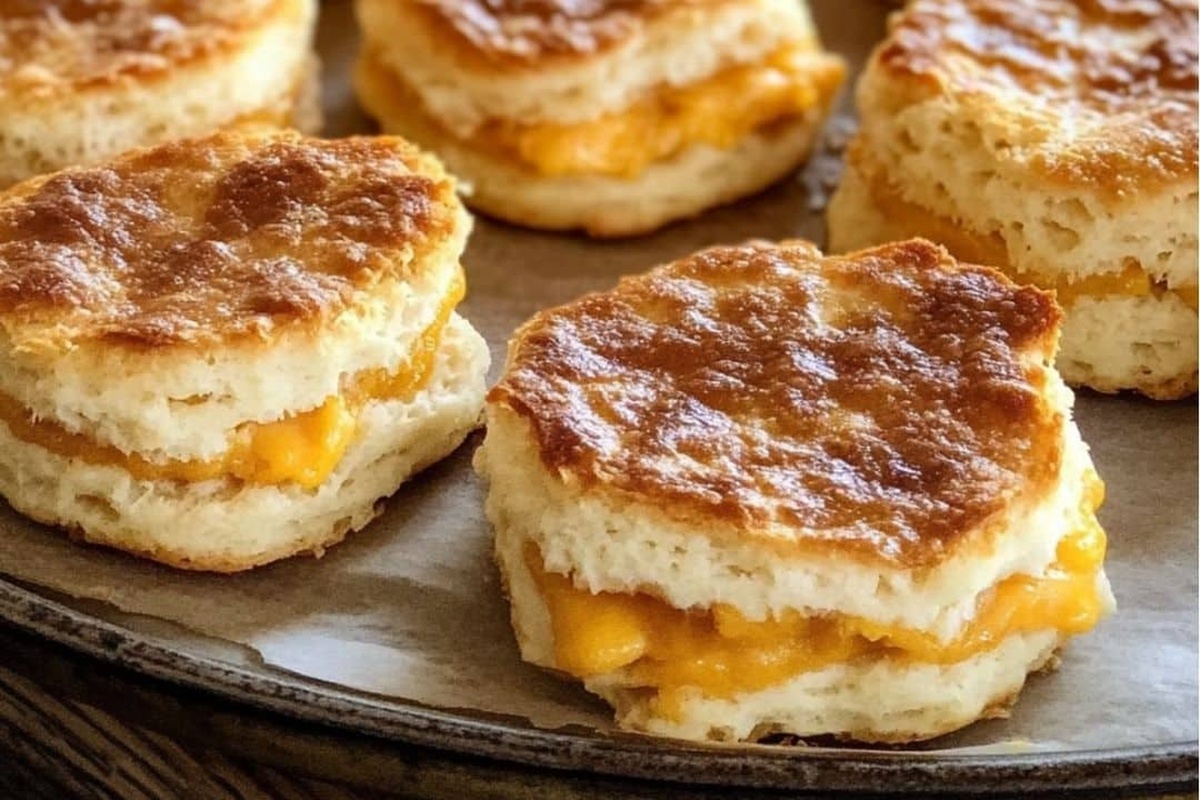
Homemade Biscuits Recipe Baked from the Heart
Grandma’s secret recipe for heartfelt biscuits always brings warmth to our kitchen.
Something magical happens when butter meets flour in her cherished method.
Soft, flaky layers whisper stories of comfort and love.
Each golden-edged morsel carries memories of Sunday morning breakfasts.
Generations of our family have savored these delicate treats with pure joy.
Crumbling gently between your fingers, these biscuits promise a delightful culinary embrace.
You’ll want to gather everyone close and share this delectable tradition.
Bake these and watch smiles bloom around your table.
Three-Ingredient Biscuits That Make Every Morning Better
Three-Ingredient Heartfelt Biscuits Ingredients
Main Ingredients:Spreads and Toppings:Biscuits 3-Ingredient Baking Guide
Step 1: Warm Up the Oven
Fire up your oven to a toasty 425°F (220°C).
Grab a baking sheet and line it with parchment paper to prevent any sticky situations.
Step 2: Crumble the Butter and Flour
Grab your cold butter and flour.
Use a pastry cutter or your fingers to break down the butter into the flour.
Keep working until the mixture looks like tiny, uneven breadcrumbs.
This is where the magic of texture begins!
Step 3: Bring the Dough Together
Pour in the milk slowly.
Stir gently until the ingredients just start to come together.
Remember, less mixing means more tender biscuits.
Stop as soon as the dough looks somewhat combined.
Step 4: Shape the Biscuits
Dust your countertop with a light sprinkle of flour.
Transfer the dough and give it a few gentle kneads.
Pat the dough down to create a thick, ¾-inch layer that’s ready for cutting.
Step 5: Cut and Arrange
Use a round cutter or the rim of a glass to create perfect biscuit circles.
Carefully transfer each cut biscuit to the prepared baking sheet, leaving a little breathing room between them.
Step 6: Bake to Golden Perfection
Slide the baking sheet into the preheated oven.
Bake for 12-15 minutes until the tops turn a beautiful golden brown color.
Your kitchen will smell amazing!
Step 7: Serve and Enjoy
Pull out the biscuits and let them cool for just a moment.
Serve them warm with a pat of butter, a dollop of jam, or a drizzle of honey.
Enjoy the homemade goodness!
Baking Tips for Three-Ingredient Heart Biscuits
Saving Heartfelt Biscuits for Later
Tasty Combos With Heartfelt Biscuits
Three-Ingredient Heartfelt Biscuits Biscuit Twists
FAQs
Yes, you can use salted butter. Just reduce or eliminate any additional salt in the recipe. The taste will be slightly different, but the biscuits will still be delicious.
All-purpose flour is perfect for this recipe. Avoid using cake or bread flour, as they have different protein contents that can affect the texture of the biscuits.
Stop mixing when the dough just comes together and looks shaggy. Overmixing can make the biscuits tough and dense instead of light and fluffy.
Absolutely! Cut out the biscuits, place them on a baking sheet, and freeze. Once frozen, transfer to a freezer bag. You can bake them directly from frozen, just add a few extra minutes to the baking time.
Print
Heartfelt Biscuits Recipe
- Total Time: 17 minutes
- Yield: 8 1x
Description
Homemade “Three-Ingredient Heartfelt Biscuits” offer pure comfort with minimal effort and maximum flavor. Bakers seeking quick, delightful treats will savor these golden, buttery rounds that bring warmth to any kitchen gathering.
Ingredients
Main Ingredients:
- 2 cups self-rising flour
- 3/4 cup (180 milliliters) whole milk
- 1/2 cup (1 stick or 113 grams) unsalted butter, cold and cubed
Instructions
- Create a warm oven environment at 425°F (220°C) and prepare a parchment-lined baking sheet to ensure optimal baking conditions.
- Transform cold butter into fine, delicate crumbs by meticulously working it into the flour using a pastry cutter or fingertips, creating a textured foundation.
- Introduce milk gradually, gently folding until the mixture harmonizes without aggressive mixing, preserving the biscuits’ tender structure.
- Transfer the delicate dough onto a lightly dusted work surface, tenderly kneading just enough to bring the ingredients together, then flatten to a uniform three-quarter-inch thickness.
- Utilize a circular cutter or glass rim to craft uniform biscuit shapes, carefully transferring each piece onto the prepared baking sheet.
- Allow the biscuits to transform in the heated oven, developing a golden, inviting exterior for 12-15 minutes until they achieve a sun-kissed complexion.
- Present these warm, comforting biscuits immediately, accompanied by luxurious butter, vibrant jam, or liquid golden honey for a delightful culinary experience.
Notes
- Use cold butter straight from the refrigerator to achieve flakier, more tender biscuits with better texture and layering.
- Handle the dough minimally to prevent tough biscuits, gently mixing ingredients just until they come together without overworking.
- For a healthier alternative, swap white flour with whole wheat or gluten-free flour while maintaining the same proportions and mixing technique.
- Brush the tops with melted butter or egg wash before baking to create a beautiful golden-brown crust and enhance the biscuits’ appearance and flavor.
- Prep Time: 5 minutes
- Cook Time: 12 minutes
- Category: Breakfast, Snacks, Desserts
- Method: Baking
- Cuisine: American
Nutrition
- Serving Size: 8
- Calories: 198
- Sugar: 1 g
- Sodium: 205 mg
- Fat: 10 g
- Saturated Fat: 6 g
- Unsaturated Fat: 4 g
- Trans Fat: 0 g
- Carbohydrates: 23 g
- Fiber: 1 g
- Protein: 3 g
- Cholesterol: 28 mg
Katherine Pierce
Recipe Curator & Food Educator
Expertise
Education
Boston University Metropolitan College
Certificate Program in the Culinary Arts
Focus: French and international cuisine techniques, Hands-on culinary training with industry professionals, Food industry insights and operations
Katherine grew up believing every dish has a story. She studied the art of food at Boston University and explored the history behind it. She loves pulling easy recipes from every corner of the world and putting them at your fingertips.
When Katherine’s not writing or testing new flavors, she’s teaching cooking classes, baking colorful mooncakes, or dreaming up new ways to mix old favorites with new twists.