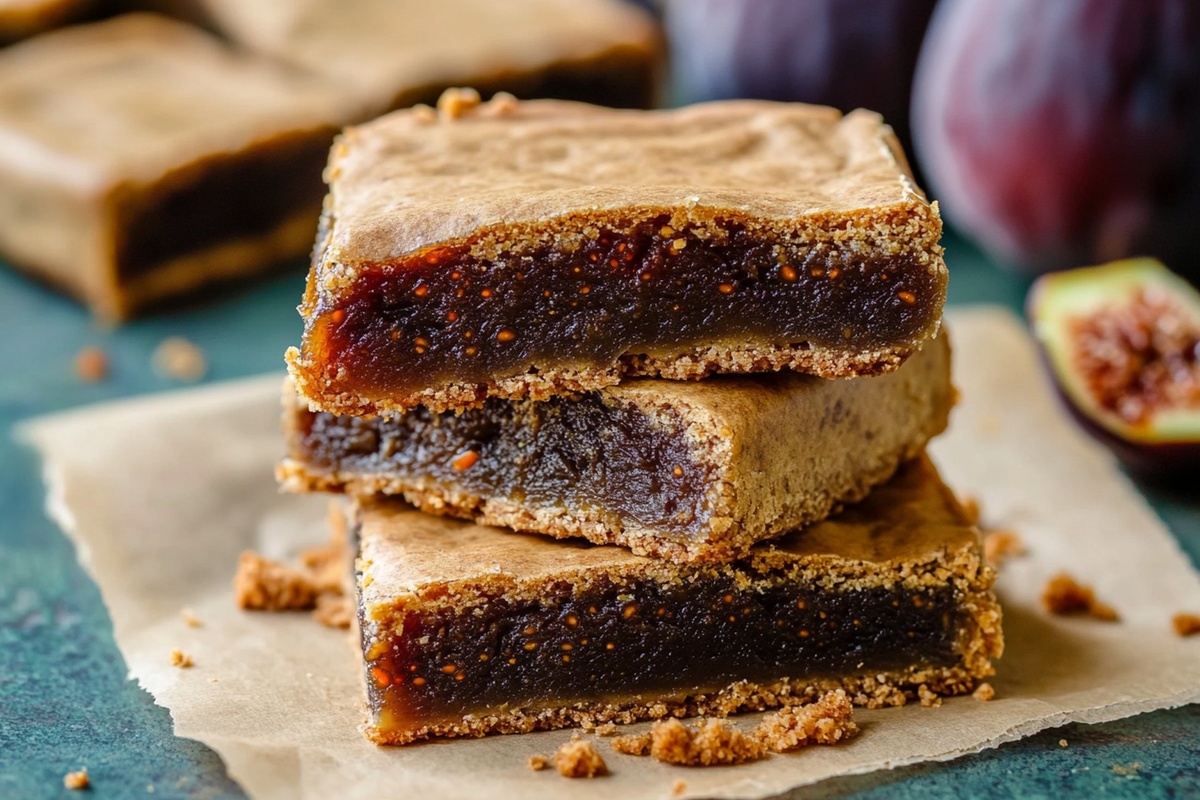
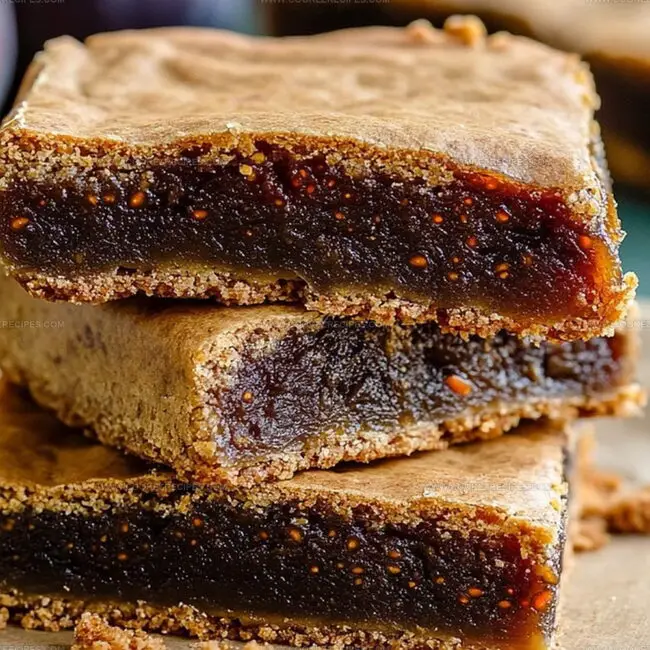
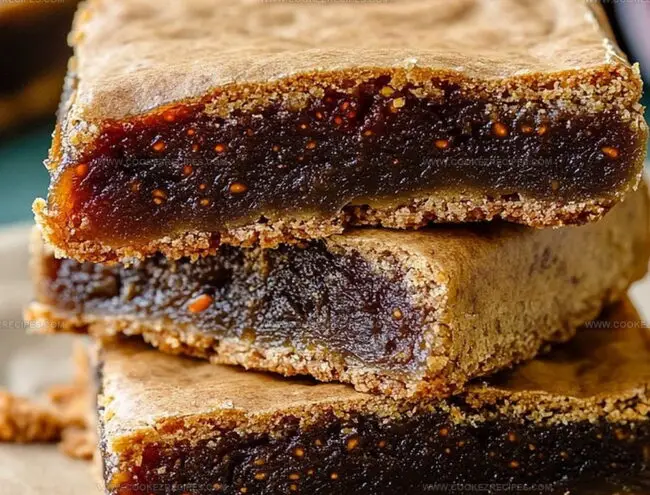
Homemade Fig Bars That Are Chewy and Sweet
Baking these delightful homemade fig bars brings pure joy to my kitchen every single time.
Memories of childhood snacks flood back with each sweet, chewy bite.
Soft, fragrant figs nestled between golden layers of buttery pastry create a nostalgic treat that feels like a warm hug.
Fresh ingredients make all the difference in this simple recipe.
Mixing the dough requires just a few basic pantry staples and minimal effort.
Crumbly, tender pastry surrounding rich fig filling promises a delectable experience that will have everyone asking for seconds.
Homemade Fig Bars Natural Sweet Snack
Ingredients Found in Homemade Fig Bars
Base Ingredients:Flour Ingredients:Optional Flavor Enhancers:Preparation Liquid:Homemade Fig Bars Made In Easy Steps
Step 1: Warm Up the Oven
Fire up your oven to a toasty 350°F.
This will create the perfect baking environment for your delightful treat.
Step 2: Transform the Figs
Drop dried figs into a small bowl and drench them in steaming hot water.
Let them soak and soften for 10 magical minutes.
Carefully drain the figs, but save a tablespoon of the luscious soaking liquid.
Step 3: Create Silky Fig Spread
Toss the plump soaked figs, golden honey, and reserved liquid into a food processor.
Blitz until you achieve a smooth, spreadable mixture that looks like pure magic.
Set this treasure aside.
Step 4: Whip Up the Dough Base
Grab your mixer and start dancing with softened butter and sugar.
Cream them together until they transform into a dreamy, light mixture.
Introduce an egg and vanilla extract, mixing until everything becomes beautifully incorporated.
Step 5: Shape the Dough
Gradually sprinkle flour into the mixture, stirring until a soft dough emerges.
The dough should feel like a tender cloud in your hands.
Step 6: Roll Out the Canvas
Place the dough between two parchment paper sheets.
Gently roll it into a rectangular masterpiece measuring 12×5 inches.
Step 7: Layer and Fold
Spread the fig mixture down the center of your dough rectangle.
Leave a small border around the edges.
Carefully fold the dough over the filling, pinching the edges to create a sealed pocket of deliciousness.
Step 8: Slice and Bake
Cut the rolled dough into 10 equal pieces.
Transfer these gems onto a parchment-lined baking sheet.
Slide into the preheated oven and bake for 15-20 minutes until they turn a gorgeous golden brown.
Step 9: Cool and Enjoy
Allow your fig bars to cool and settle.
Once they reach room temperature, they’re ready to be devoured and shared with loved ones.
Fig Bar Prep Tricks For Homemade Ease
Fig Bars Hold Up Great for On-the-Go Snacking
Cozy Picks For Fig Bars
Fig Bar Remakes at Home
FAQs
Dried figs are packed with fiber, potassium, calcium, and antioxidants. They help improve digestion, support bone health, and provide natural sweetness with lower sugar content compared to processed snacks.
Fresh figs have higher water content and might make the filling too wet. Dried figs are recommended for achieving the right consistency and concentrated flavor in this recipe.
These homemade fig bars are beginner-friendly. The recipe requires basic mixing and rolling techniques that even novice bakers can easily master. Just follow the steps carefully and you’ll create delicious bars.
All-purpose flour is perfect for these fig bars. It provides the right texture and structure for the dough. If you prefer, you can also use whole wheat flour for a nuttier flavor and added nutrition.
Print
Homemade Fig Bars Recipe
- Total Time: 35 minutes
- Yield: 12 1x
Description
Delightful homemade fig bars showcase Mediterranean sweetness with rustic charm. Wholesome ingredients blend effortlessly, creating a nostalgic treat you’ll savor with each delectable bite.
Ingredients
Fruit and Filling:
- 1 cup dried figs, roughly chopped, stems removed
Sweeteners:
- 1 tablespoon honey
- 1/2 cup sugar
Baking and Binding Ingredients:
- 6 tablespoons (3 ounces) unsalted butter, softened
- 1 large egg
- 1 teaspoon vanilla extract
- 1 1/2 cups white whole wheat flour
Instructions
- Activate your oven to a toasty 350°F (175°C), preparing the environment for delectable pastry creation.
- Immerse dried figs in steaming water for 10 minutes, allowing them to plump and soften. Carefully drain, reserving a tablespoon of the fragrant liquid.
- Transform the hydrated figs into a silky puree using a food processor, incorporating honey and the reserved soaking essence. Blend until achieving a luscious, spreadable consistency.
- Whip softened butter and sugar together in a mixing vessel, creating a creamy base. Introduce egg and vanilla, blending until harmoniously integrated.
- Gradually incorporate flour into the mixture, gently kneading until a cohesive dough emerges.
- Using parchment paper as your canvas, roll the dough into a rectangular landscape measuring approximately 12×5 inches.
- Artfully distribute the fig puree along the dough’s central corridor, maintaining a delicate border. Tenderly fold the dough edges, sealing the filling within its buttery embrace.
- Slice the filled dough into 10 uniform segments, arranging them on a parchment-lined baking sheet. Bake for 15-20 minutes until achieving a golden, tempting complexion.
- Allow the fig bars to cool and settle, transforming from piping hot delicacies to irresistible treats ready for enjoyment.
Notes
- Select soft, plump dried figs for the most vibrant and rich filling flavor, ensuring a smooth and spreadable consistency.
- Experiment with alternative sweeteners like maple syrup or agave nectar for different dietary preferences or to reduce refined sugar intake.
- Chill the dough for 30 minutes before rolling to make handling easier and prevent excessive spreading during baking.
- For gluten-free options, substitute all-purpose flour with almond or coconut flour, adjusting liquid content slightly to maintain dough texture.
- Prep Time: 15 minutes
- Cook Time: 20 minutes
- Category: Snacks, Desserts
- Method: Baking
- Cuisine: American
Nutrition
- Serving Size: 12
- Calories: 168
- Sugar: 10 g
- Sodium: 36 mg
- Fat: 7 g
- Saturated Fat: 4 g
- Unsaturated Fat: 2 g
- Trans Fat: 0 g
- Carbohydrates: 24 g
- Fiber: 1 g
- Protein: 2 g
- Cholesterol: 23 mg
Daniel Bruns
Founder & Culinary Innovator
Expertise
Recipe development for home cooks, Nutritional analysis and meal planning, Culinary education and food writing
Education
Auguste Escoffier School of Culinary Arts
Diploma in Culinary Arts and Operations
Focus: Classical and contemporary cooking techniques, Culinary entrepreneurship and kitchen management, Menu development and food cost analysis
Daniel’s story started with flour on his face and a pie in the oven at his grandma’s house. He later sharpened his skills at the Auguste Escoffier School of Culinary Arts.
His goal? Recipes so simple you’ll want to cook every night. When he’s not whipping up one-pan wonders, Daniel’s outside picking herbs, hosting neighborhood cook-offs, or baking chocolate cakes with his kids, messy, sweet, and unforgettable.