
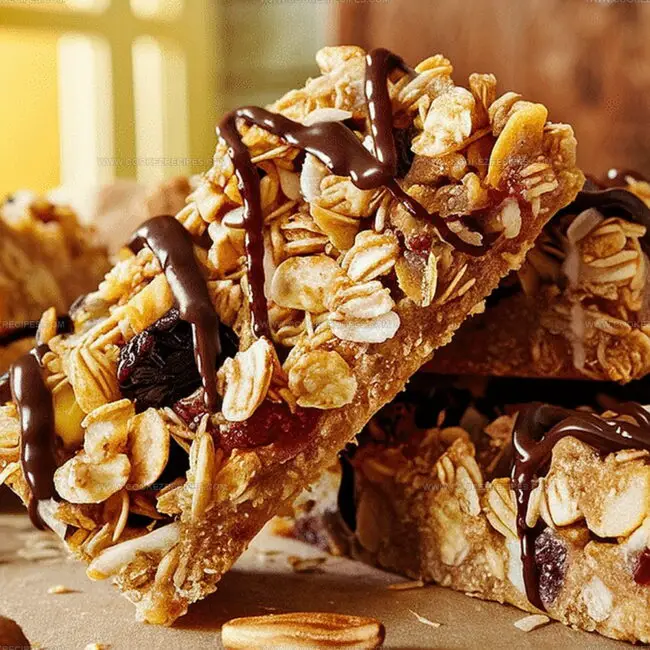
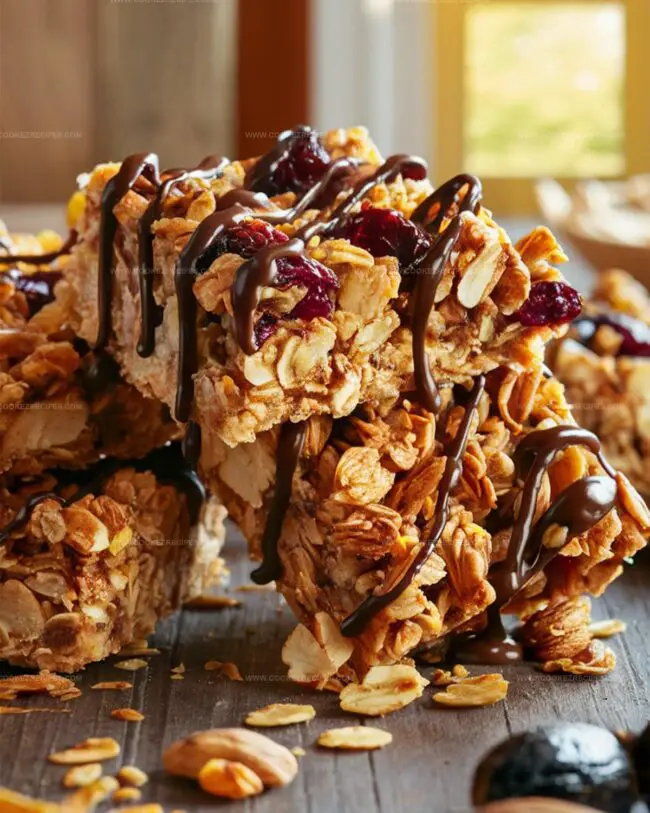
Homemade Granola Bars Recipe for Grab-and-Go Snacks
Crafting delectable homemade granola bars unlocks a world of nutty, sweet possibilities right in your kitchen.
Pantry staples transform into crunchy, wholesome treats that beat anything store-bought.
Each bite promises a perfect balance of texture and flavor, packed with nutrients.
Mixing ingredients becomes an adventure in creativity, where oats, nuts, and honey dance together.
Simple techniques guarantee success, even for novice bakers seeking a healthy snack.
No complicated equipment stands between you and these delightful energy-boosting morsels.
Jump into this recipe and watch magic unfold with every golden, crispy square.
Homemade Granola Bars That Fit Your Snack Goals
Energy Bars with Granola and Nuts
Base Ingredients:Nut and Seed Mixture:Flavor Enhancers:Preparation Support:How to Prepare Homemade Granola Bars
Step 1: Prepare the Baking Station
Line an 8×8-inch baking pan with parchment paper, ensuring the paper covers the bottom and sides completely.
This will help you easily remove the granola bars later.
Step 2: Create the Sticky Binding Sauce
In a small saucepan, gently warm the honey (or maple syrup) and peanut butter over low heat.
Stir constantly until the mixture becomes smooth and well combined.
Remove from heat and stir in the vanilla extract to add a warm, comforting flavor.
Step 3: Mix Dry Ingredients
Grab a large mixing bowl and combine the following ingredients:Stir these ingredients together to create a delicious base for your granola bars.
Step 4: Bind the Ingredients
Pour the warm peanut butter mixture over the dry ingredients.
Mix thoroughly, ensuring every bit of the dry ingredients gets coated with the sticky sauce.
This will help the bars hold together perfectly.
Step 5: Press and Shape
Transfer the mixture to the prepared baking pan.
Use your hands or a spatula to press the mixture down firmly, creating an even, compact layer.
Make sure to push the mixture into all corners of the pan.
Step 6: Chill and Set
Place the pan in the refrigerator for at least 1 hour.
This cooling time allows the bars to firm up and become easier to slice.
Step 7: Slice and Store
Remove the pan from the refrigerator and lift the granola mixture out using the parchment paper.
Slice into bars of your desired size.
Store the bars in an airtight container at room temperature for up to a week, or refrigerate for extended freshness.
Granola Bar Tips For Homemade Crunch

Granola Bars That Stay Firm With Proper Storage
Balanced Snacks For Granola Bars
Granola Bar Variations
FAQs
Yes, they’re packed with nutritious ingredients like oats, nuts, chia seeds, and dried fruit. They provide good protein, fiber, and healthy fats, making them a wholesome snack option.
Absolutely! You can swap nuts based on your preference or availability. Almonds, walnuts, pecans, or cashews all work great and add different flavor profiles.
It depends on the oats you use. Choose certified gluten-free oats if you need a gluten-free version. Otherwise, standard oats may contain trace gluten.
Reduce the honey or maple syrup quantity, or use unsweetened nut butter. You can also add less sweet dried fruit like unsweetened coconut flakes to balance the sweetness.
Print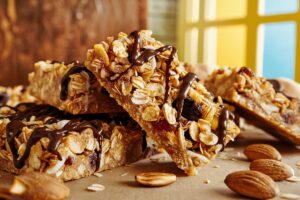
Homemade Granola Bars Recipe
- Total Time: 10 minutes
- Yield: 12 1x
Description
Wholesome “homemade granola bars” blend nutty oats, sweet honey, and crunchy almonds into a delightful snack. Packed with energy and flavor, these bars offer a perfect balance of texture and nutrition you’ll crave between meals.
Ingredients
Main Ingredients:
- 2 cups (480 ml / 16 fl oz) rolled oats
- 1/2 cup (120 ml / 4 fl oz) honey or maple syrup
- 1/2 cup (120 g / 4.2 oz) natural peanut butter or almond butter
Nuts and Add-ins:
- 1/4 cup (30 g / 1 oz) chopped nuts (almonds, walnuts, or cashews)
- 1/4 cup (40 g / 1.4 oz) dried fruit (raisins, cranberries, or apricots)
- 1/4 cup (45 g / 1.6 oz) dark chocolate chips (optional)
- 2 tablespoons (20 g / 0.7 oz) chia seeds or flaxseeds (optional)
Flavor Enhancers:
- 1 teaspoon vanilla extract
- 1/2 teaspoon cinnamon
- 1/4 teaspoon salt
Instructions
- Prepare a square baking dish by lining it completely with parchment paper, ensuring the paper overhangs on two sides for easy removal.
- Create a smooth binding liquid by gently heating honey and peanut butter in a saucepan over low temperature, stirring continuously until well combined and glossy.
- Remove the liquid mixture from heat and incorporate vanilla extract, mixing thoroughly to enhance the flavor profile.
- In a spacious mixing bowl, assemble the dry ingredients: rolled oats, chopped nuts, dried fruit pieces, ground cinnamon, sea salt, and nutrient-rich chia and flaxseeds.
- Pour the warm liquid mixture over the dry ingredients, using a spatula to fold and coat every component evenly, ensuring comprehensive integration.
- Transfer the granola mixture into the prepared pan, using firm pressure and smooth motions to compress the ingredients into a compact, uniform layer.
- Chill the pan in the refrigerator for a minimum of 60 minutes to allow the bars to set and solidify completely.
- Once firm, lift the parchment paper to remove the entire block from the pan and slice into individual rectangular bars using a sharp knife.
- Keep the granola bars in a sealed container at ambient temperature for up to seven days, or extend their preservation by storing in the refrigerator.
Notes
- Opt for rolled oats instead of quick oats to maintain a chewier texture and better structural integrity in your granola bars.
- Toast nuts and seeds beforehand to enhance their nutty flavor and add a deeper, more complex taste profile to the bars.
- Experiment with different nut butter alternatives like almond or cashew butter for unique flavor variations and potential allergy accommodations.
- Use parchment paper overhang to easily lift and remove the entire batch of granola bars from the pan without breaking them.
- Prep Time: 10 minutes
- Cook Time: 0 minutes
- Category: Snacks, Breakfast
- Method: Baking
- Cuisine: American
Nutrition
- Serving Size: 12
- Calories: 200
- Sugar: 10 g
- Sodium: 50 mg
- Fat: 9 g
- Saturated Fat: 1.5 g
- Unsaturated Fat: 7 g
- Trans Fat: 0 g
- Carbohydrates: 30 g
- Fiber: 3 g
- Protein: 5 g
- Cholesterol: 0 mg
Daniel Bruns
Founder & Culinary Innovator
Expertise
Recipe development for home cooks, Nutritional analysis and meal planning, Culinary education and food writing
Education
Auguste Escoffier School of Culinary Arts
Diploma in Culinary Arts and Operations
Focus: Classical and contemporary cooking techniques, Culinary entrepreneurship and kitchen management, Menu development and food cost analysis
Daniel’s story started with flour on his face and a pie in the oven at his grandma’s house. He later sharpened his skills at the Auguste Escoffier School of Culinary Arts.
His goal? Recipes so simple you’ll want to cook every night. When he’s not whipping up one-pan wonders, Daniel’s outside picking herbs, hosting neighborhood cook-offs, or baking chocolate cakes with his kids, messy, sweet, and unforgettable.