Kings Hawaiian Cheesecake Danish Recipe for Brunch Joy
My latest culinary adventure with kings hawaiian cheesecake danish started as a spontaneous breakfast experiment.
Sweet memories of childhood mornings inspired this delightful creation.
Pastry lovers appreciate how simple ingredients can become something extraordinary.
Soft, pillowy bread meets creamy cheesecake in a harmonious blend of textures.
Rich flavors dance across your palate with each delectable bite.
Weekend brunch just became more exciting and irresistible.
Savor every moment of this delicious journey waiting to unfold.
Kings Hawaiian Cheesecake Danish That Combines Two Loves
Hawaiian Cheesecake Danish Ingredient Mix
Bread Base:Cream Cheese Filling:Spice and Topping Mixture:Kings Hawaiian Cheesecake Danish Baking Process
Step 1: Prepare the Oven
Warm up the oven to 375°F.
Grab a 9×13-inch baking dish and coat the bottom with a thin layer of melted butter, ensuring complete coverage.
Step 2: Create Roll Pockets
Arrange the Hawaiian sweet rolls in the buttered dish.
Carefully slice a deep “X” into the top of each roll, cutting about two-thirds down without piercing the bottom completely.
Step 3: Mix Cinnamon Butter Glaze
Combine melted butter with the following ingredients in a bowl:Pour this fragrant mixture evenly over the prepared rolls, allowing the flavors to seep into every crevice.
Step 4: Whip Cream Cheese Filling
In a separate mixing bowl, transform the cream cheese into a silky smooth base:Blend until the mixture becomes perfectly creamy and consistent.
Step 5: Stuff the Rolls
Transfer the cream cheese mixture into a piping bag or a zip-top bag with a corner snipped.
Carefully pipe the filling into the X-shaped cuts, ensuring each roll gets a generous dose of creamy goodness.
Step 6: Bake to Golden Perfection
Slide the dish into the preheated oven.
Bake uncovered for 12-15 minutes until the rolls turn a beautiful golden brown and the cream cheese filling sets completely.
Step 7: Cool and Serve
Let the Danish rest for a few minutes to prevent burning.
The filling will be scorching hot, so patience is key.
Serve while warm for maximum deliciousness.
Step 8: Store Remaining Treats
Preserve any leftover Danish in an airtight container inside the refrigerator.
They’ll stay fresh and tasty for 3-4 days.
Danish Tips For Cheesecake Kings Hawaiian Style
Cheesecake Danish: Save Kings Hawaiian Treats
Best Ideas With Cheesecake Danish
Sweet Styles of Kings Hawaiian Cheesecake Danish
FAQs
You can substitute with brioche or challah rolls, but Hawaiian sweet rolls provide the best flavor and texture for this recipe.
No, you’ll pipe the raw cream cheese mixture directly into the rolls before baking, which helps it set perfectly during the cooking process.
Yes, you can prepare the rolls and cream cheese mixture ahead of time, assemble them right before baking, and keep them refrigerated until ready to cook.
While possible, you’ll need to use gluten-free sweet rolls and ensure all other ingredients are gluten-free certified to maintain the original taste and texture.
Print
Kings Hawaiian Cheesecake Danish Recipe
- Total Time: 22 minutes
- Yield: 12 1x
Description
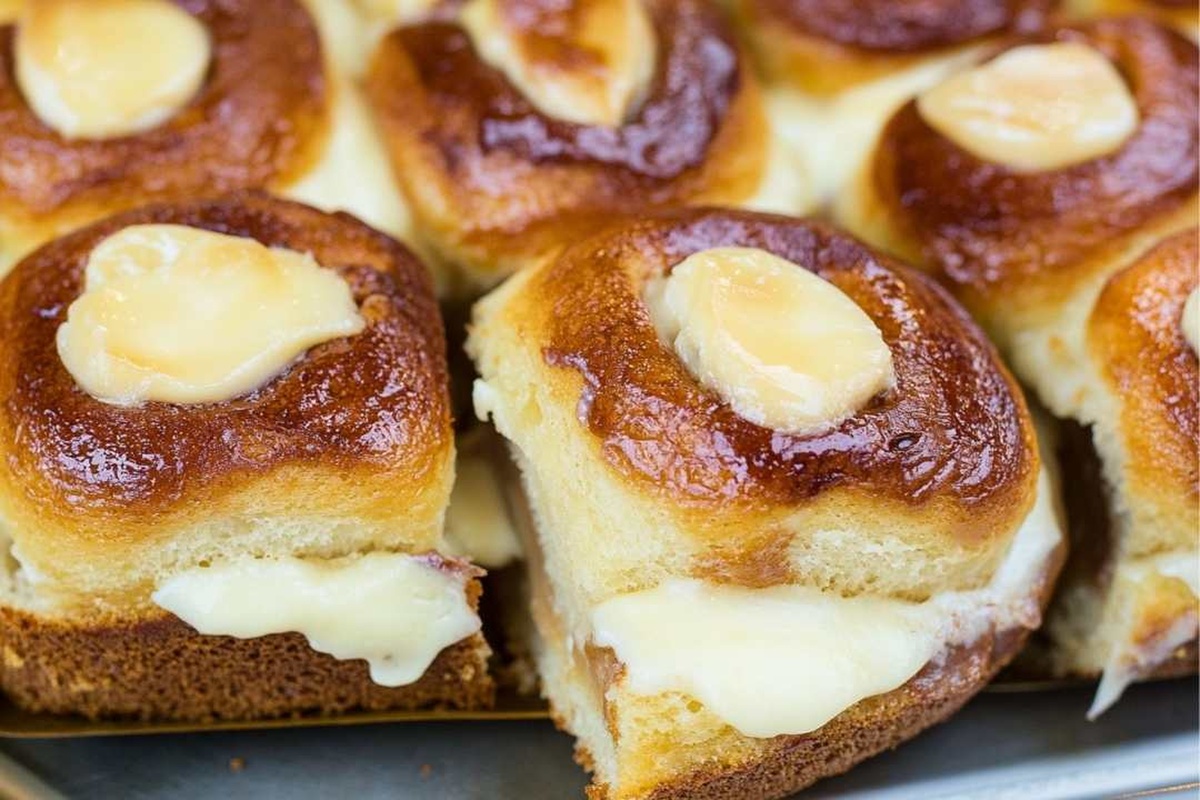
Indulgent kings hawaiian cheesecake danish brings together creamy cheesecake filling and buttery pastry in a delightful fusion of flavors. Sweet, pillowy pastry and rich cream cheese create a heavenly breakfast treat you’ll crave again and again.
Ingredients
Main Ingredients:
- 12 pack Kings Hawaiian sweet rolls
- 8 ounces (226 grams) cream cheese, softened
- 1 large egg, beaten
Sweeteners and Spices:
- 3 tablespoons granulated sugar
- 2 tablespoons brown sugar
- 1/2 tablespoon ground cinnamon
- 1/8 teaspoon freshly grated nutmeg (optional)
Butter and Greasing:
- 1 tablespoon butter, melted (for greasing the dish)
- 1/3 cup butter, melted
Instructions
- Prepare the baking workspace by heating the oven to 375°F and coating a 9×13-inch baking dish with melted butter, ensuring complete coverage.
- Position the Hawaiian sweet rolls inside the greased dish, carefully creating a diagonal cross-cut on top of each roll, penetrating approximately two-thirds deep without slicing through the base.
- Craft a decadent cinnamon butter blend by whisking together melted butter, brown sugar, cinnamon, and nutmeg in a mixing vessel, then uniformly distribute the mixture across the prepared rolls.
- Develop the cream cheese filling by smoothing out the softened cream cheese, gradually incorporating granulated sugar until perfectly integrated, then gently fold in the beaten egg for a silky consistency.
- Transfer the cream cheese mixture into a piping bag or sealed plastic bag with a trimmed corner, then methodically inject the filling into the cross-cut openings of each roll, ensuring complete and even distribution.
- Place the prepared dish into the preheated oven and bake uncovered for 12-15 minutes, monitoring until the rolls transform to a golden hue and the cream cheese filling reaches a stable 145°F internal temperature.
- Remove from the oven and allow a brief cooling period to prevent potential burns, as the filling will be extremely hot upon initial removal.
- Preserve any remaining danish by storing in a sealed container within the refrigerator, maintaining freshness for 3-4 days.
Notes
- Customize bread selection by using gluten-free Hawaiian rolls for a celiac-friendly version.
- Prevent cream cheese filling from overflowing by not overfilling the roll cuts and keeping filling slightly below the top edge.
- Enhance flavor profile by adding vanilla extract or orange zest to cream cheese mixture for deeper, more complex taste notes.
- Achieve perfect golden-brown color by brushing rolls with egg wash before baking, which creates a beautiful shiny finish and promotes even browning.
- Prep Time: 10 minutes
- Cook Time: 12 minutes
- Category: Desserts, Breakfast, Snacks
- Method: Baking
- Cuisine: Hawaiian
Nutrition
- Serving Size: 12
- Calories: 244
- Sugar: 9 g
- Sodium: 295 mg
- Fat: 14 g
- Saturated Fat: 8 g
- Unsaturated Fat: 4 g
- Trans Fat: 0 g
- Carbohydrates: 27 g
- Fiber: 1 g
- Protein: 3 g
- Cholesterol: 50 mg
Daniel Bruns
Founder & Culinary Innovator
Expertise
Recipe development for home cooks, Nutritional analysis and meal planning, Culinary education and food writing
Education
Auguste Escoffier School of Culinary Arts
Diploma in Culinary Arts and Operations
Focus: Classical and contemporary cooking techniques, Culinary entrepreneurship and kitchen management, Menu development and food cost analysis
Daniel’s story started with flour on his face and a pie in the oven at his grandma’s house. He later sharpened his skills at the Auguste Escoffier School of Culinary Arts.
His goal? Recipes so simple you’ll want to cook every night. When he’s not whipping up one-pan wonders, Daniel’s outside picking herbs, hosting neighborhood cook-offs, or baking chocolate cakes with his kids, messy, sweet, and unforgettable.