
Krispie Easter Nests Recipe for a Cheery Treat
Crafting delightful krispie easter nests brings pure childhood joy to spring celebrations.
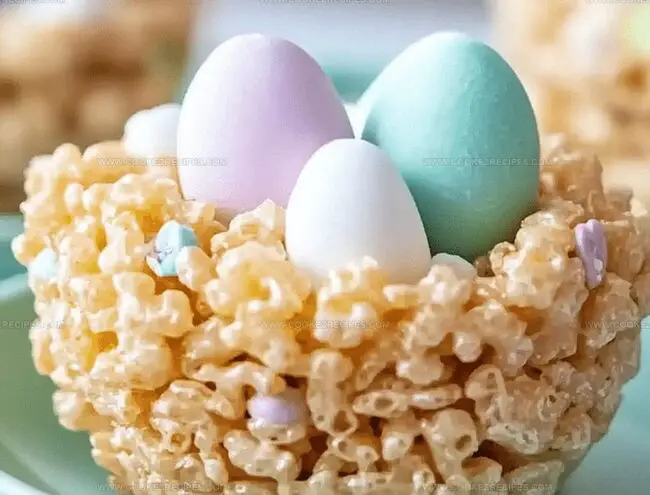
Colorful marshmallow magic transforms simple ingredients into whimsical treats.
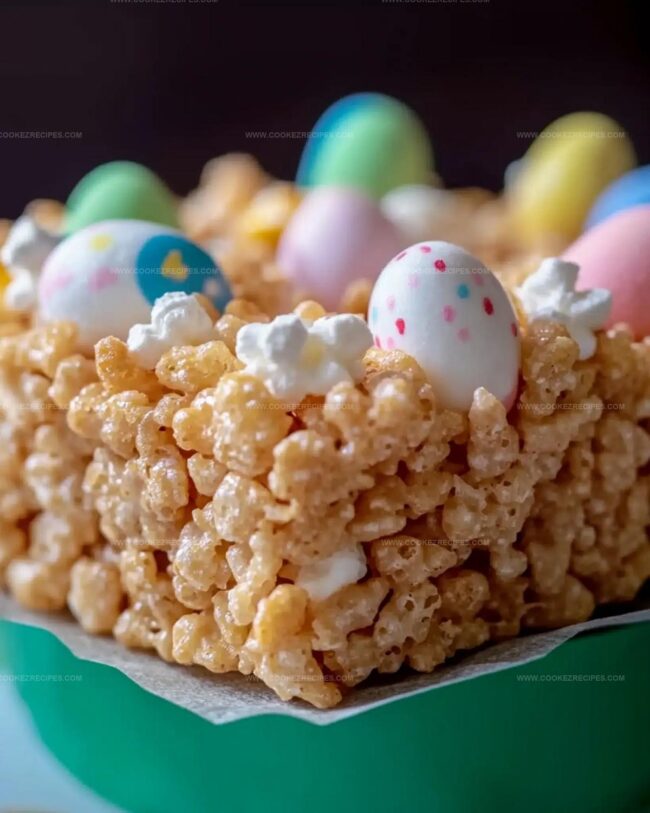
Pastel candies nestle perfectly within crispy, sweet edges.
Springtime baking becomes an adventure of playful creativity.
Kids absolutely adore helping create these charming little confections.
Delicate chocolate drizzles and speckled eggs make each nest unique.
Krispie Easter Nests That Kids Love To Help With

What Goes into Krispie Easter Nests
Base Ingredients:Coloring and Decoration Ingredients:Topping Ingredients:Krispie Easter Nests – Easy Instructions
Step 1: Prepare Muffin Tin
Grab your muffin tin and give it a light butter coating to prevent sticking.
Set the tin aside while you get ready to create some magical Easter treats.
Step 2: Melt Butter and Marshmallows
Pop a large saucepan on low heat and gently melt the butter.
Toss in marshmallows and stir continuously until they transform into a smooth, creamy mixture.
Once fully melted, take the pan off the heat.
Step 3: Mix Crispy Base
Fold in Crisp Rice Cereal until every piece gets coated with the marshmallow mixture.
With butter-slicked hands, scoop about a third cup into each muffin cup.
Press down in the center using a pestle or the back of a spoon to create a cute nest-like depression.
Let these sit and set for half an hour.
Step 4: Create Grass Decoration
In a separate bowl, combine:Stir until the coconut turns a vibrant green, mimicking fresh spring grass.
Step 5: Fill Nests with Green Grass
Sprinkle about a teaspoon of the green coconut “grass” into each nest, creating a festive base.
Step 6: Add Sweet Decorations
Top each nest with playful Easter candies such as:Serve and watch everyone’s eyes light up with these adorable Easter treats!
Easter Nest Tips With Krispie Touch
Krispie Easter Nests Keep Their Snap Overnight
Kid-Friendly Picks For Easter Nests
Krispie Easter Nests Takes
FAQs
Yes, you can substitute Crisp Rice Cereal with similar crispy cereals like Rice Krispies or corn flakes for a similar texture.
Butter your hands thoroughly before shaping the nests to prevent sticking and make handling easier.
Absolutely! You can prepare the nests a day in advance and store them in an airtight container at room temperature until you’re ready to add the coconut grass and candy.
Yes, you can skip the food coloring or use natural alternatives like matcha powder for green coconut, or leave the coconut its natural white color.
Print
Krispie Easter Nests Recipe
- Total Time: 45 minutes
- Yield: 12 1x
Description
Chocolate magic weaves through homemade Krispie Easter Nests, delighting families with nostalgic sweetness. Small marshmallow-bound rice cereal clusters cradle pastel candy eggs, promising springtime joy you cannot resist.
Ingredients
Main Ingredients:
- 6 cups crisp rice cereal
- 1 package (250 grams / 8.8 ounces) marshmallows
- 1 cup sweetened shredded coconut
Binding Ingredients:
- 1/4 cup (4 tablespoons) salted butter
Decorative Ingredients:
- 25 drops green food coloring
- Jujubes (for garnish)
- Gourmet jelly beans (for garnish)
- Chocolate mini eggs (for garnish)
Instructions
- Prepare a muffin tin by lightly coating each cavity with butter to prevent sticking.
- In a spacious saucepan, gently melt butter over low temperature, then carefully incorporate marshmallows, stirring continuously until they transform into a smooth, uniform liquid.
- Remove the marshmallow mixture from heat and fold in Crisp Rice Cereal, ensuring even distribution throughout the mixture.
- Using hands lightly coated with butter, carefully distribute approximately one-third cup of the cereal mixture into each muffin tin compartment.
- Create a delicate indentation in the center of each nest using a pestle or the back of a spoon, forming a shallow pocket while maintaining a sturdy base.
- Allow the nests to solidify and set for half an hour at room temperature.
- In a separate mixing bowl, combine shredded coconut with green food coloring, stirring meticulously until the coconut achieves a vibrant, uniform emerald hue.
- Delicately sprinkle approximately one teaspoon of the verdant coconut “grass” into the center of each nest.
- Embellish the nests with festive Easter confections such as chocolate mini eggs, colorful jelly beans, or whimsical jujubes.
- Serve and savor these charming seasonal treats.
Notes
- Use unsalted butter to control the saltiness and prevent the nests from becoming too salty.
- Work quickly when pressing the mixture into muffin tins, as the marshmallow mixture sets fast.
- For a gluten-free version, swap regular Crisp Rice Cereal with a certified gluten-free alternative.
- Create variations by using different colored coconut or experimenting with seasonal candies like pastel M&Ms or mini Cadbury eggs.
- Prevent sticky hands by keeping a small bowl of water or cooking spray nearby when shaping the nests.
- Store in an airtight container at room temperature for up to three days to maintain freshness and crispness.
- Kids can help with decorating the nests, making this a fun family activity that encourages creativity.
- Prep Time: 45 minutes
- Cook Time: 0 minutes
- Category: Snacks, Desserts
- Method: None
- Cuisine: American
Nutrition
- Serving Size: 12
- Calories: 150
- Sugar: 10g
- Sodium: 80mg
- Fat: 6g
- Saturated Fat: 4g
- Unsaturated Fat: 2g
- Trans Fat: 0g
- Carbohydrates: 23g
- Fiber: 1g
- Protein: 1g
- Cholesterol: 15mg
Daniel Bruns
Founder & Culinary Innovator
Expertise
Recipe development for home cooks, Nutritional analysis and meal planning, Culinary education and food writing
Education
Auguste Escoffier School of Culinary Arts
Diploma in Culinary Arts and Operations
Focus: Classical and contemporary cooking techniques, Culinary entrepreneurship and kitchen management, Menu development and food cost analysis
Daniel’s story started with flour on his face and a pie in the oven at his grandma’s house. He later sharpened his skills at the Auguste Escoffier School of Culinary Arts.
His goal? Recipes so simple you’ll want to cook every night. When he’s not whipping up one-pan wonders, Daniel’s outside picking herbs, hosting neighborhood cook-offs, or baking chocolate cakes with his kids, messy, sweet, and unforgettable.