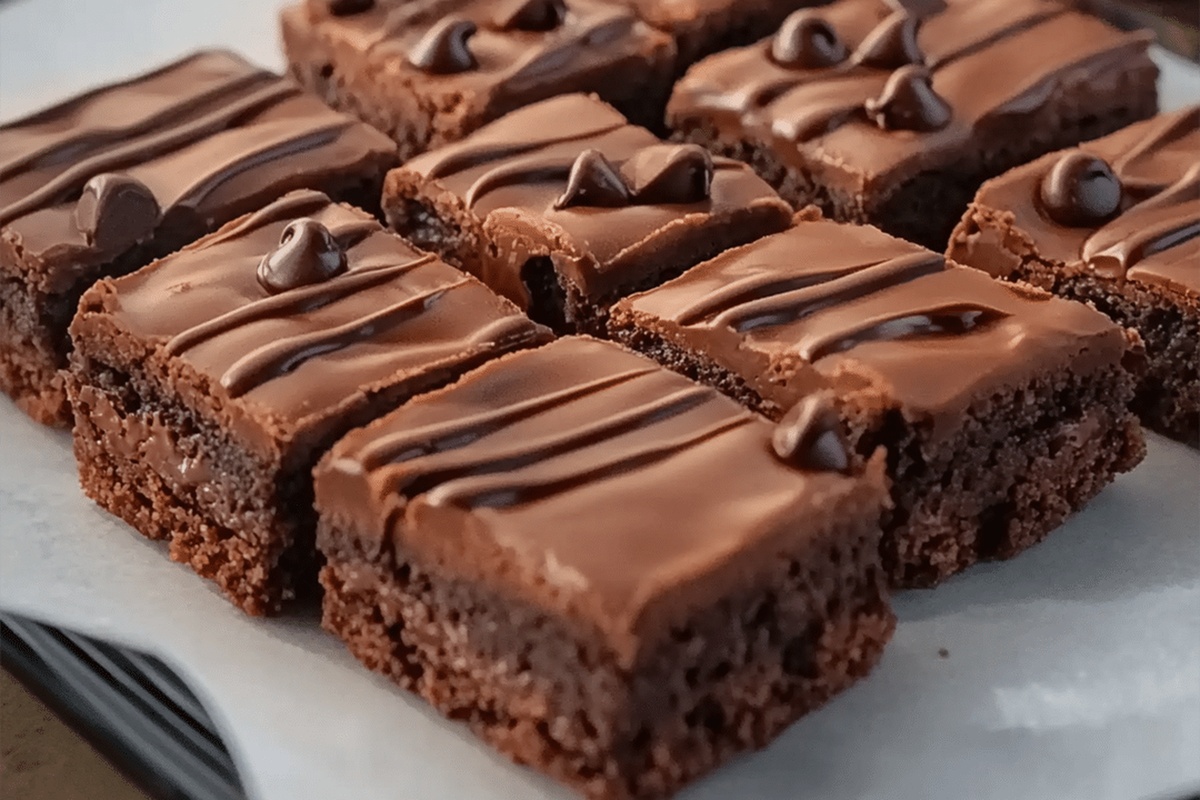
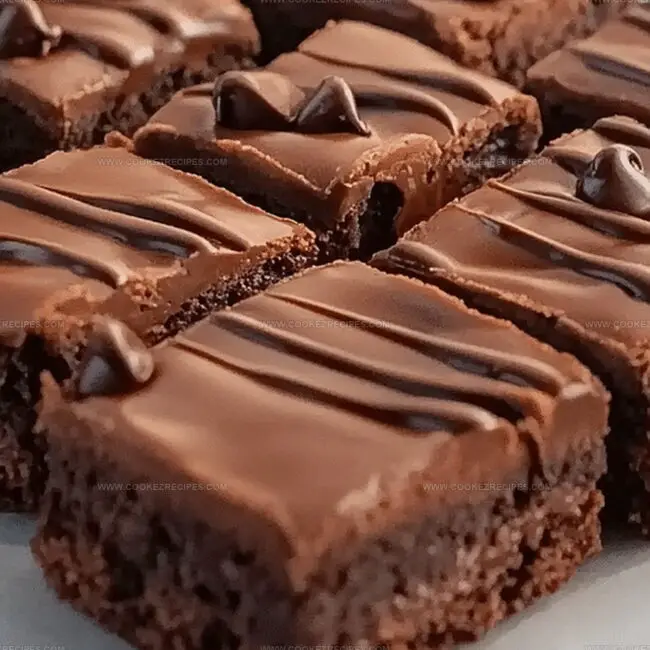
No-Bake Chocolate Chip Brownie Bars Recipe
Chocolate chip brownie bars without baking promise a delightful twist on classic desserts.
Crisp edges and gooey centers burst with rich flavor combinations.
Sweet treats often feel complicated, but these bars simplify indulgence.
Minimal kitchen effort delivers maximum satisfaction for chocolate enthusiasts.
No oven required means anyone can craft these delectable squares.
Layers of creamy chocolate and nutty undertones create an irresistible experience.
No Bake Chocolate Chip Brownie Bars For Busy Day Sweet Tooth
No-Bake Chocolate Chip Brownie Bar Mix
Base Ingredients:Liquid Binders:Chocolate Elements:No Bake Chocolate Chip Brownie Bars Steps

Step 1: Blend Dry Ingredients
In a spacious mixing bowl, whisk together almond flour, cocoa powder, and a pinch of salt until completely combined and lump-free.
Step 2: Introduce Wet Components
Pour in the following ingredients:Stir thoroughly until the mixture transforms into a rich, thick dough with a smooth consistency.
Step 3: Fold in Chocolate Goodness
Gently incorporate mini chocolate chips throughout the dough, ensuring an even distribution of chocolatey delights.
Step 4: Prepare Baking Vessel
Line an 8×8-inch baking dish with parchment paper, allowing slight overhang for easy removal.
Step 5: Shape and Smooth
Transfer the dough into the prepared pan, pressing firmly and evenly with a spatula to create a uniform surface.
Step 6: Chill and Set
Place the pan in the refrigerator for a minimum of 1 hour, allowing the bars to firm up and develop their delectable texture.
Step 7: Slice and Indulge
Remove the bars from the refrigerator, lift out using parchment paper, and slice into perfect squares.
Serve chilled for a fudgy experience or let sit at room temperature for a softer treat.
Brownie Bar Tips Without Baking Hassle
No Bake Chocolate Chip Brownie Bars: How to Store
Snack Picks For Brownie Bars
Easy No Bake Chocolate Chip Brownie Bars
FAQs
Yes, these no-bake chocolate chip brownie bars are naturally gluten-free since they use almond flour instead of traditional wheat flour, making them perfect for people with gluten sensitivities or celiac disease.
You can try using other nut flours like cashew or hazelnut flour, but the texture and taste might slightly differ. Coconut flour is not recommended as a direct substitute due to its high absorption rate.
When stored in an airtight container in the refrigerator, these bars will remain fresh for up to 7-10 days. For best texture and flavor, keep them chilled until ready to enjoy.
These bars are healthier than traditional brownies, using natural sweeteners like maple syrup and nutrient-rich ingredients like almond flour and coconut oil. They’re lower in refined sugars and provide some protein and healthy fats.
Print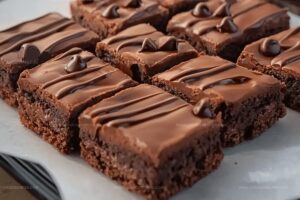
No Bake Chocolate Chip Brownie Bars Recipe
- Total Time: 10 minutes
- Yield: 16 1x
Description
Chocolate chip brownie bars promise pure dessert magic without turning on the oven. Rich layers of chocolatey goodness meld together, creating a delightful treat you’ll crave again and again.
Ingredients
Main Ingredients:
- 1 1/2 cups (360 ml) almond flour
- 1/2 cup (120 ml) unsweetened cocoa powder
- 1/2 cup (120 ml) maple syrup or honey
Binding and Flavor Ingredients:
- 1/4 cup (60 ml) coconut oil, melted
- 1 teaspoon (5 ml) vanilla extract
Finishing Ingredients:
- 1/4 teaspoon (1.25 ml) salt
- 1/2 cup (120 ml) mini chocolate chips
Instructions
- Prepare the foundational mixture by blending almond flour, cocoa powder, and salt in a spacious mixing vessel until thoroughly integrated.
- Introduce liquid elements – maple syrup, melted coconut oil, and vanilla extract – stirring methodically to create a cohesive, dense consistency.
- Gently incorporate mini chocolate chips, folding them evenly throughout the dough to ensure balanced distribution.
- Arrange parchment paper inside an 8×8-inch pan, allowing slight overhang for easy removal.
- Transfer the prepared mixture into the lined pan, utilizing a flexible spatula to compress and level the surface uniformly.
- Place the pan in the refrigerator, allowing the bars to solidify and set for a minimum of 60 minutes until achieving a firm texture.
- Extract the chilled confection from the refrigerator and utilize the parchment paper edges to lift the entire block onto a cutting surface.
- Slice into precise rectangular portions using a sharp knife, creating clean, consistent bars.
- Serve immediately or store in a sealed container, enjoying either chilled or at ambient temperature for a delectable no-bake treat.
Notes
- Customize flour alternatives by substituting almond flour with oat flour or gluten-free blend for various dietary needs.
- Enhance protein content by adding a scoop of plant-based protein powder directly into the dough mixture for extra nutrition.
- Control sweetness levels by adjusting maple syrup quantity or experimenting with alternative liquid sweeteners like agave or honey.
- Ensure perfect texture by pressing dough firmly and evenly into pan, using a flat-bottomed glass or spatula to create smooth, compact bars.
- Prep Time: 10 minutes
- Cook Time: 0 minutes
- Category: Desserts, Snacks
- Method: None
- Cuisine: American
Nutrition
- Serving Size: 16
- Calories: 181
- Sugar: 7 g
- Sodium: 58 mg
- Fat: 12 g
- Saturated Fat: 5 g
- Unsaturated Fat: 7 g
- Trans Fat: 0 g
- Carbohydrates: 18 g
- Fiber: 3 g
- Protein: 3 g
- Cholesterol: 0 mg
Daniel Bruns
Founder & Culinary Innovator
Expertise
Recipe development for home cooks, Nutritional analysis and meal planning, Culinary education and food writing
Education
Auguste Escoffier School of Culinary Arts
Diploma in Culinary Arts and Operations
Focus: Classical and contemporary cooking techniques, Culinary entrepreneurship and kitchen management, Menu development and food cost analysis
Daniel’s story started with flour on his face and a pie in the oven at his grandma’s house. He later sharpened his skills at the Auguste Escoffier School of Culinary Arts.
His goal? Recipes so simple you’ll want to cook every night. When he’s not whipping up one-pan wonders, Daniel’s outside picking herbs, hosting neighborhood cook-offs, or baking chocolate cakes with his kids, messy, sweet, and unforgettable.