Sweet No-Bake Chocolate Bird Nests Recipe: A Fun Spring Treat
Crafting delightful no-bake chocolate bird nests sparks pure childhood nostalgia for me.
Sweet memories of kitchen adventures flood back whenever I mix these treats.
Chocolate becomes the perfect glue binding crispy noodles into adorable nest shapes.
Kids absolutely adore helping create these whimsical little desserts.
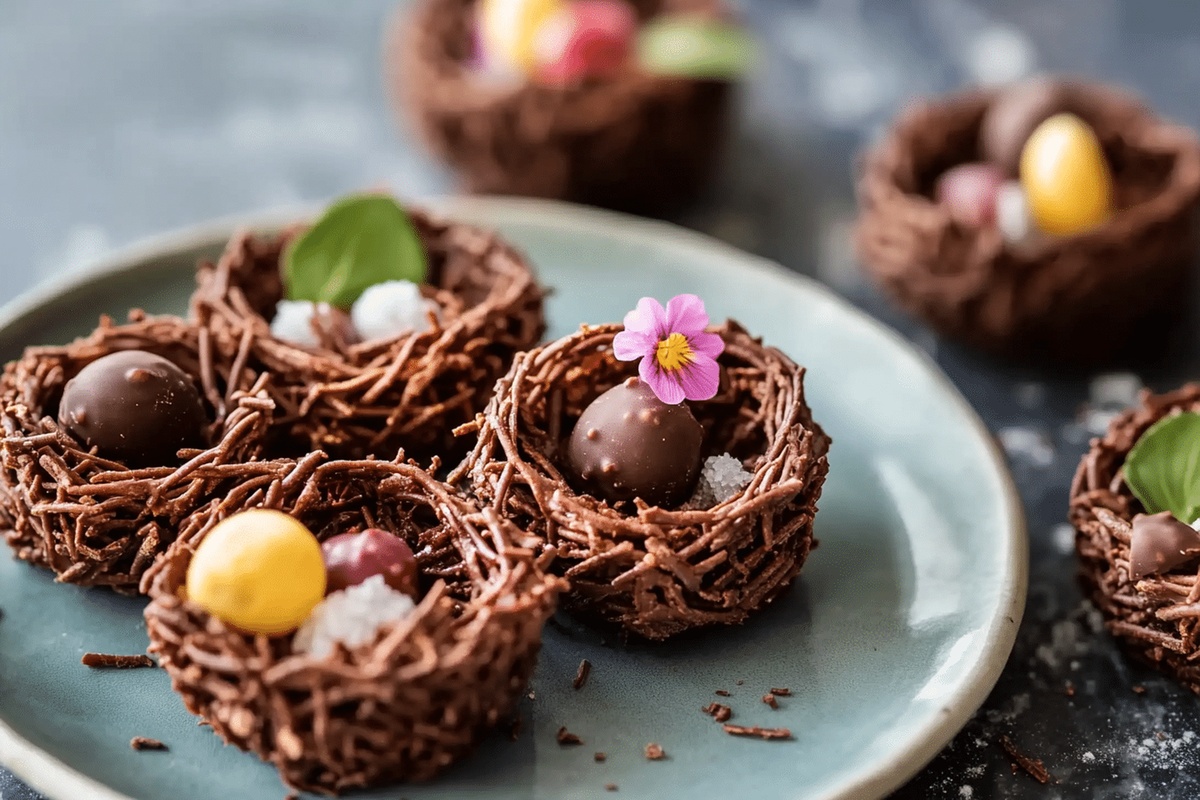
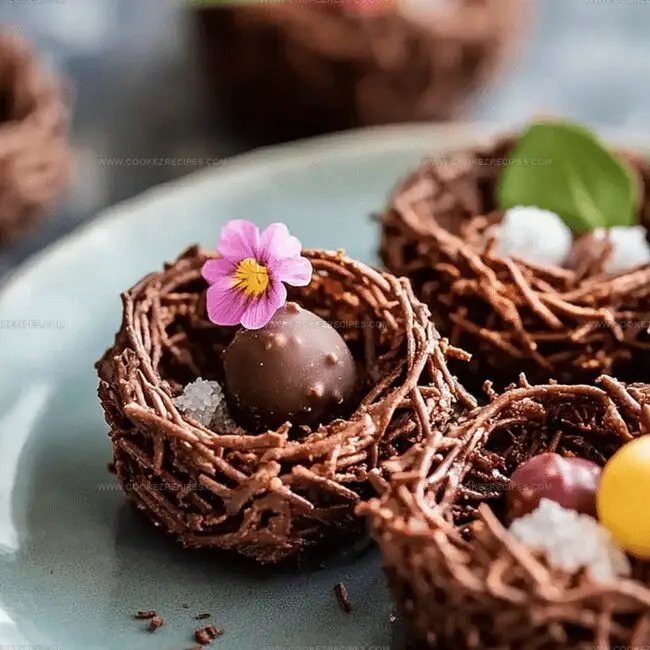
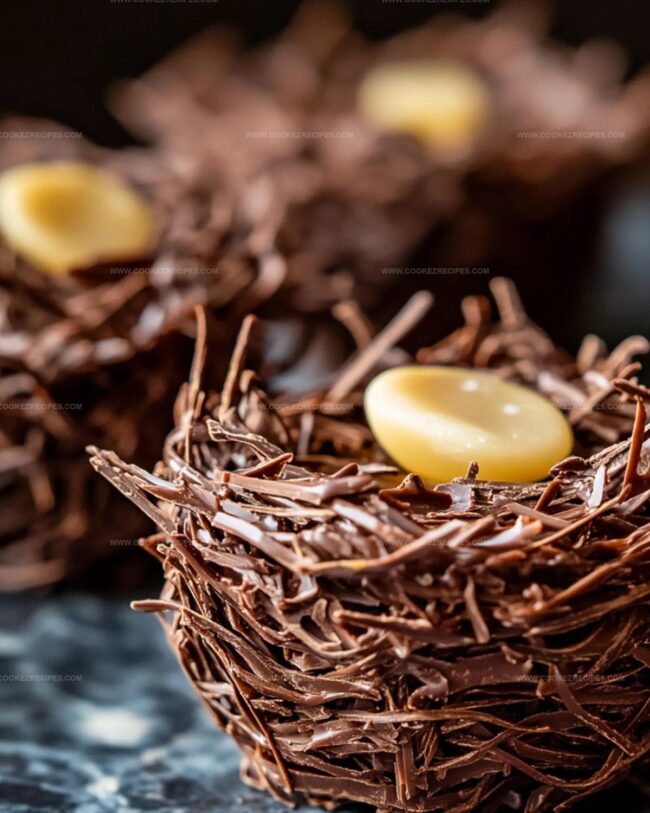
Pastel candies nestled atop each chocolate creation look like precious eggs waiting to surprise.
Minimal ingredients and zero oven time make this recipe a real winner for busy families.
You will absolutely love how quickly these charming treats come together.
Chocolate Bird Nests That Are Fun And Fast
Chocolate and Cereal in Bird Nest No-Bake Bites
Chocolate Base:Crunchy Element:Decorative Topping:No-Bake Chocolate Bird Nests Recipe – Steps to Follow
Step 1: Melt Chocolate Smoothly
Grab a microwave-safe bowl and gently melt chocolate chips.
Zap in short 30-second bursts on low power, stirring between each interval until chocolate becomes silky and completely liquid.
Step 2: Create Chocolate Peanut Butter Blend
Combine melted chocolate with creamy peanut butter, stirring until the mixture looks glossy and well-integrated.
Step 3: Coat Cereal Completely
Pour chocolate-peanut butter mixture over crispy Rice Krispies.
Fold and mix until every single cereal piece gets a generous chocolate coating.
Step 4: Prepare Muffin Tin
Lightly grease a 12-count muffin tin using butter or cooking spray.
This prevents nests from sticking and makes removal easy.
Step 5: Shape Chocolate Nests
Scoop the chocolate-coated cereal mixture evenly into muffin cups.
Press gently to fill each cup completely.
Step 6: Create Nest Indentations
Use a round measuring spoon to softly hollow out the center of each chocolate nest, mimicking a bird’s nest shape.
Step 7: Chill and Harden
Place the muffin tin in the refrigerator or freezer.
Allow nests to firm up and solidify completely.
Step 8: Add Colorful Eggs
Once hardened, carefully place three Cadbury mini eggs in the center of each chocolate nest.
Step 9: Serve and Enjoy
Let the nests sit at room temperature for a few minutes before serving.
Share and delight in these adorable sweet treats!
Nest Tips With Chocolate No-Bake Ease

Chocolate Bird Nests Stay Crunchy in Storage
Sweet Matches For Chocolate Bird Nests
No-Bake Chocolate Bird Nests Recipe Spins
FAQs
Yes, you can substitute milk chocolate, dark chocolate, or white chocolate chips based on your preference. Just ensure they melt smoothly.
Absolutely! You can use almond butter, sunflower seed butter, or even caramel sauce as an alternative binding ingredient for the chocolate mixture.
When stored in an airtight container in the refrigerator, these nests will remain fresh for up to 5-7 days. Keep them cool to maintain their shape and texture.
These nests contain peanut butter and chocolate, which might trigger nut and dairy allergies. Always check ingredient labels and consider alternative ingredients for those with specific dietary restrictions.
Print
No-Bake Chocolate Bird Nests Recipe
- Total Time: 10 minutes
- Yield: 12 1x
Description
Delightful no-bake chocolate bird nests bring whimsical spring charm to dessert tables with minimal effort. Sweet chocolate clusters nestled with delicate candy eggs create a playful treat perfect for seasonal celebrations.
Ingredients
Main Ingredients:
- 3 cups cocoa rice krispies
- 1 cup peanut butter
- 1 cup milk chocolate chips
Decorative Ingredients:
- 36 Cadbury mini eggs
Instructions
- Melt chocolate chips in a microwave-safe bowl, using 30-second intervals on low power and stirring between each interval until completely smooth and liquid.
- Incorporate peanut butter into the melted chocolate, mixing thoroughly to create a uniform chocolatey blend.
- Add Rice Krispies to the chocolate-peanut butter mixture, gently folding until every cereal piece is evenly coated with the rich, glossy mixture.
- Prepare a 12-count muffin tin by lightly greasing each cup with butter or cooking spray to prevent sticking.
- Distribute the chocolate-coated cereal mixture evenly across the muffin tin, pressing firmly to ensure each nest is compact and well-formed.
- Create a gentle indentation in the center of each nest using a round measuring spoon, forming a small hollow for egg placement.
- Chill the muffin tin in the refrigerator or freezer until the nests become firm and hold their shape, approximately 15-20 minutes.
- Remove the hardened nests from the tin and delicately place three Cadbury mini eggs in the center of each nest.
- Allow the nests to set completely at room temperature, then serve and enjoy these whimsical chocolate treats.
Notes
- Ensure chocolate chips melt slowly to prevent burning by using low microwave power and stirring frequently during intervals.
- Create smooth coating by mixing peanut butter thoroughly with melted chocolate before adding Rice Krispies for even distribution.
- Use cooking spray or butter generously to prevent sticking and make nest removal easier from muffin tin.
- Customize the recipe by substituting chocolate with dairy-free alternatives for vegan diets or swapping mini eggs with nuts, dried fruits, or allergy-friendly candies to suit different preferences.
- Prep Time: 10 minutes
- Cook Time: 0 minutes
- Category: Desserts, Snacks
- Method: None
- Cuisine: American
Nutrition
- Serving Size: 12
- Calories: 202
- Sugar: 12 g
- Sodium: 98 mg
- Fat: 10 g
- Saturated Fat: 3 g
- Unsaturated Fat: 7 g
- Trans Fat: 0 g
- Carbohydrates: 25 g
- Fiber: 1 g
- Protein: 4 g
- Cholesterol: 2 mg
Daniel Bruns
Founder & Culinary Innovator
Expertise
Recipe development for home cooks, Nutritional analysis and meal planning, Culinary education and food writing
Education
Auguste Escoffier School of Culinary Arts
Diploma in Culinary Arts and Operations
Focus: Classical and contemporary cooking techniques, Culinary entrepreneurship and kitchen management, Menu development and food cost analysis
Daniel’s story started with flour on his face and a pie in the oven at his grandma’s house. He later sharpened his skills at the Auguste Escoffier School of Culinary Arts.
His goal? Recipes so simple you’ll want to cook every night. When he’s not whipping up one-pan wonders, Daniel’s outside picking herbs, hosting neighborhood cook-offs, or baking chocolate cakes with his kids, messy, sweet, and unforgettable.