
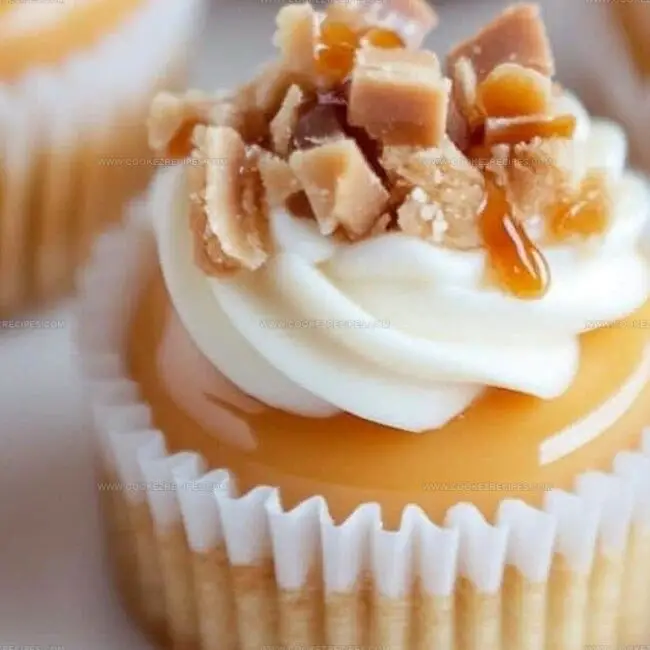
Try This Creamy No-Bake Mini Dulce de Leche Cheesecakes Recipe
Sweet-toothed dessert lovers will adore these delightful no-bake mini dulce de leche cheesecakes that promise pure indulgence.
Creamy textures meld with caramel notes in every delectable bite.
Minimal kitchen effort delivers maximum flavor satisfaction.
Each petite cheesecake delivers a rich, decadent experience without turning on the oven.
Silky smooth layers create an irresistible treat perfect for spontaneous gatherings.
Minimal ingredients and simple assembly mean you can whip up these delicious mini desserts in minutes.
Treat yourself to a mouthwatering escape that’s sure to impress and delight.
Mini Dulce de Leche Cheesecakes That Don’t Need Baking
Dulce de Leche Mini Cheesecakes Ingredients
Crust Base:Cheesecake Filling:Toppings:Dulce de Leche Cheesecakes No-Bake Dessert Steps
Step 1: Craft the Crumbly Base
Grab your mixing bowl and toss in the graham cracker crumbs.
Pour in the melted butter and sprinkle sugar.
Mix everything until the crumbs look like wet sand.
Divide this mixture evenly into mini cheesecake molds or a lined muffin tin.
Use your fingers or the back of a spoon to press the crumbs down firmly, creating a solid foundation.
Pop the molds into the refrigerator to chill while you prepare the luxurious filling.
Step 2: Whip Up the Creamy Filling
Take your mixing bowl and beat the cream cheese until it becomes silky smooth.
Add the luscious dulce de leche, powdered sugar, and a splash of vanilla extract.
Blend these ingredients until they’re perfectly combined and look like a dreamy cloud.
In a separate bowl, whip the heavy cream until it forms gorgeous stiff peaks.
Carefully fold the whipped cream into the cheesecake mixture, creating a light and airy texture that will melt in your mouth.
Step 3: Build Your Delectable Desserts
Carefully spoon or pipe the heavenly filling over the chilled crusts.
Use a spatula to smooth the tops, creating a perfectly even surface.
Slide the molds back into the refrigerator and let them set for at least 3 hours.
This resting time allows the cheesecakes to firm up and develop their incredible flavor.
Step 4: Dress Up and Devour
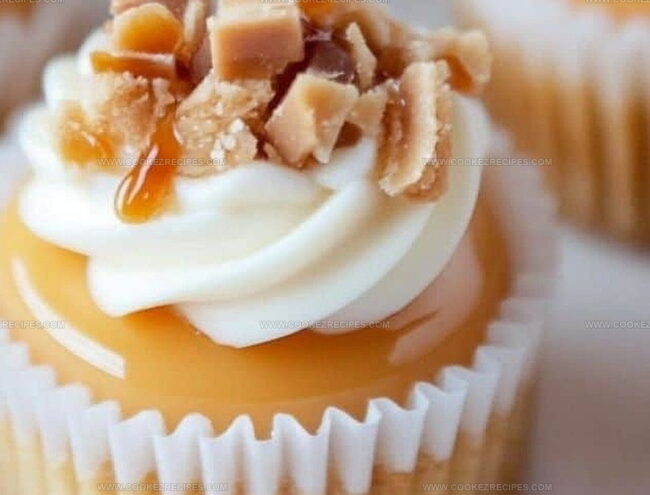
Just before serving, drizzle extra dulce de leche over the top of each mini cheesecake.
For an extra touch of indulgence, add a dollop of whipped cream, sprinkle some chocolate shavings, or finish with a pinch of sea salt.
These mini cheesecakes are now ready to delight and impress your friends and family.
No-Bake Tips For Dulce De Leche Cheesecakes
How to Store Mini Dulce de Leche Cheesecakes
Cheesecake Bites Go Best With These
Dulce de Leche Mini Cheesecake Choices
FAQs
Yes, this no-bake cheesecake is perfect for beginners. It requires simple ingredients and basic mixing techniques with no complicated baking steps. Even those with limited cooking experience can easily create these delicious mini desserts.
Absolutely! These mini cheesecakes can be prepared up to 2-3 days in advance. Keep them refrigerated in an airtight container until you’re ready to serve. They actually taste better after the flavors have melded together for a few hours.
No problem! You can use a standard muffin tin lined with cupcake papers. This recipe is very flexible and will work perfectly with standard baking equipment you likely already have in your kitchen.
Ensure your cream cheese is completely softened at room temperature and beat it thoroughly before adding other ingredients. Use an electric mixer and mix until the filling is completely smooth with no lumps, which guarantees a creamy texture.
Print
No-Bake Mini Dulce de Leche Cheesecakes Recipe
- Total Time: 3 hours 15 minutes
- Yield: 12 1x
Description
Creamy no-bake mini dulce de leche cheesecakes bring sweet Argentine indulgence to dessert tables with minimal effort. Silky caramel layers and crumbly graham base create irresistible mini treats you won’t be able to resist.
Ingredients
Main Ingredients (Cheesecake Base):
- 8 ounces (226 grams) cream cheese, softened
- 1/2 cup (120 milliliters) dulce de leche
- 1/2 cup (120 milliliters) heavy whipping cream
- 1/4 cup (30 grams) powdered sugar
- 1/2 teaspoon vanilla extract
Crust Ingredients:
- 1 cup (100 grams) graham cracker crumbs
- 3 tablespoons (45 milliliters) melted butter
- 1 tablespoon (12.5 grams) sugar
Garnish Ingredients:
- Extra dulce de leche, drizzled
- Whipped cream (optional)
- Chocolate shavings or a sprinkle of sea salt (optional)
Instructions
- Craft a buttery foundation by blending graham cracker crumbs with melted butter and sugar, creating a cohesive mixture that will form the base of your miniature desserts.
- Distribute the crumbly mixture evenly into individual cheesecake molds or a lined muffin tin, pressing down firmly to create a compact and uniform crust.
- Chill the prepared crusts in the refrigerator to set while you transition to the luxurious filling preparation.
- Whip the cream cheese in a mixing bowl until it reaches a silky, lump-free consistency, ensuring a smooth texture for your cheesecake base.
- Incorporate dulce de leche, powdered sugar, and vanilla extract into the cream cheese, blending thoroughly until the mixture becomes completely homogeneous.
- In a separate bowl, whip the heavy cream until it develops sturdy, peaked formations that hold their shape when the whisk is lifted.
- Delicately fold the whipped cream into the cream cheese mixture, maintaining the airiness while creating a harmonious blend.
- Carefully transfer the filling into the chilled crusts, using a spoon or piping bag to achieve elegant, even layers.
- Refrigerate the assembled cheesecakes for a minimum of three hours, allowing them to set and develop a perfect, firm consistency.
- Before serving, embellish with an additional drizzle of dulce de leche and optional garnishes like whipped cream, chocolate shavings, or a delicate sprinkle of sea salt.
Notes
- Swap graham crackers with gluten-free alternatives like almond flour or crushed gluten-free cookies for a celiac-friendly version.
- Use low-fat cream cheese and Greek yogurt to reduce overall calorie content while maintaining creamy texture.
- Chill the mixing bowl and whisk before whipping cream to achieve faster, more stable peaks with maximum volume.
- Allow cream cheese to reach room temperature before mixing to prevent lumpy filling and ensure smooth, silky consistency.
- Prep Time: 15 minutes
- Cook Time: 3 hours
- Category: Desserts
- Method: Chilling
- Cuisine: Mexican
Nutrition
- Serving Size: 12
- Calories: 250
- Sugar: 18 g
- Sodium: 150 mg
- Fat: 17 g
- Saturated Fat: 10 g
- Unsaturated Fat: 5 g
- Trans Fat: 0 g
- Carbohydrates: 23 g
- Fiber: 1 g
- Protein: 3 g
- Cholesterol: 50 mg
Katherine Pierce
Recipe Curator & Food Educator
Expertise
Education
Boston University Metropolitan College
Certificate Program in the Culinary Arts
Focus: French and international cuisine techniques, Hands-on culinary training with industry professionals, Food industry insights and operations
Katherine grew up believing every dish has a story. She studied the art of food at Boston University and explored the history behind it. She loves pulling easy recipes from every corner of the world and putting them at your fingertips.
When Katherine’s not writing or testing new flavors, she’s teaching cooking classes, baking colorful mooncakes, or dreaming up new ways to mix old favorites with new twists.