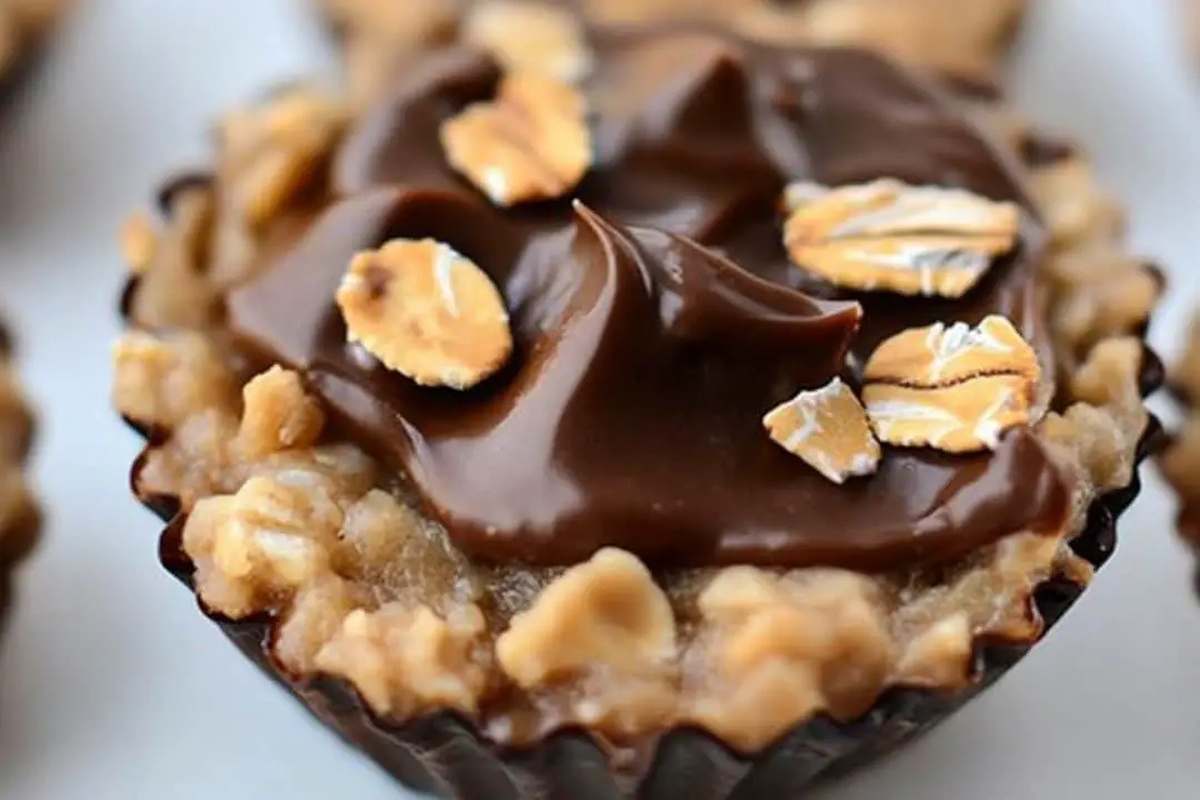
No-Bake Peanut Butter Oat Cups Recipe for Quick Treats
Creamy peanut butter meets delightful oat cups in a no-bake dessert that promises pure bliss.
Sweet magic happens when simple ingredients combine effortlessly.
Chocolate chips add an unexpected crunch to these irresistible treats.
Nobody can resist the smooth, rich texture melting on their tongue.
Minimal kitchen skills work perfectly for crafting these delectable morsels.
Quick preparation means you’ll satisfy dessert cravings in minutes.
Each bite delivers a perfect balance of nutty and sweet flavors that’ll make you smile.
Whip up these cups and watch everyone ask for seconds.
Peanut Butter Oat Cups That Define Quick Sweet Satisfaction
Peanut Butter Oat Cups (No-Bake) Ingredients
Main Ingredients:Flavor Enhancers:Oat Cups No-Bake Method
Step 1: Blend Core Ingredients
In a roomy mixing bowl, combine rolled oats, creamy peanut butter, golden honey, pure vanilla extract, and a pinch of salt.
Use a sturdy spatula or wooden spoon to mix everything thoroughly.
The mixture should become slightly sticky and have the ability to hold its shape when pressed together.
Step 2: Shape Tasty Treats
Grab a muffin tin and lightly spray or grease each cup with cooking oil to prevent sticking.
Scoop the oat and peanut butter mixture into each muffin cavity.
Press the mixture firmly and evenly with the back of a spoon or your clean fingers to create compact, uniform cups.
Step 3: Chill and Set
Place the muffin tin in the refrigerator and let the cups cool and firm up for about 30 minutes.
The chilling process helps the cups maintain their shape and enhances their delicious texture.
Step 4: Prepare Chocolate Drizzle
Melt chocolate chips in a microwave-safe bowl, heating in short 15-second intervals and stirring between each interval to prevent burning.
Once smooth and completely melted, drizzle the chocolate over the chilled oat cups using a spoon or piping bag.
Step 5: Final Chill and Serve
Return the chocolate-drizzled cups to the refrigerator for an additional 10 minutes to let the chocolate set.
Once firm, gently remove the cups from the muffin tin.
Serve immediately or store in an airtight container in the refrigerator for up to a week.
No-Bake Tips for Peanut Butter Oat Cups
Reusing No-Bake Oat Cups
What to Eat With Peanut Butter Oat Cups
No-Bake Peanut Butter Oat Cups Snack Variants
FAQs
No, steel-cut oats won’t work well. Rolled oats provide the right texture and ability to bind together. Steel-cut oats are too hard and won’t create the necessary consistency for these no-bake cups.
Yes, but you might need to stir in a little extra honey to help the mixture stick together. Natural peanut butter tends to be less creamy and might make the mixture slightly drier.
Press the mixture firmly into the muffin tin and compact it tightly. Chilling the cups in the refrigerator for at least 30 minutes helps them hold their shape and become more stable.
No, these cups contain peanut butter. For those with nut allergies, you’ll need to find an alternative recipe or substitute the peanut butter with seed butter like sunflower seed butter.
Print
No-Bake Peanut Butter Oat Cups Recipe
- Total Time: 10 minutes
- Yield: 12 1x
Description
Creamy no-bake peanut butter oat cups deliver a delightful dessert sensation that combines rich nutty flavors with smooth chocolate. Sweet and satisfying, this quick treat offers pure indulgence you’ll savor with each delectable bite.
Ingredients
Main Ingredients:
- 1 1/2 cups (360 ml) rolled oats
- 1/2 cup (120 ml) creamy peanut butter
Binding and Sweetening Ingredients:
- 1/4 cup (60 ml) honey (or maple syrup for vegan option)
- 1/4 teaspoon salt
- 1/2 teaspoon vanilla extract
Topping Ingredients:
- 1/2 cup (120 ml) dark chocolate chips
- 1 tablespoon (15 ml) coconut oil
- 1 tablespoon (15 ml) peanut butter (for drizzle, optional)
Instructions
- Thoroughly combine rolled oats, peanut butter, honey, vanilla extract, and salt in a medium mixing bowl, ensuring all ingredients are evenly integrated and create a cohesive, slightly sticky texture.
- Line a muffin tin with paper liners to prepare for molding the mixture.
- Press the oat and peanut butter blend firmly into each muffin cup, compacting the mixture to create dense, uniform cups that will hold their shape.
- Smooth the tops of each cup with the back of a spoon or your fingertips to create an even surface.
- Refrigerate the prepared cups for approximately 30 minutes, allowing them to firm up and set completely.
- Once chilled and solidified, gently remove the no-bake peanut butter oat cups from the muffin tin by lifting the paper liners.
- Store the cups in an airtight container in the refrigerator for up to one week, ensuring they maintain their perfect texture and flavor.
Notes
- Adjust honey levels for desired sweetness, using less for a less sweet treat or more for a sweeter bite.
- Swap traditional peanut butter with almond or sunflower seed butter for nut-free or alternative dietary needs.
- Chill the mixture thoroughly before shaping to help cups maintain a firmer structure and easier handling.
- Add dark chocolate chips or chopped nuts for extra texture and flavor complexity in the no-bake cups.
- Prep Time: 10 minutes
- Cook Time: 0 minutes
- Category: Snacks, Desserts
- Method: None
- Cuisine: American
Nutrition
- Serving Size: 12
- Calories: 180
- Sugar: 8 g
- Sodium: 90 mg
- Fat: 9 g
- Saturated Fat: 3 g
- Unsaturated Fat: 5 g
- Trans Fat: 0 g
- Carbohydrates: 22 g
- Fiber: 2 g
- Protein: 5 g
- Cholesterol: 0 mg
Katherine Pierce
Recipe Curator & Food Educator
Expertise
Education
Boston University Metropolitan College
Certificate Program in the Culinary Arts
Focus: French and international cuisine techniques, Hands-on culinary training with industry professionals, Food industry insights and operations
Katherine grew up believing every dish has a story. She studied the art of food at Boston University and explored the history behind it. She loves pulling easy recipes from every corner of the world and putting them at your fingertips.
When Katherine’s not writing or testing new flavors, she’s teaching cooking classes, baking colorful mooncakes, or dreaming up new ways to mix old favorites with new twists.