
Crisp & Juicy Panko-Crusted Chicken Recipe You’ll Adore
Crispy panko-crusted chicken promises a delightful culinary adventure that’ll make your taste buds dance with excitement.
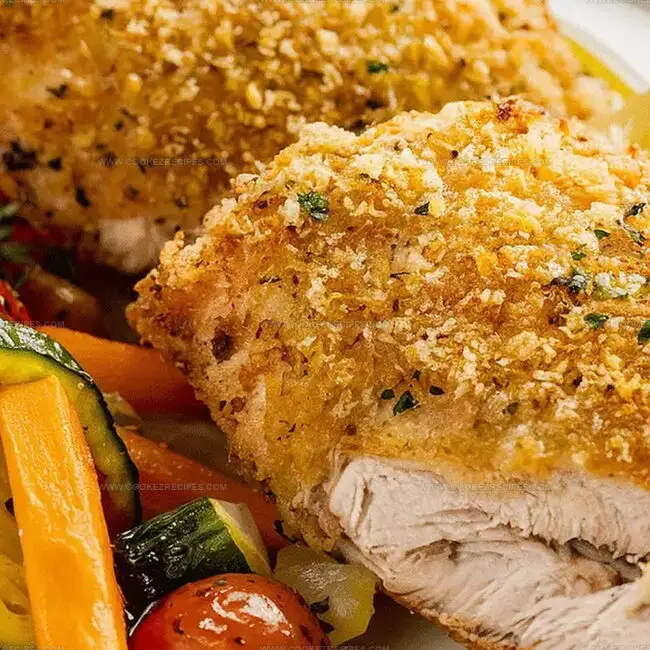
Crunchy coating meets tender meat in a perfect harmony of textures.
Forget bland chicken dinners that leave you uninspired.
Simple ingredients combine to create something magical on your plate.
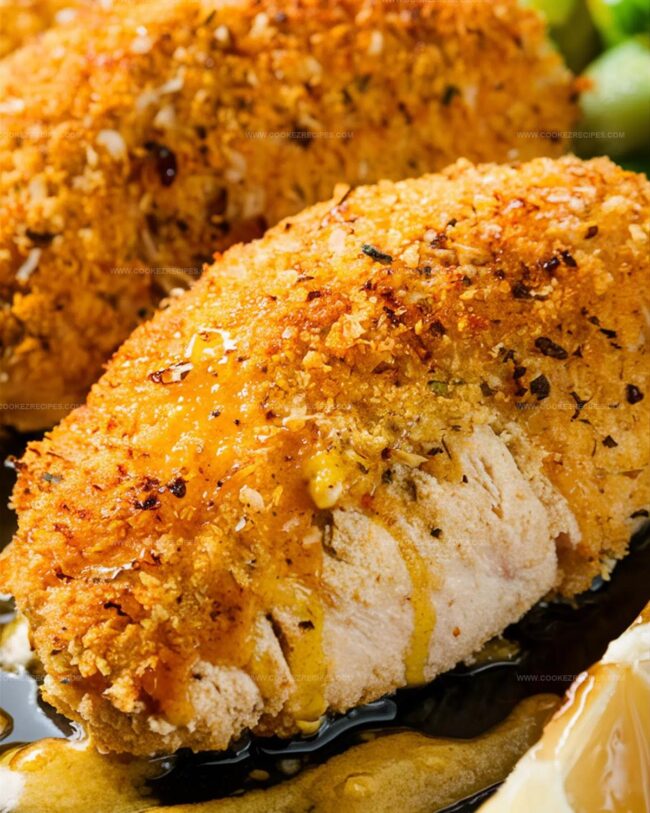
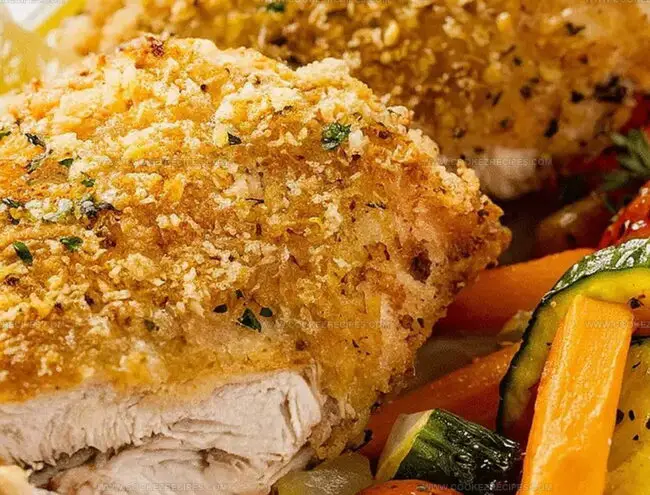
Lightweight Japanese breadcrumbs provide an irresistible golden exterior that cracks beautifully with each bite.
Home cooks can easily master this technique with a few smart tips.
We promise this dish will become your new go-to meal that impresses everyone at the table.
Panko Crusted Chicken That Stays Extra Crunchy
Crispy Crust on Panko Chicken
Protein Base:Coating Components:Dredging Ingredients:Seasoning Blend:Cooking Fats:Method for Panko-Crusted Chicken
Step 1: Prep the Oven
Warm up your oven to a sizzling 400°F.
Line a baking sheet with parchment paper for easy cleanup.
Step 2: Create Flavor-Packed Coating
Grab a mixing bowl and combine:Stir these ingredients until they’re perfectly blended and ready to create a crunchy exterior.
Step 3: Set Up Dredging Stations
Arrange three shallow dishes:
First dish: Flour
Second dish: Whisk together eggs and milk
Third dish: Your prepared panko mixture
Step 4: Transform Chicken into Crispy Masterpiece
Take each chicken piece and transform it through three magical steps:
First, dust it generously with flour, shaking off any excess.
Next, give it a luxurious bath in the egg mixture.
Finally, press it firmly into the panko mixture, ensuring every inch gets a delicious coating.
Step 5: Cook to Perfection
Baking Method:
Place coated chicken on the prepared baking sheet.
Give a light spray of oil for extra crispiness.
Slide into the oven and bake for 18-20 minutes.
Flip halfway through to ensure even golden browning.
Pan-Frying Method:
Heat olive oil in a skillet over medium heat.
Carefully place chicken pieces and cook 4-5 minutes on each side until they turn a gorgeous golden brown and reach complete doneness.
Step 6: Serve and Enjoy
Plate your crispy chicken immediately.
Pair with your favorite dipping sauce or side dish for a meal that’ll make taste buds dance with joy!
Chicken Coating Tips For Crisp Panko Finish
Breaded Chicken That Returns Crispy With Oven Reheat
Crispy Additions For Panko Chicken
Panko Chicken Bread Crumbs Options
FAQs
Panko breadcrumbs create a crispier, lighter coating that stays crunchier longer compared to traditional breadcrumbs. They have a flakier texture and absorb less oil, resulting in a more delicate and crisp exterior.
Both chicken breasts and thighs work perfectly. Chicken breasts are leaner, while thighs offer more moisture and flavor. Just ensure the chicken is pounded to an even thickness for consistent cooking.
Use a meat thermometer to check that the internal temperature reaches 165°F (74°C). If you don’t have a thermometer, cut into the thickest part of the chicken – the meat should be white throughout with no pink areas.
While each spice adds depth, you can adjust or omit based on personal preference. Garlic powder and salt are most crucial for enhancing the overall flavor of the chicken.
Print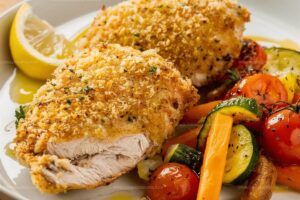
Panko-Crusted Chicken Recipe
- Total Time: 30 minutes
- Yield: 2 1x
Description
Crispy panko-crusted chicken delivers golden perfection on your dinner plate, bringing restaurant-quality crunch right to your kitchen. Juicy chicken beneath a delicate, light breading promises a delightful meal you’ll savor with each satisfying bite.
Ingredients
Protein:
- 2 chicken breasts, boneless & skinless
Breading and Seasoning:
- 1 cup panko breadcrumbs
- 1/2 cup grated Parmesan cheese
- 1/2 cup all-purpose flour
- 1 teaspoon garlic powder
- 1 teaspoon onion powder
- 1 teaspoon paprika
- 1/2 teaspoon black pepper
- 1/2 teaspoon salt
Wet Ingredients:
- 1 egg, beaten
- 2 tablespoons milk
- 2 tablespoons olive oil (for pan-frying)
Instructions
- Prepare a clean workspace and gather all necessary culinary tools for crafting crispy panko-crusted chicken.
- Arrange three distinct shallow containers: one for flour seasoning, another for egg liquid mixture, and the final for crunchy panko coating blend.
- Carefully dust each chicken piece with seasoned flour, ensuring complete yet light coverage by gently shaking off excess powder.
- Immerse the floured chicken into whisked egg and milk combination, allowing complete moisture absorption without heavy saturation.
- Transfer egg-coated chicken into panko mixture, pressing firmly to create an even, textured exterior that guarantees maximum crunchiness.
- Select cooking method: oven-roasting or skillet-searing based on preference and available equipment.
- For oven preparation, position breaded chicken on parchment-lined baking sheet, lightly misting with olive oil to enhance golden coloration.
- Roast chicken in preheated 400°F oven, rotating midway through cooking cycle to ensure uniform browning and consistent internal temperature.
- Alternatively, for stovetop technique, heat olive oil in heavy-bottomed skillet over medium temperature, carefully placing breaded chicken to achieve crisp, caramel-toned exterior.
- Confirm chicken’s doneness through internal temperature reaching 165°F, verifying meat’s complete cooking without compromising moisture.
- Allow briefly rested chicken to maintain its crisp coating, then plate alongside complementary dipping sauce or fresh accompaniments.
Notes
- Customize the seasoning by experimenting with herbs like thyme, rosemary, or Italian blend to add unique flavor dimensions to the panko coating.
- Ensure chicken reaches an internal temperature of 165°F to guarantee safe and perfectly cooked meat, using a meat thermometer for precise checking.
- Transform this recipe into a gluten-free version by substituting regular flour with almond flour or gluten-free breadcrumbs, keeping the crispy texture intact.
- Prep chicken pieces uniformly to promote even cooking, using a meat mallet to pound chicken to consistent thickness before breading.
- Prep Time: 10 minutes
- Cook Time: 20 minutes
- Category: Dinner
- Method: Baking
- Cuisine: Japanese
Nutrition
- Serving Size: 2
- Calories: 532
- Sugar: 1 g
- Sodium: 700 mg
- Fat: 24 g
- Saturated Fat: 5 g
- Unsaturated Fat: 18 g
- Trans Fat: 0 g
- Carbohydrates: 42 g
- Fiber: 2 g
- Protein: 38 g
- Cholesterol: 135 mg
Daniel Bruns
Founder & Culinary Innovator
Expertise
Recipe development for home cooks, Nutritional analysis and meal planning, Culinary education and food writing
Education
Auguste Escoffier School of Culinary Arts
Diploma in Culinary Arts and Operations
Focus: Classical and contemporary cooking techniques, Culinary entrepreneurship and kitchen management, Menu development and food cost analysis
Daniel’s story started with flour on his face and a pie in the oven at his grandma’s house. He later sharpened his skills at the Auguste Escoffier School of Culinary Arts.
His goal? Recipes so simple you’ll want to cook every night. When he’s not whipping up one-pan wonders, Daniel’s outside picking herbs, hosting neighborhood cook-offs, or baking chocolate cakes with his kids, messy, sweet, and unforgettable.