Peanut Butter Fudge Cups Recipe for Quick Chocolate Fix
Whipping up delectable peanut butter fudge cups can turn an ordinary afternoon into a sweet celebration of indulgence.
Chocolate and creamy peanut butter create an irresistible combination that melts seamlessly on your tongue.
Rich layers of decadent flavors promise an instant mood boost for anyone seeking comfort.
Minimal ingredients and simple preparation make this treat accessible to baking novices and experts alike.
Smooth textures and deep nutty undertones ensure each bite feels like a luxurious escape from everyday stress.
Small yet powerful, these fudge cups deliver maximum satisfaction in just a few delightful morsels.
Prepare to be amazed by how something so simple can taste absolutely extraordinary.
Reasons Peanut Butter Fudge Cups Feel Like Instant Gratification

Peanut Butter Fudge Cup Components
Cookie Cup Base:Cookie Dry Ingredients:Fudge Filling:Optional Toppings:Peanut Butter Fudge Cups Directions
Step 1: Whip Up Cookie Dough Base
Grab your mixer and cream together butter, brown sugar, and granulated sugar until the mixture looks fluffy and light.
Drop in the egg and blend until everything is perfectly combined.
Keep scraping down the bowl’s sides to ensure even mixing.
Step 2: Blend Creamy Peanut Butter Goodness
Incorporate peanut butter and vanilla extract, stirring until the mixture looks smooth and uniform.
Step 3: Create Dry Ingredient Mixture
Add these dry ingredients:Mix on low speed, then increase to medium until everything blends seamlessly.
Cover the dough and let it chill in the refrigerator for a minimum of one hour.
Step 4: Prepare Baking Station
Heat the oven to 325°F.
Prepare mini muffin pans by greasing them thoroughly or lining with mini cupcake liners.
Step 5: Shape Cookie Bases
Roll small portions of dough into bite-sized balls.
Press your thumb gently into each ball’s center, creating a small well and pushing the dough slightly up the pan’s sides.
Step 6: Bake and Shape Cups
Bake cookie cups for 14-15 minutes until edges turn a soft golden brown.
After removing from the oven, let them rest for 5-10 minutes.
Use a rounded teaspoon to press centers again, deepening the indent.
Allow cups to cool completely.
Step 7: Prepare Luxurious Fudge Filling
Melt chocolate using a double boiler or microwave in short intervals.
Stir until silky smooth.
Allow chocolate to cool for three minutes.
Gently fold mascarpone cheese into the melted chocolate until the mixture looks uniform.
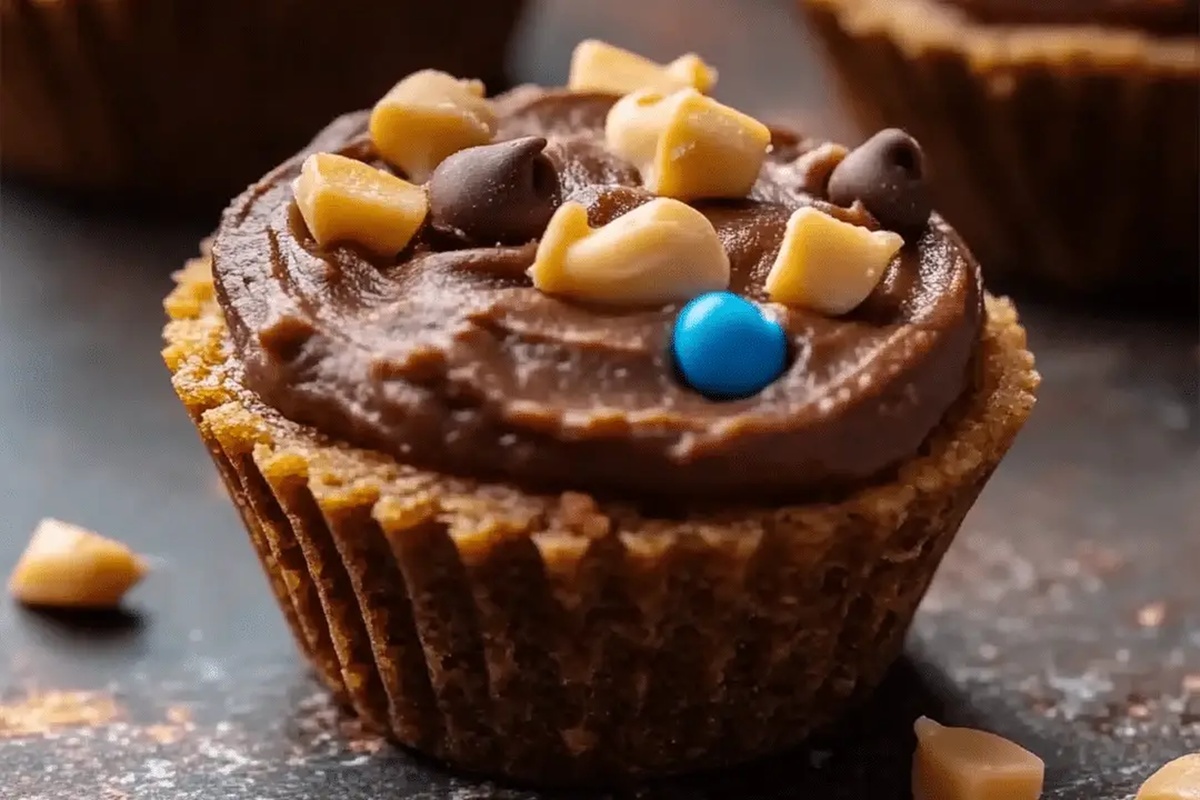
Step 8: Fill and Garnish Cookie Cups
Spoon a generous amount of fudge filling into each cooled cookie cup.
Optionally sprinkle toffee bits or chopped peanuts on top for extra crunch.
Step 9: Store and Enjoy
These delightful treats can be stored at room temperature for one day or refrigerated for up to five days.
Perfect for sharing or savoring solo!
Fudge Cup Tips For Peanut Butter Lovers

Fudge Cups Store Richly for a Quick Fix
Fun Additions To Fudge Cups
Creamy Ideas for Peanut Butter Fudge Cups
FAQs
Yes, you can substitute peanut butter with almond butter or cashew butter for a different flavor profile. Just ensure it’s a smooth, creamy variety for best results.
Absolutely. Chilling helps prevent spreading and allows the flavors to develop. Aim for at least 1 hour of refrigeration before baking to get the perfect cookie cup shape.
You can replace mascarpone with cream cheese. It will provide a similar creamy texture and richness to the fudge filling. The taste will be slightly tangier but still delicious.
Be gentle when creating the indent and removing them from the pan. Let them cool for 5-10 minutes after baking, which allows them to set and become more stable before reshaping the center.
Print
Peanut Butter Fudge Cups Recipe
- Total Time: 1 hour 59 minutes
- Yield: 12 1x
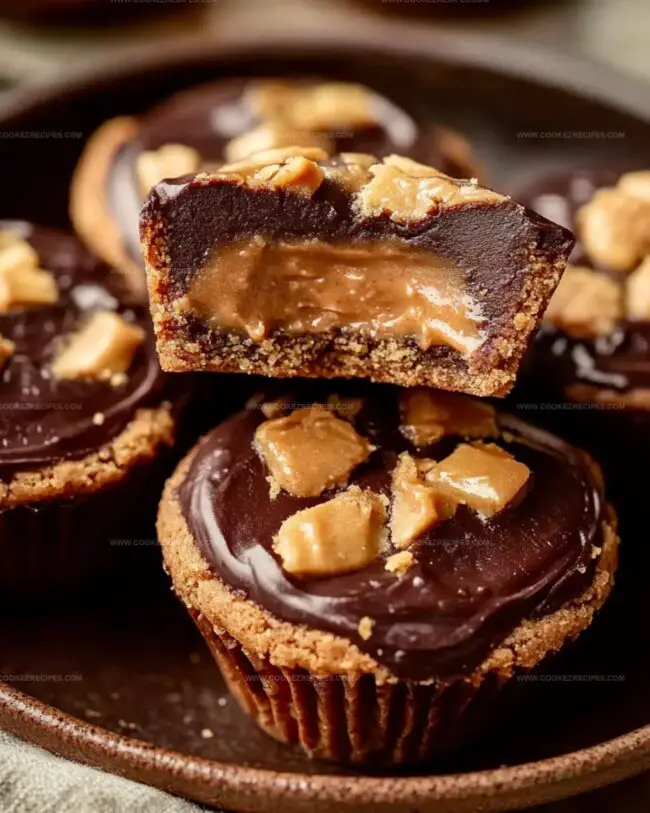
Description
Indulgent peanut butter fudge cups deliver rich chocolate and creamy peanut butter in one irresistible bite. Sweet and salty flavors meld perfectly, promising pure dessert bliss that will make you crave another delectable treat.
Ingredients
Main Ingredients:
- 1/2 cup (113g) unsalted butter, softened
- 2/3 cup (156g) creamy peanut butter
- 1 large egg, at room temperature
- 8 oz (226g) semi-sweet chocolate, chopped
- 8 oz (226g) mascarpone cheese, at room temperature
Cookie Base Ingredients:
- 1/2 cup (100g) packed light or dark brown sugar
- 1/2 cup (100g) granulated sugar
- 1 1/4 cups (156g) all-purpose flour
- 1/2 teaspoon baking soda
- 1/2 teaspoon salt
- 1 teaspoon pure vanilla extract
Garnish Ingredients:
- 1 teaspoon vegetable oil or coconut oil
- 1/2 cup (120g) Heath toffee bits or chopped peanuts (optional)
Instructions
- Whip softened butter with brown and granulated sugars until achieving a fluffy, pale consistency, incorporating the egg thoroughly while periodically scraping the mixing bowl.
- Introduce peanut butter and vanilla extract, blending until the mixture becomes uniform and silky.
- Gradually incorporate flour, baking soda, and salt, mixing at progressively faster speeds until a cohesive dough forms. Refrigerate the dough for a minimum of one hour to enhance flavor development and texture.
- Heat the oven to 325°F. Prepare mini muffin pans with non-stick spray or cupcake liners.
- Form small dough balls, approximately one tablespoon in size. Gently create a central depression using your thumb, carefully pushing the dough upward along the pan’s sides to construct cup-like shapes.
- Bake until edges exhibit a delicate golden-brown hue, approximately 14-15 minutes. After removing from the oven, allow brief cooling. Reinforce the center indent using a rounded teaspoon, ensuring a well-defined cavity. Permit complete cooling.
- Create the fudge filling by melting chocolate with oil, utilizing either a double boiler or microwave method. Stir continuously until achieving a smooth consistency. Allow slight cooling before gently incorporating mascarpone cheese, mixing until perfectly integrated.
- Generously fill each cooled cookie cup with the chocolate mixture. Optional: Garnish with toffee bits or chopped peanuts for added texture and visual appeal.
- Preserve the treats at ambient temperature for 24 hours or refrigerate for up to five days, maintaining optimal flavor and texture.
Notes
- Chill the dough thoroughly to prevent spreading and maintain the cup shape during baking, ensuring perfect mini cookie shells.
- Use room temperature ingredients like butter and egg for smoother, more consistent cookie dough that blends effortlessly.
- Press the center of cookie dough gently but firmly to create a deep well for the fudge filling, preventing overflow and maintaining a clean presentation.
- Melt chocolate slowly and carefully to avoid burning, which can make the fudge grainy and affect the overall texture of the filling.
- Replace mascarpone with cream cheese for a tangy alternative if mascarpone is unavailable, maintaining similar creamy consistency.
- Opt for natural peanut butter with no added sugar for a less sweet, more nutty flavor profile in the cookie base.
- Experiment with different chocolate types like dark, milk, or white chocolate to customize the fudge filling’s richness and taste.
- Sprinkle sea salt on top for a sophisticated sweet-salty contrast that elevates the dessert’s complexity.
- Prep Time: 1 hour 45 minutes
- Cook Time: 14 minutes
- Category: Desserts, Snacks
- Method: Baking
- Cuisine: American
Nutrition
- Serving Size: 12
- Calories: 246
- Sugar: 18g
- Sodium: 140mg
- Fat: 14g
- Saturated Fat: 7g
- Unsaturated Fat: 6g
- Trans Fat: 0g
- Carbohydrates: 29g
- Fiber: 1g
- Protein: 4g
- Cholesterol: 24mg
Daniel Bruns
Founder & Culinary Innovator
Expertise
Recipe development for home cooks, Nutritional analysis and meal planning, Culinary education and food writing
Education
Auguste Escoffier School of Culinary Arts
Diploma in Culinary Arts and Operations
Focus: Classical and contemporary cooking techniques, Culinary entrepreneurship and kitchen management, Menu development and food cost analysis
Daniel’s story started with flour on his face and a pie in the oven at his grandma’s house. He later sharpened his skills at the Auguste Escoffier School of Culinary Arts.
His goal? Recipes so simple you’ll want to cook every night. When he’s not whipping up one-pan wonders, Daniel’s outside picking herbs, hosting neighborhood cook-offs, or baking chocolate cakes with his kids, messy, sweet, and unforgettable.