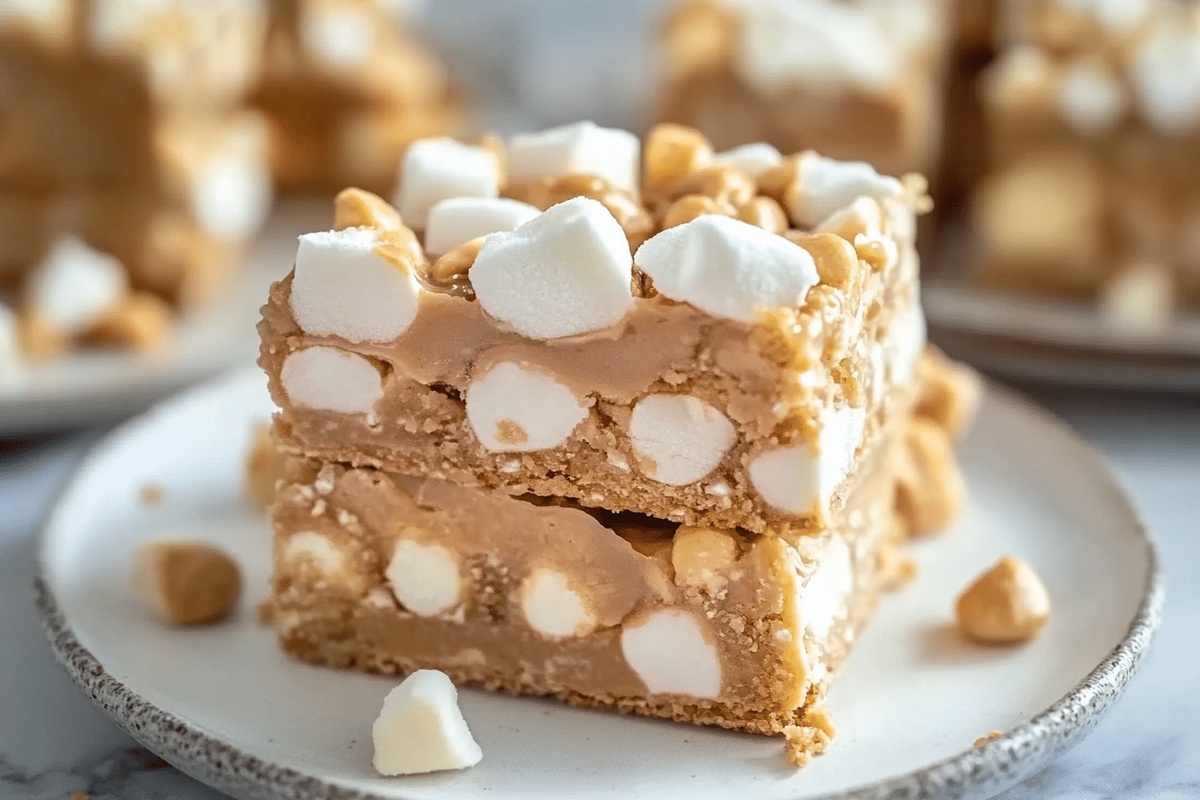
Gooey Peanut Butter Marshmallow Squares Recipe for Sweet Tooths
Crafting these delectable peanut butter marshmallow squares brings pure childhood nostalgia rushing back to me.
Sweet memories dance through my kitchen whenever I mix these ingredients.
Soft marshmallows and creamy peanut butter create a magical combination that melts hearts instantly.
Each bite transports us to carefree afternoons of sugary indulgence.
Simple ingredients transform into something extraordinary with minimal effort.
Layers of gooey sweetness promise an irresistible treat that will have everyone asking for seconds.
You won’t be able to stop at just one square of this irresistible confection.
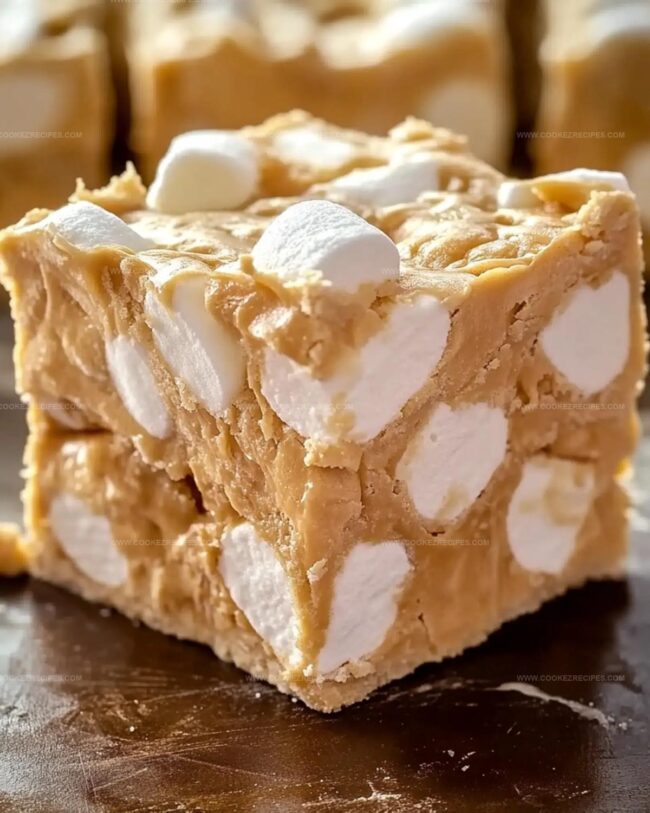
Peanut Butter Marshmallow Squares That Mix Soft And Sweet

Marshmallow Squares with Peanut Butter Ingredients
Base Ingredients:Binding Ingredients:Flavor Enhancer:Preparation Ingredients:Peanut Butter Marshmallow Squares – Quick Instructions
Step 1: Prepare Baking Pan
Grab an 8×8 or 9×9 inch pan and line it with parchment paper.
Lightly coat the paper with cooking spray or a thin layer of shortening to prevent sticking.
Step 2: Create Melt-Worthy Base
In a medium saucepan, combine:Melt these ingredients over low heat, stirring gently until the mixture transforms into a smooth, glossy liquid.
Step 3: Enhance Flavor Profile
Remove the pan from heat and pour in vanilla extract.
Stir thoroughly to blend the flavors completely into the melted mixture.
Step 4: Incorporate Fluffy Marshmallows
Let the mixture cool slightly to prevent marshmallows from completely melting.
Add marshmallows and fold gently until they are evenly distributed throughout the mixture.
Step 5: Transfer and Chill
Pour the marshmallow mixture into the prepared pan.
Use a spatula to spread it evenly across the surface, ensuring a smooth top.
Transfer the pan to the refrigerator and let it set for approximately 2 hours.
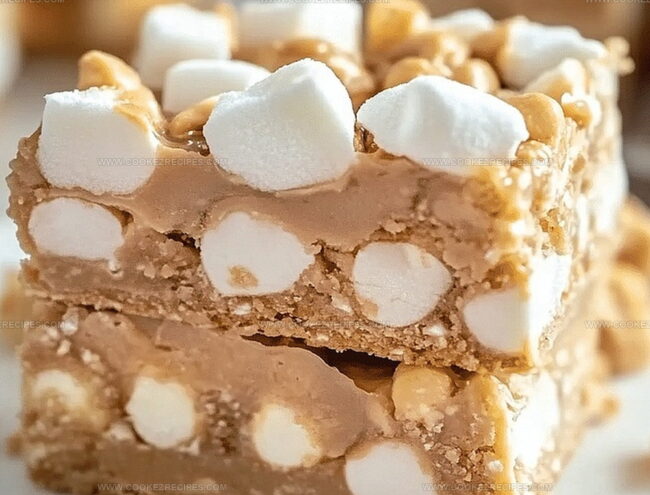
Step 6: Slice and Serve
Once the squares are firm and fully set, remove from the refrigerator.
Lift the parchment paper to remove the entire block, then cut into delightful squares using a sharp knife.
Marshmallow Square Tips With Peanut Butter
Peanut Butter Marshmallow Squares Stay Soft Overnight
Sweet Picks For Marshmallow Squares
Peanut Butter Marshmallow Squares Variants
FAQs
No, any creamy or smooth peanut butter works well. Just avoid natural or separated peanut butter that might affect the texture.
Yes, you can substitute butterscotch chips with chocolate chips or white chocolate chips for a different flavor profile.
Cooling prevents marshmallows from completely melting, which helps maintain their shape and creates a more textured dessert. If the mixture is too hot, marshmallows will dissolve and lose their distinct appearance.
The squares are ready when they feel firm to the touch and hold their shape when you lift the parchment paper. Refrigerating for about 2 hours ensures they are completely hardened.
Print
Peanut Butter Marshmallow Squares Recipe
- Total Time: 5 minutes
- Yield: 12 1x
Description
Sweet nostalgia meets creamy indulgence in these peanut butter marshmallow squares, a classic treat that whispers childhood memories. Chocolate drizzles and gooey marshmallows create a simple yet irresistible dessert you’ll crave again and again.
Ingredients
Main Ingredients:
- 5 cups mini marshmallows
- 1 cup peanut butter
- 11 ounces (310 grams) butterscotch chips
Binding Ingredients:
- 1/4 cup butter
Additional Flavor:
- 1 teaspoon vanilla extract
Instructions
- Prepare a square baking pan by lining it with parchment paper, ensuring complete coverage and lightly coating with a thin layer of non-stick spray.
- Combine butter, peanut butter, and butterscotch chips in a medium saucepan over gentle heat.
- Stir the ingredients continuously until they melt into a uniform, glossy mixture with no visible lumps.
- Remove the pan from heat and introduce vanilla extract, mixing thoroughly to integrate the flavors.
- Allow the melted mixture to cool for several minutes, preventing marshmallows from completely dissolving when added.
- Gently fold marshmallows into the warm mixture, ensuring they are evenly distributed without breaking apart.
- Transfer the combined mixture into the prepared pan, using a spatula to create an even, smooth surface.
- Place the pan in the refrigerator and chill for approximately two hours until the mixture solidifies completely.
- Once set, lift the parchment paper to remove the entire dessert from the pan and slice into neat, uniform squares.
Notes
- Prevent sticking by thoroughly greasing parchment paper with extra cooking spray or butter for easy square removal.
- Opt for low heat when melting ingredients to avoid burning or separating the mixture, ensuring a smooth, creamy texture.
- Consider using mini marshmallows for more even distribution and quicker melting throughout the peanut butter base.
- Experiment with alternative nut butters like almond or cashew for unique flavor variations while maintaining the same recipe structure.
- Prep Time: 5 minutes
- Cook Time: 0 minutes
- Category: Desserts, Snacks
- Method: None
- Cuisine: American
Nutrition
- Serving Size: 12
- Calories: 320
- Sugar: 24 g
- Sodium: 120 mg
- Fat: 18 g
- Saturated Fat: 7 g
- Unsaturated Fat: 10 g
- Trans Fat: 0 g
- Carbohydrates: 36 g
- Fiber: 1 g
- Protein: 6 g
- Cholesterol: 15 mg
Daniel Bruns
Founder & Culinary Innovator
Expertise
Recipe development for home cooks, Nutritional analysis and meal planning, Culinary education and food writing
Education
Auguste Escoffier School of Culinary Arts
Diploma in Culinary Arts and Operations
Focus: Classical and contemporary cooking techniques, Culinary entrepreneurship and kitchen management, Menu development and food cost analysis
Daniel’s story started with flour on his face and a pie in the oven at his grandma’s house. He later sharpened his skills at the Auguste Escoffier School of Culinary Arts.
His goal? Recipes so simple you’ll want to cook every night. When he’s not whipping up one-pan wonders, Daniel’s outside picking herbs, hosting neighborhood cook-offs, or baking chocolate cakes with his kids, messy, sweet, and unforgettable.