
Festive Pistachio Easter Crown Recipe: A Sweet Holiday Twist
My culinary adventure with this pistachio easter crown began unexpectedly during a spring afternoon experiment.
Nutty aromas filled my kitchen while crafting this delightful centerpiece.
Pastel colors and delicate textures promised something extraordinary.
Elegant yet approachable, this dessert speaks of celebration and warmth.
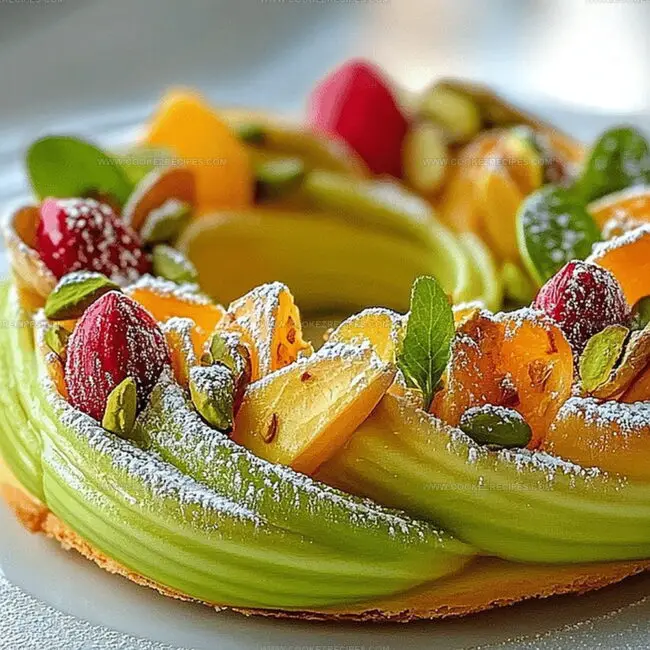
Soft green hues from crushed pistachios dance across the sweet surface.
Each slice promises a moment of pure indulgence.
Pistachio Easter Crown That’s Almost Too Pretty To Eat
Pistachio Easter Crown Essentials
Yeasted Base:Pistachio Filling:Finishing Touches:How to Shape a Pistachio Easter Crown
Step 1: Activate Yeast
Warm the milk and mix with yeast.
Let the mixture sit and become bubbly, creating a magical base for your dough.
Step 2: Mix Dry Ingredients
Combine the dry ingredients in a large mixing bowl:Step 3: Create Dough Foundation
Add the wet ingredients to your dry mixture:Knead the dough thoroughly until it becomes smooth and elastic.
This process develops the gluten and creates a perfect texture.
Step 4: First Rise
Cover the dough with a clean cloth and let it rest in a warm spot.
Allow the dough to double in size, which typically takes about 1.5 hours.
Step 5: Prepare Pistachio Filling
Blend the filling ingredients until completely smooth:Step 6: Shape the Dough
Roll out the dough into a rectangular shape on a floured surface.
Spread the pistachio filling evenly across the surface.
Step 7: Create Decorative Twist
Roll the dough into a long log from the longer side.
Carefully slice the log in half lengthwise.
Twist the two halves together to create a beautiful braided effect.
Step 8: Form the Crown
Shape the twisted dough into a ring, gently pinching the ends together.
Place on a parchment-lined baking sheet and let it rise for an additional 30 minutes.
Step 9: Prepare for Baking
Preheat the oven to 350°F.
Brush the brioche with egg yolk to achieve a gorgeous golden color.
Step 10: Bake to Perfection
Bake for 25-30 minutes until the crown turns a beautiful golden brown.
Step 11: Final Touches
Once cooled slightly, add elegant decorations:Serve warm or at room temperature and savor your culinary masterpiece!
Easter Crown Tips With Pistachio Flair
Pistachio Crown That Stays Regal and Tasty
Easy Pairings For Easter Crown
Easter Crown Nutty Switches
FAQs
This Pistachio Easter Crown is a modern twist on traditional Easter breads, combining classic brioche techniques with a delightful pistachio filling that makes it unique and special for holiday celebrations.
This recipe requires intermediate baking skills. While it looks impressive, it’s manageable for bakers comfortable with yeast doughs and basic pastry techniques. The key is patience during rising times and careful handling of the dough.
You can make homemade pistachio paste by grinding roasted pistachios with powdered sugar until smooth. If that seems complex, store-bought pistachio paste works perfectly and saves time without compromising flavor.
The long kneading and rising process creates a soft, tender brioche-like texture. The butter and eggs contribute richness, while careful handling ensures a light, airy bread that’s both delicate and satisfying.
Print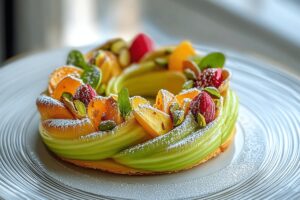
Pistachio Easter Crown Recipe
- Total Time: 2 hours 20 minutes
- Yield: 12 1x
Description
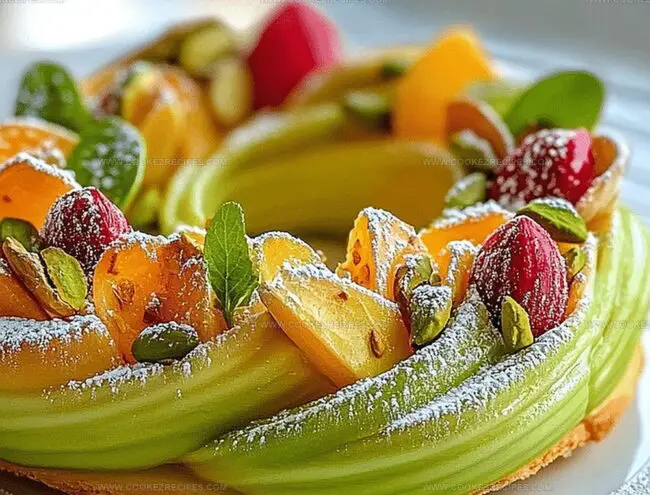
Sweet Easter celebrations find new delight with this pistachio easter crown, blending Mediterranean flavors and festive charm. Delicate layers of nutty pistachio and delightful pastry will draw everyone to your springtime table.
Ingredients
Main Ingredients:
- 4 cups (500 grams) all-purpose flour
- 3 eggs
- 1 cup (250 milliliters) warm milk
- 7 tablespoons (100 grams) softened butter
Sweet Ingredients:
- 1/2 cup (100 grams) sugar
- 1/2 cup (100 grams) pistachio paste
- 1/2 cup (50 grams) powdered sugar
- 1/2 cup (50 grams) almond flour
Additional Ingredients:
- 1 packet (7 grams) dry yeast
- 1 pinch of salt
- 1 tablespoon milk
- 1 egg yolk (for brushing)
- Crushed pistachios
- Pearl sugar
- Melted white chocolate
Instructions
- Activate the yeast by dissolving it in tepid milk, allowing it to bloom and become frothy for about 5 minutes.
- In a spacious mixing vessel, amalgamate the dry ingredients: flour, granulated sugar, and a pinch of salt.
- Incorporate beaten eggs, room-temperature butter, and the activated yeast mixture into the dry ingredients.
- Massage and knead the dough vigorously for approximately 10 minutes until achieving a silky, resilient texture.
- Drape a pristine cloth over the dough and position in a cozy environment, permitting it to rise and expand for roughly 90 minutes.
- Create the luxurious pistachio filling by whisking pistachio paste, powdered sugar, almond flour, and milk until achieving a velvety consistency.
- Deflate the risen dough and roll it into a rectangular shape on a flour-dusted surface.
- Distribute the pistachio mixture evenly across the dough’s surface.
- Carefully roll the dough into a cylindrical shape from the elongated edge.
- Bisect the log vertically, then artfully intertwine the two halves.
- Form the twisted dough into a circular crown, sealing the ends meticulously.
- Transfer the shaped crown onto a parchment-lined baking sheet and allow a secondary rise for 30 minutes.
- Preheat the oven to 350°F (180°C).
- Delicately brush the crown with egg yolk to ensure a lustrous, golden exterior.
- Bake for 25-30 minutes until achieving a rich, amber coloration.
- After cooling briefly, embellish with crushed pistachios and pearl sugar.
- Optionally, drizzle melted white chocolate for an extra layer of decadence.
- Serve either warm or at ambient temperature, savoring the intricate flavors.
Notes
- Activate yeast perfectly by ensuring milk is warm (110-115°F), not hot, to prevent killing the living cultures.
- Choose high-quality pistachio paste for intense nutty flavor and smooth filling consistency.
- Create uniform rise by proofing dough in draft-free, warm area like inside a turned-off oven with light on.
- Make gluten-free version by substituting regular flour with gluten-free blend and adding xanthan gum for elasticity.
- Prep Time: 20 minutes
- Cook Time: 2 hours
- Category: Desserts
- Method: Baking
- Cuisine: American
Nutrition
- Serving Size: 12
- Calories: 260
- Sugar: 9g
- Sodium: 80mg
- Fat: 10g
- Saturated Fat: 5g
- Unsaturated Fat: 4g
- Trans Fat: 0g
- Carbohydrates: 36g
- Fiber: 1g
- Protein: 6g
- Cholesterol: 50mg
Daniel Bruns
Founder & Culinary Innovator
Expertise
Recipe development for home cooks, Nutritional analysis and meal planning, Culinary education and food writing
Education
Auguste Escoffier School of Culinary Arts
Diploma in Culinary Arts and Operations
Focus: Classical and contemporary cooking techniques, Culinary entrepreneurship and kitchen management, Menu development and food cost analysis
Daniel’s story started with flour on his face and a pie in the oven at his grandma’s house. He later sharpened his skills at the Auguste Escoffier School of Culinary Arts.
His goal? Recipes so simple you’ll want to cook every night. When he’s not whipping up one-pan wonders, Daniel’s outside picking herbs, hosting neighborhood cook-offs, or baking chocolate cakes with his kids, messy, sweet, and unforgettable.