
Red Velvet Snowball Cookies Recipe for Winter Baking
Chilly winter afternoons spark magic with these delightful red velvet snowball cookies that melt hearts instantly.
Sweet crumbles dance between cocoa and cream cheese nuances.
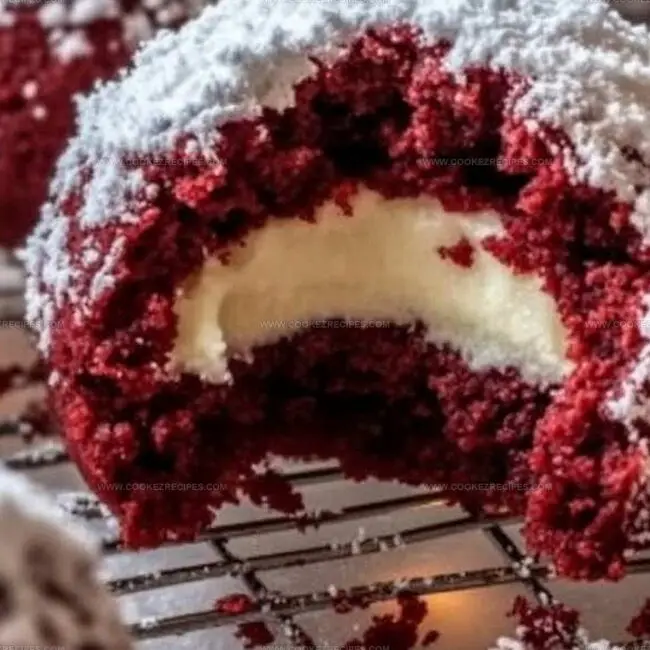
Powdered sugar coating creates a mesmerizing winter landscape on each perfectly round treat.
Delicate textures promise comfort in every single bite.
Subtle hints of vanilla complement the rich red hue beautifully.
Lightweight and irresistible, these cookies invite warm moments of pure indulgence.
You’ll want to savor each morsel and share the delectable joy with everyone around.
Red Velvet Snowball Cookies Make Holiday Baking Extra Fun
Red Velvet Snowball Cookie Ingredients
Butter and Sugar Base:Wet Ingredients:Dry Ingredients:Optional Nut Texture:Coating:Red Velvet Snowball Cookies Holiday Bake Steps

Step 1: Cream Butter and Sugar
Grab a large mixing bowl and whip together softened butter and granulated sugar until the mixture becomes light, airy, and super fluffy.
Use an electric mixer to make this process quick and smooth.
Step 2: Add Wet Ingredients
Pour in the egg, vanilla extract, and vibrant red food coloring.
Mix everything thoroughly until the ingredients blend into a beautiful crimson-colored mixture.
Step 3: Combine Dry Ingredients
In a separate bowl, whisk together:Slowly incorporate the dry ingredients into the wet mixture, stirring gently until just combined.
Don’t overmix the dough.
Step 4: Optional Nut Addition
If you love some crunch, fold in chopped pecans or walnuts for extra texture and flavor.
Step 5: Chill the Dough
Cover the dough and refrigerate for at least one hour.
Chilling helps the cookies hold their shape and makes them easier to handle.
Step 6: Prepare for Baking
Preheat the oven to 350°F.
Line baking sheets with parchment paper to prevent sticking.
Step 7: Shape the Cookies
Roll the chilled dough into small, round balls about one inch in diameter.
Place them on the prepared baking sheets, keeping some space between each cookie.
Step 8: Bake to Perfection
Slide the baking sheets into the oven and bake for 10-12 minutes.
The cookies should look set but not browned.
Step 9: Coat with Powdered Sugar
Let the cookies rest on the baking sheet for five minutes.
While still warm, roll them generously in powdered sugar.
Once completely cool, give them a second roll for an extra thick, snowy coating that looks like winter magic.
Holiday Baking Tips for Red Velvet Snowball Cookies
Red Velvet Snowball Cookies Leftover Help
Christmas Sips for Red Velvet Snowball Cookies
Red Velvet Snowball Cookie Ideas
FAQs
The red food coloring creates the vibrant red hue, transforming traditional snowball cookies into a festive red velvet version that’s perfect for Christmas.
Absolutely! The nuts are optional, so you can easily skip them if you have nut allergies or simply prefer a nut-free cookie. The recipe works perfectly without adding pecans or walnuts.
Chilling helps the dough firm up, making it easier to roll into balls and prevents the cookies from spreading too much during baking. It also allows the flavors to develop and creates a better texture.
Roll the cookies in powdered sugar while they’re still warm from the oven, and then roll them again once they’re completely cool. This double coating ensures a thick, snowy white layer that’s characteristic of snowball cookies.
Print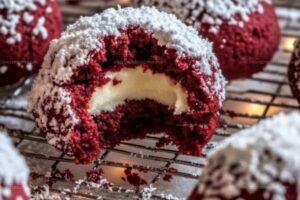
Red Velvet Snowball Cookies Recipe
- Total Time: 25 minutes
- Yield: 24 1x
Description
Festive Red Velvet Snowball Cookies bring winter magic to classic holiday treats, melding rich cocoa and powdered sugar in one delightful bite. Crumbly, crimson-hued cookies roll in delicate white sugar will charm guests and spark sweet celebration memories.
Ingredients
Main Ingredients:
- 2 cups (250 g / 8.8 oz) all-purpose flour
- 1 cup (230 g / 8 oz) unsalted butter, softened
- 1 cup (120 g / 4.2 oz) chopped pecans or walnuts (optional)
Flavor and Color Ingredients:
- 2 tablespoons (12 g / 0.4 oz) cocoa powder
- 2 teaspoons red food coloring
- 1 teaspoon vanilla extract
Sweeteners and Finishing:
- 1/2 cup (100 g / 3.5 oz) granulated sugar
- 1 1/2 cups (180 g / 6.3 oz) powdered sugar, for rolling
- 1 large egg
- 1/2 teaspoon salt
Instructions
- Cream softened butter and granulated sugar until the mixture becomes pale and airy, using an electric mixer on medium speed for approximately 2 minutes.
- Incorporate the egg, vanilla extract, and red food coloring, blending thoroughly until the ingredients form a uniform, vibrant mixture.
- In a separate mixing vessel, sift together flour, cocoa powder, and salt to eliminate potential lumps and ensure even distribution.
- Gradually introduce the dry ingredient mixture into the wet ingredients, stirring gently until just combined to prevent overmixing.
- If desired, delicately fold chopped pecans or walnuts into the dough, distributing them evenly throughout.
- Wrap the dough in plastic film and refrigerate for a minimum of 1 hour, allowing the ingredients to meld and the dough to firm up for easier handling.
- Preheat the oven to 350°F (175°C) and prepare baking sheets by lining them with parchment paper.
- Using clean hands, shape the chilled dough into uniform 1-inch spheres, placing them approximately 1 inch apart on the prepared baking sheets.
- Bake the cookies for 10-12 minutes, ensuring they appear set but not darkened or overly browned.
- Remove from the oven and let the cookies rest on the baking sheet for 5 minutes to stabilize their structure.
- While still slightly warm, gently roll each cookie in powdered sugar, creating an initial delicate coating.
- Once the cookies have completely cooled, roll them a second time in powdered sugar to achieve a thick, snow-like exterior.
Notes
- Chilling the dough helps prevent spreading and creates a more compact, perfectly shaped cookie that holds its snowball form.
- Opt for gel food coloring for intense red color without thinning the dough, ensuring a vibrant festive appearance.
- Toasting nuts before adding them enhances their nutty flavor and provides a delightful crunch to the cookies.
- For gluten-free options, substitute all-purpose flour with a 1:1 gluten-free baking blend to maintain the cookie’s tender texture.
- Prep Time: 15 minutes
- Cook Time: 10 minutes
- Category: Desserts
- Method: Baking
- Cuisine: American
Nutrition
- Serving Size: 24
- Calories: 188
- Sugar: 9g
- Sodium: 52mg
- Fat: 10g
- Saturated Fat: 4g
- Unsaturated Fat: 6g
- Trans Fat: 0g
- Carbohydrates: 24g
- Fiber: 1g
- Protein: 2g
- Cholesterol: 20mg
Katherine Pierce
Recipe Curator & Food Educator
Expertise
Education
Boston University Metropolitan College
Certificate Program in the Culinary Arts
Focus: French and international cuisine techniques, Hands-on culinary training with industry professionals, Food industry insights and operations
Katherine grew up believing every dish has a story. She studied the art of food at Boston University and explored the history behind it. She loves pulling easy recipes from every corner of the world and putting them at your fingertips.
When Katherine’s not writing or testing new flavors, she’s teaching cooking classes, baking colorful mooncakes, or dreaming up new ways to mix old favorites with new twists.