Fluffy Homemade Soft French Bread Recipe Everyone Loves
Crafting a delectable soft French bread can transport you to the charming streets of paris with minimal effort.
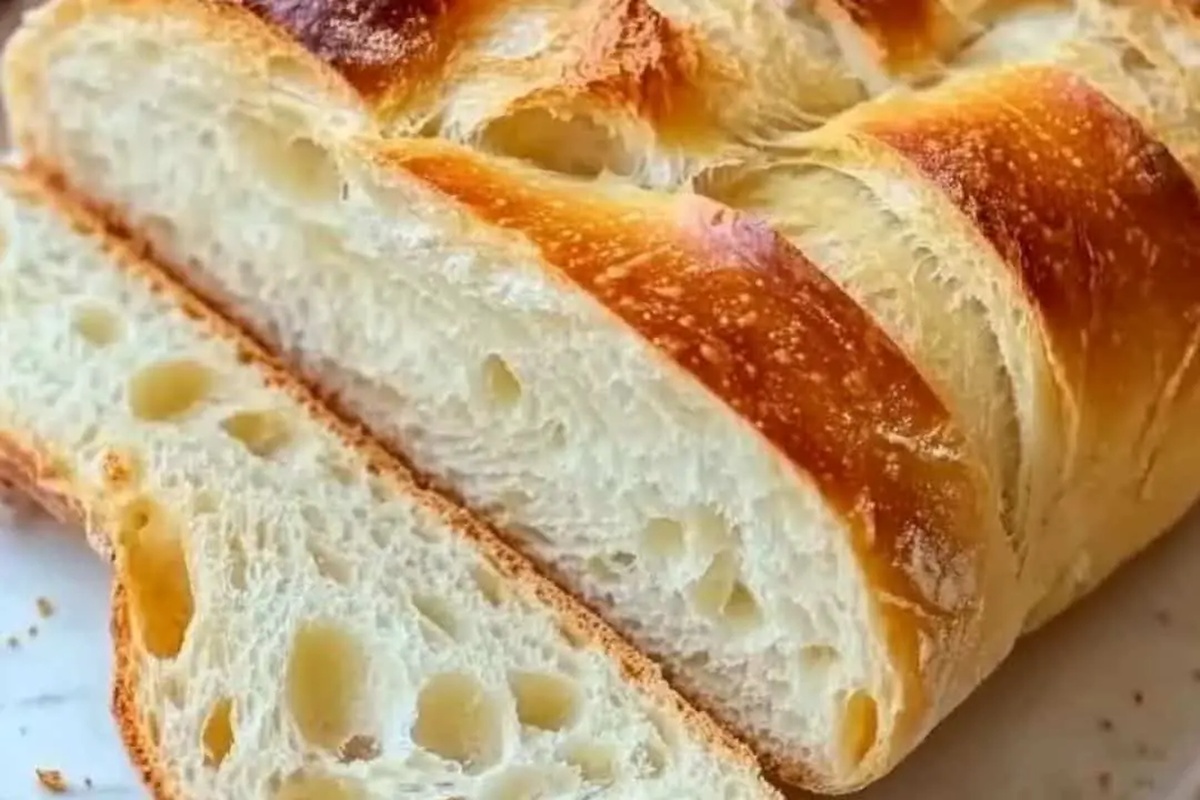
Fragrant loaves emerge from home ovens, promising golden crusts and pillowy interiors.
Bakers of all skill levels find joy in this simple yet magical process.
Whispers of butter and fresh herbs dance around warm, freshly sliced bread.
Kneading dough becomes a meditative experience that connects you to centuries-old culinary traditions.
Crisp exterior and tender crumb await your skilled hands and passionate heart.
You’ll fall in love with how effortlessly this recipe brings comfort and warmth to any meal.
What’s So Good About Soft and Fluffy French Bread
Soft French Bread Ingredient Guide
Flour and Dry Ingredients:Yeast and Liquid Activators:Fat and Binding Ingredients:Homemade French Bread Baking Directions
Step 1: Awaken the Yeast
Grab warm water and sprinkle sugar into it.
Gently dust yeast over the liquid and let it hang out for 5-10 minutes.
Watch for tiny bubbles that signal the yeast is coming to life, creating a frothy playground.
Step 2: Mix the Foundation
Combine flour and salt in a roomy mixing bowl.
Create a cozy crater in the center and pour in the energetic yeast mixture along with oil.
Stir everything until a shaggy, rough dough starts to form.
Step 3: Massage the Dough
Transfer the dough onto a flour-dusted surface.
Start kneading with your hands, pushing and folding rhythmically.
Work the dough for 8-10 minutes, adding extra flour if it feels sticky.
You’ll know it’s ready when the texture becomes smooth and bouncy.
Step 4: First Rising Adventure
Nestle the dough into an oiled bowl.
Drape a damp cloth over the top and find a warm, peaceful spot for it to rest.
Let the dough expand and grow for 45-60 minutes until it doubles in size.
Step 5: Shape Your Bread
Gently deflate the risen dough.
Roll it out into a rectangular landscape.
Starting from the long edge, roll the dough tightly like a cozy sleeping bag.
Pinch the seam closed to seal in the magic.
Step 6: Second Rising Journey
Place your shaped loaf on a parchment-lined baking sheet.
Cover with a soft, damp cloth and let it rise again for 45-60 minutes.
Watch it plump up and get ready for baking.
Step 7: Prepare the Oven
Crank up the oven to 375°F.
Let it warm up and get ready for bread transformation.
Step 8: Final Touch and Baking
Grab a sharp knife and create 5-7 gentle slashes across the loaf’s surface.
Brush the top with beaten egg for a gorgeous golden shine.
Slide the bread into the oven and bake for 20-25 minutes until it turns a beautiful golden brown.
Step 9: Cool and Enjoy
Rescue the bread from the oven and let it rest on a wire rack.
Allow it to cool completely before slicing into your masterpiece.
Soft French Bread Baking Pointers
Soft French Bread That Doesn’t Dry Out Overnight
Easy Combos for Soft French Bread
French Bread Done a Different Way
FAQs
When you combine warm water, sugar, and yeast and let it sit, you’re “proofing” the yeast. This process helps activate the yeast, ensuring it’s alive and will help your bread rise properly. If the mixture doesn’t become frothy, your yeast might be old or inactive.
The dough should become smooth, elastic, and slightly springy when touched. When you press your finger into the dough, it should spring back slowly. Proper kneading develops gluten, which gives bread its structure and texture.
Punching down releases air bubbles that formed during the first rise. This helps redistribute the yeast, relax the gluten, and create a more even texture in your final bread. It’s not actually a hard punch, but a gentle deflation of the dough.
Scoring the bread allows steam to escape during baking and helps control how the bread expands. These cuts create those beautiful, professional-looking lines on your French bread and prevent the loaf from splitting randomly in the oven.
Print
Soft French Bread Recipe
- Total Time: 1 hour 55 minutes
- Yield: 8 1x
Description
Warm, golden French bread rises to culinary perfection with this classic recipe that whispers comfort and tradition. Crisp exterior and pillowy interior promise a delightful experience you’ll savor with each aromatic, freshly baked slice.
Ingredients
Bread Ingredients:
- 2 1/2 to 3 cups all-purpose flour
- 1 cup warm water (approximately 90-110°F or 32-43°C)
Yeast and Sweetener:
- 2 teaspoons active dry yeast
- 1 tablespoon granulated sugar
Finishing and Seasoning:
- 1 teaspoon salt
- 1 tablespoon olive oil or vegetable oil
- 1 egg, beaten (for brushing the loaf)
Instructions
- Initiate the yeast activation by blending warm water with sugar in a compact vessel. Gently disperse yeast granules across the liquid surface and allow it to transform for 5-10 minutes until a frothy texture emerges.
- Merge flour and salt within a capacious mixing container. Excavate a central cavity and introduce the yeast liquid along with oil. Amalgamate ingredients until a rough, uneven dough materializes.
- Transfer the nascent dough onto a flour-dusted workspace. Engage in vigorous kneading for 8-10 minutes, incrementally incorporating additional flour to achieve a silky, resilient consistency.
- Nestle the dough within a lightly lubricated receptacle, drape with a moistened fabric, and permit fermentation in a temperate environment for 45-60 minutes until volume doubles.
- Depress the risen dough and elongate into a rectangular formation measuring roughly 9×13 inches. Commence rolling from the extended edge, constructing a compact cylindrical shape while meticulously sealing the longitudinal junction.
- Position the sculpted loaf on a parchment-lined baking surface. Envelop with a dampened cloth, allowing a secondary expansion period of 45-60 minutes until near-maximum volume.
- Calibrate oven temperature to 375°F (190°C), ensuring thorough preheating.
- Execute precise diagonal incisions across the loaf’s superior surface using a razor-sharp implement. Apply an egg wash to enhance surface luminosity. Roast for 20-25 minutes until achieving a golden-bronze hue and producing a resonant hollow sound when tapped.
- Extract from oven and permit complete cooling on a wire grid before slicing to preserve structural integrity.
Notes
- Proofing Perfection: Choose a warm, draft-free spot like near a preheated oven or inside a turned-off oven with the light on to help yeast rise consistently.
- Flour Power: Use bread flour for extra protein content, which creates a chewier texture and better gluten development compared to all-purpose flour.
- Moisture Magic: Brush the loaf with egg wash or water to achieve a gorgeous golden-brown crust with beautiful shine and crispy exterior.
- Gluten-Free Adaptation: Swap wheat flour with a commercial gluten-free bread flour blend and add xanthan gum to maintain structure and texture.
- Prep Time: 1 hour 30 minutes
- Cook Time: 25 minutes
- Category: Breakfast, Lunch, Dinner, Snacks
- Method: Baking
- Cuisine: French
Nutrition
- Serving Size: 8
- Calories: 150
- Sugar: 1 g
- Sodium: 200 mg
- Fat: 3.5 g
- Saturated Fat: 0.5 g
- Unsaturated Fat: 2.5 g
- Trans Fat: 0 g
- Carbohydrates: 28 g
- Fiber: 1 g
- Protein: 4 g
- Cholesterol: 10 mg
Katherine Pierce
Recipe Curator & Food Educator
Expertise
Education
Boston University Metropolitan College
Certificate Program in the Culinary Arts
Focus: French and international cuisine techniques, Hands-on culinary training with industry professionals, Food industry insights and operations
Katherine grew up believing every dish has a story. She studied the art of food at Boston University and explored the history behind it. She loves pulling easy recipes from every corner of the world and putting them at your fingertips.
When Katherine’s not writing or testing new flavors, she’s teaching cooking classes, baking colorful mooncakes, or dreaming up new ways to mix old favorites with new twists.