Homemade Soft Pretzels Recipe with a Golden Crust
Homemade soft pretzels can make any afternoon feel like a German street fair adventure.
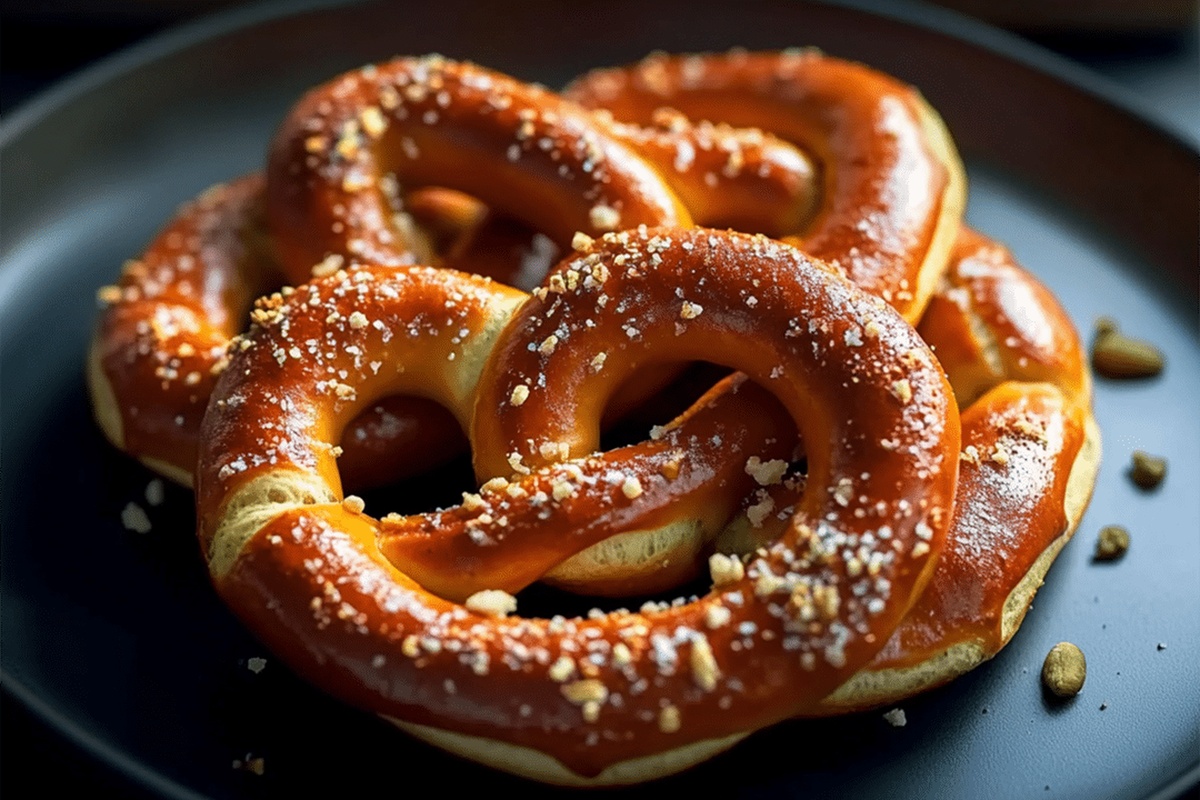
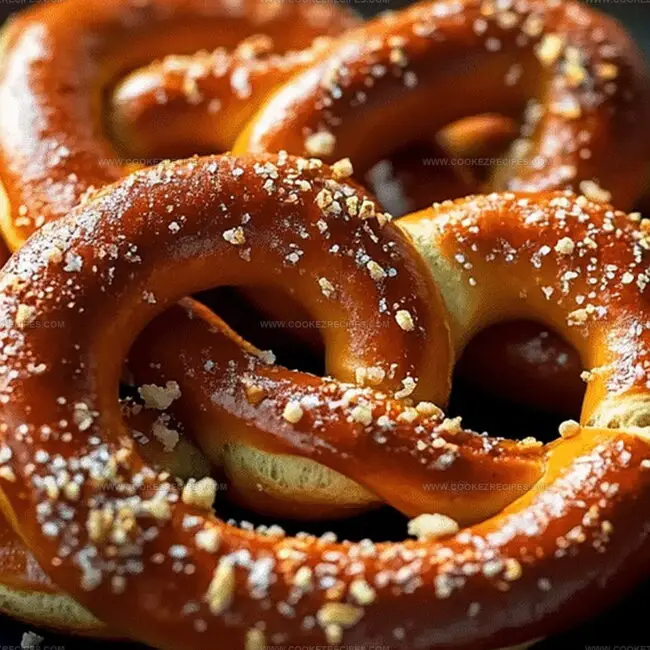
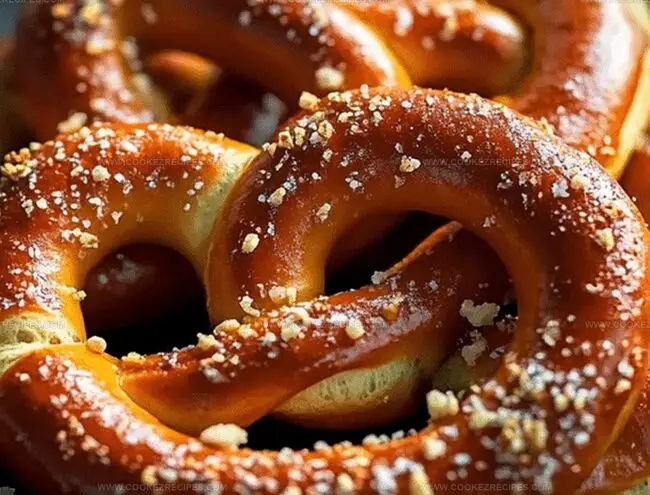
Golden twists of dough beckon with their glossy, salt-sprinkled surfaces.
Kneading becomes a playful dance between you and simple ingredients.
Salt crystals wink from each curves surface, promising tangy satisfaction.
Warm, pillowy textures emerge straight from your kitchen oven.
Steam rises as you break open a pretzel, revealing its tender interior.
Soft Pretzels That Keep Everyone Reaching For More
Soft Pretzels Dough Essentials
Leavening Agents:Dry Ingredients:Wet Ingredients:Learn To Bake Soft Pretzels
Step 1: Awaken The Yeast
Combine warm water and yeast in a mixing bowl.
Allow the mixture to rest and become frothy, watching as tiny bubbles develop and signify the yeast is activating.
Step 2: Create Pretzel Dough
Add these ingredients to the yeast mixture:Mix ingredients gradually until a soft, cohesive dough forms.
Knead the dough thoroughly for 5-7 minutes, developing a smooth and elastic texture.
Step 3: Nurture Dough Growth
Transfer dough to a generously greased bowl.
Cover with a clean kitchen towel and let it rest in a warm spot.
Allow dough to expand and rise for approximately one hour, or until its volume doubles.
Step 4: Shape Pretzel Magic
Preheat oven to 450°F.
Divide dough into 8 equal portions.
Roll each segment into a long, slender rope.
Twist each rope into classic pretzel formations, creating beautiful curved shapes.
Step 5: Prepare Baking Soda Bath
Boil water in a large pot.
Add baking soda to create a special alkaline solution.
Gently dip each pretzel into the bubbling bath for 30 seconds, which helps create a signature golden-brown exterior.
Step 6: Enhance With Egg Wash
Brush each pretzel with egg wash.
Sprinkle coarse salt generously across the surface, adding delightful texture and flavor.
Step 7: Bake To Perfection
Place pretzels in the preheated oven.
Bake for 12-15 minutes until they transform into a gorgeous golden-brown color with crispy edges.
Pretzel Baking Tips For Soft, Salty Bites
How to Keep Soft Pretzels Tasting Fresh
Soft Pairings For Pretzels
Pair Soft Beer-Soaked Cheese Dip: Craft a creamy cheddar beer cheese that complements the pretzels’ salty crunch, using a hoppy pale ale for depth and tanginess.
Enhance with Mustard Medley: Create a trio of mustards – classic yellow, spicy Dijon, and whole grain – offering different heat levels and textures for dipping adventures.
Match German-Style Beverages: Serve with traditional wheat beer (hefeweizen) or crisp pilsner that echoes the pretzels’ Bavarian roots, cutting through the bread’s richness.
Elevate with Charcuterie: Arrange a small board of German-inspired meats like smoked bratwurst and Black Forest ham to transform the pretzels into a hearty appetizer experience.
Homemade Soft Pretzel Options
FAQs
The baking soda creates an alkaline environment that gives pretzels their signature golden brown color and distinctive chewy crust by causing a Maillard reaction during baking.
Yes, active dry yeast works perfectly. Just dissolve it in warm water first and make sure it gets foamy before adding other ingredients. The process remains the same.
The dough should roughly double in size and look puffy. When you gently press it with a finger, the indentation should slowly spring back but still leave a slight mark.
Add a little extra flour, one tablespoon at a time, while kneading. The dough should be smooth and slightly tacky but not sticking to your hands excessively.
Print
Soft Pretzels Recipe
- Total Time: 35 minutes
- Yield: 8 1x
Description
Warm German-style soft pretzels invite culinary adventurers into a world of salty, golden-brown deliciousness. Crisp exterior and chewy interior promise a delightful experience you won’t forget, making each bite a celebration of traditional bakery magic.
Ingredients
Dough Ingredients:
- 4 cups all-purpose flour
- 1 1/2 cups warm water (110°F / 43°C)
- 1 packet (2 1/4 teaspoons) active dry yeast
- 1 tablespoon granulated sugar
- 1 teaspoon salt
Boiling Solution:
- 2/3 cup baking soda
Finishing Ingredients:
- 1 large egg yolk
- 1 tablespoon water
- Coarse salt for topping
Instructions
- Awaken the yeast by combining it with tepid water, allowing the mixture to bloom and become frothy for approximately 5 minutes.
- Incorporate salt and sugar into the activated yeast solution, then gradually fold in flour until a cohesive dough emerges. Knead the mixture thoroughly for 5-7 minutes, developing a smooth and elastic texture.
- Transfer the dough to a lightly oiled container, drape with a clean kitchen towel, and permit it to rise in a warm environment until it doubles in volume, roughly 1 hour.
- Heat the oven to 450°F (230°C). Segment the risen dough into 8 uniform portions, then roll each piece into elongated ropes and artfully twist them into classic pretzel formations.
- Prepare a poaching liquid by bringing water and baking soda to a vigorous boil. Submerge each pretzel in the alkaline bath for 30 seconds, which will enhance their signature bronzed exterior and distinctive flavor profile.
- Gently paint the pretzels with beaten egg, creating a lustrous sheen, and generously dust with coarse salt to introduce a delightful textural contrast.
- Position the pretzels on a parchment-lined baking sheet and bake until they achieve a rich, golden-brown complexion, approximately 12-15 minutes.
Notes
- Choose warm water between 110-115°F to perfectly activate yeast without killing it.
- Knead dough on a lightly floured surface to prevent sticking and develop gluten structure for chewier pretzels.
- Use room temperature ingredients to help dough rise consistently and create better texture.
- Experiment with alternative toppings like everything bagel seasoning, cinnamon sugar, or herbs for unique flavor variations.
- Prep Time: 20 minutes
- Cook Time: 15 minutes
- Category: Snacks, Appetizer
- Method: Baking
- Cuisine: German
Nutrition
- Serving Size: 8
- Calories: 210
- Sugar: 1 g
- Sodium: 550 mg
- Fat: 3 g
- Saturated Fat: 1 g
- Unsaturated Fat: 2 g
- Trans Fat: 0 g
- Carbohydrates: 41 g
- Fiber: 2 g
- Protein: 6 g
- Cholesterol: 10 mg
Daniel Bruns
Founder & Culinary Innovator
Expertise
Recipe development for home cooks, Nutritional analysis and meal planning, Culinary education and food writing
Education
Auguste Escoffier School of Culinary Arts
Diploma in Culinary Arts and Operations
Focus: Classical and contemporary cooking techniques, Culinary entrepreneurship and kitchen management, Menu development and food cost analysis
Daniel’s story started with flour on his face and a pie in the oven at his grandma’s house. He later sharpened his skills at the Auguste Escoffier School of Culinary Arts.
His goal? Recipes so simple you’ll want to cook every night. When he’s not whipping up one-pan wonders, Daniel’s outside picking herbs, hosting neighborhood cook-offs, or baking chocolate cakes with his kids, messy, sweet, and unforgettable.