Sizzling Spatchcock Chicken Recipe: Flavorful Family Favorite
Mastering the art of spatchcock chicken can revolutionize your weekend cooking adventures.
Crispy skin and perfectly cooked meat become your new culinary signature.
Professional chefs swear by this technique for even heat distribution.
Removing the backbone allows the bird to lay flat, ensuring uniform roasting.
Marinades penetrate deeper, creating layers of incredible flavor throughout the meat.
Your kitchen will smell incredible as this method guarantees juicy, succulent results.
Trust me, you’ll never want to roast chicken any other way again.
Spatchcock Chicken That Cooks Fast And Juicy
Ingredients for Spatchcock Chicken
Main Protein:Seasoning Blend:Herb and Fat Mixture:Roasting Companions:Cooking Essentials:Spatchcock Chicken Cooking Process
Step 1: Prepare the Chicken
Position the whole chicken breast-side down on a sturdy cutting board.
Using sharp kitchen shears, carefully cut along both sides of the backbone and completely remove it.
Open up the rib cage and gently score the sternum with a heavy knife to help the chicken flatten more easily.
Generously season the inner cavity with salt and black pepper.
Step 2: Create the Perfect Flatness
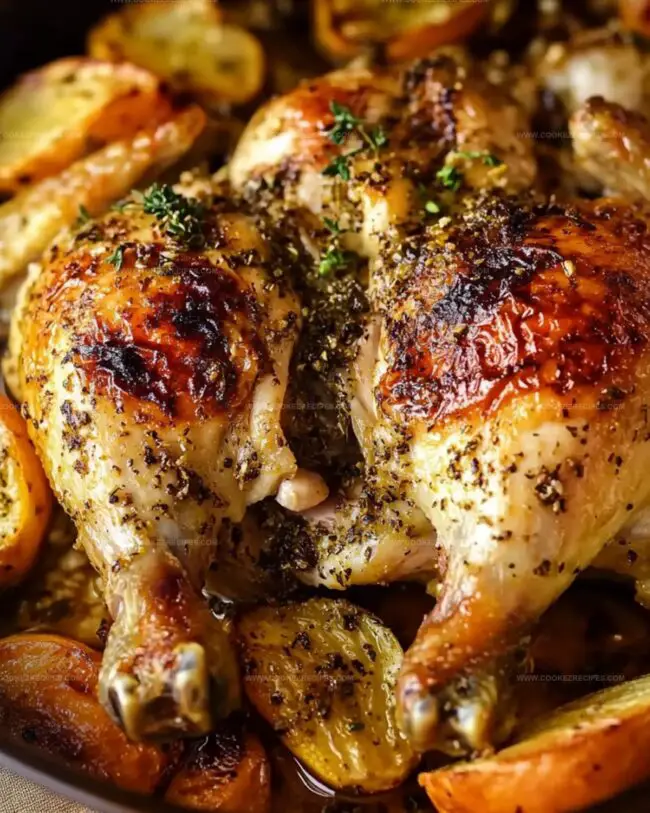
Turn the chicken breast-side up and apply firm pressure on the breastbone with both hands until the chicken lies completely flat.
Carefully slide your thumbs underneath the skin of the breast, thighs, and drumsticks to create a loose pocket for seasoning.
Step 3: Craft Flavorful Herbed Butter
In a small mixing bowl, combine softened butter with freshly chopped herbs, minced garlic, and a touch of lemon zest.
Mash and mix the ingredients until they form a smooth, fragrant blend.
Step 4: Apply Herbed Butter Coating
Gently spread approximately two-thirds of the herbed butter mixture underneath the loosened skin, ensuring even coverage.
Use the remaining butter to dot and spread across the exterior of the chicken.
Step 5: Prepare Vegetable Companions
Select a rimmed baking sheet and line it with parchment paper.
Arrange a colorful mix of vegetables around the chicken:Drizzle the vegetables with olive oil and sprinkle with salt and freshly ground black pepper.
Step 6: Roast to Perfection
Preheat the oven to 425°F.
Place the chicken and vegetables in the oven and roast uncovered for approximately 45 minutes.
Check the internal temperature of the chicken breast using an instant-read thermometer – it should reach 160°F for safe consumption.
Step 7: Rest and Serve
Remove the chicken from the oven and allow it to rest for 10 minutes, which helps redistribute the juices.
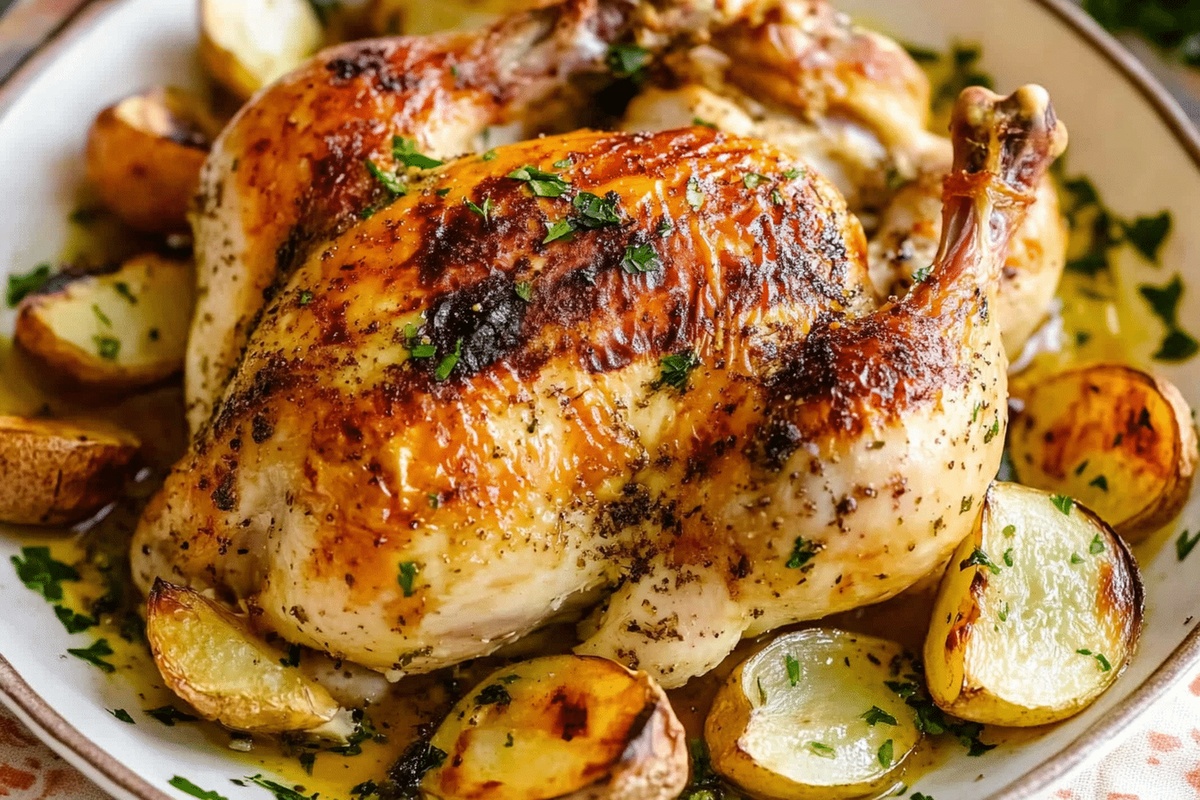
Carve the chicken and plate alongside the beautifully roasted vegetables, creating a stunning and delicious meal.
Spatchcock Timing & Crispy Skin Tricks
Spatchcock Chicken That Warms Up Juicy
Balanced Bites For Spatchcock Chicken
Spatchcock Chicken Flavor Swaps
FAQs
Spatchcocking involves removing the backbone of a chicken so it can lay flat, which helps the chicken cook more evenly and quickly. This technique reduces cooking time and ensures crispy skin and juicy meat throughout.
Use an instant-read thermometer to check the internal temperature. The chicken is safe to eat when it reaches 160°F in the thickest part of the breast. After resting, the temperature will rise to 165°F, which is the USDA recommended safe temperature.
Absolutely! Feel free to experiment with fresh herbs like rosemary, thyme, or sage. You can also add dried herbs like Italian seasoning or swap out some herbs based on your preference or what’s available in your kitchen.
Separating the skin allows you to spread the herb butter directly onto the meat, which helps infuse more flavor into the chicken. This technique ensures the butter melts into the meat, creating a more flavorful and moist result.
Print
Spatchcock Chicken Recipe
- Total Time: 1 hour
- Yield: 4 1x
Description
Succulent spatchcock chicken delivers Mediterranean flavors that dance across your palate with bold herb-infused charm. Crispy golden skin and juicy meat promise a delightful dining experience you’ll savor from first bite to last.
Ingredients
Proteins:
- 4 1/4 pounds (1.9 kilograms) whole chicken
Herbs and Seasoning:
- 1/2 teaspoon sea salt
- 1/8 teaspoon black pepper
- 1 tablespoon fresh parsley, finely chopped
- 2 garlic cloves, minced
- 1/2 teaspoon lemon zest
Dairy and Oils:
- 4 tablespoons unsalted butter, softened
- 1 tablespoon olive oil (plus more for drizzling)
- 1 tablespoon lemon juice
Vegetables:
- 2 pounds (907 grams) medium red potatoes, scrubbed and quartered
- 3 medium carrots, peeled and quartered
- 8 ounces (226 grams) Brussels sprouts, trimmed and halved
Additional Seasonings:
- 1 teaspoon salt (plus more for vegetables)
- 1/8 teaspoon black pepper
Instructions
- Prepare the chicken by laying it breast-side down on a sturdy cutting surface. Using sharp kitchen shears, meticulously remove the backbone by cutting along both sides. Carefully split open the rib cage and create a precise score on the sternum to facilitate flattening. Season the exposed interior with salt and black pepper.
- Transform the chicken to breast-side up, applying firm pressure to the breastbone until completely flat. Gently separate the skin from breast, thighs, and drumsticks using fingertips to create pockets for seasoning.
- Create a fragrant herb butter by thoroughly blending butter with minced garlic, fresh herbs, and seasonings until smooth and well-incorporated.
- Carefully distribute two-thirds of the herb butter underneath the loosened skin, ensuring even coverage across the chicken’s surface. Delicately spread the remaining butter over the exterior.
- Prepare a large rimmed baking sheet with parchment paper. Artfully arrange chopped vegetables around the prepared chicken. Drizzle the vegetables with olive oil and generously season with salt and pepper.
- Heat the oven to 425°F. Position the chicken in the center of the prepared pan, allowing the vegetables to surround it. Roast uncovered for approximately 45 minutes, monitoring until the internal temperature of the breast reaches 160°F using an instant-read thermometer.
- Once cooked, remove from the oven and allow the chicken to rest for 10 minutes. This resting period helps redistribute juices and ensures tender meat. Carve and serve alongside the perfectly roasted vegetables.
Notes
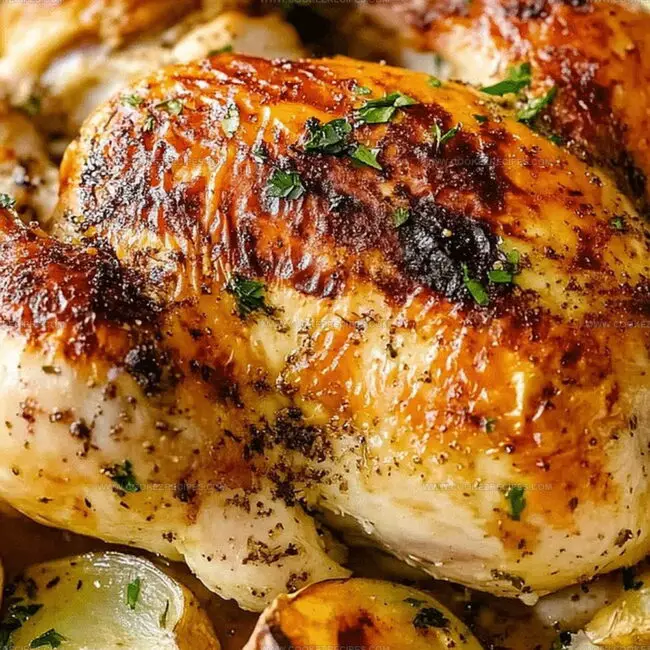
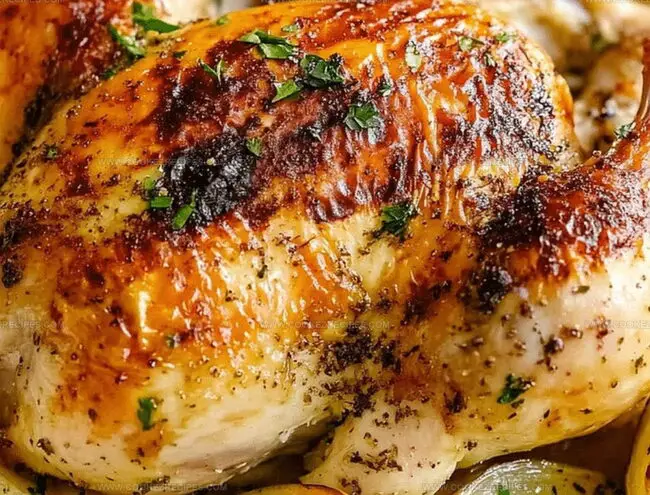
- Pat the chicken completely dry before spatchcocking to ensure crispy, golden-brown skin that will make your mouth water.
- Use sharp kitchen shears for clean, precise cuts when removing the backbone for a professional-looking preparation.
- Create extra flavor by sliding herb butter under the skin, which helps keep the meat incredibly moist and infuses deep, rich tastes throughout the chicken.
- For gluten-free diets, confirm all ingredients like butter and seasonings are certified gluten-free to accommodate dietary restrictions.
- Prep Time: 15 minutes
- Cook Time: 45 minutes
- Category: Dinner
- Method: Roasting
- Cuisine: American
Nutrition
- Serving Size: 4
- Calories: 680
- Sugar: 4 g
- Sodium: 800 mg
- Fat: 34 g
- Saturated Fat: 14 g
- Unsaturated Fat: 18 g
- Trans Fat: 0 g
- Carbohydrates: 52 g
- Fiber: 7 g
- Protein: 48 g
- Cholesterol: 140 mg
Daniel Bruns
Founder & Culinary Innovator
Expertise
Recipe development for home cooks, Nutritional analysis and meal planning, Culinary education and food writing
Education
Auguste Escoffier School of Culinary Arts
Diploma in Culinary Arts and Operations
Focus: Classical and contemporary cooking techniques, Culinary entrepreneurship and kitchen management, Menu development and food cost analysis
Daniel’s story started with flour on his face and a pie in the oven at his grandma’s house. He later sharpened his skills at the Auguste Escoffier School of Culinary Arts.
His goal? Recipes so simple you’ll want to cook every night. When he’s not whipping up one-pan wonders, Daniel’s outside picking herbs, hosting neighborhood cook-offs, or baking chocolate cakes with his kids, messy, sweet, and unforgettable.