
Easy Strawberry Jello Cake Recipe: A Sweet Summer Delight
Sweet memories flood back with every slice of this magical strawberry jello cake that dances between classic dessert and whimsical treat.
Summer afternoons feel lighter when such a vibrant confection sits center stage.
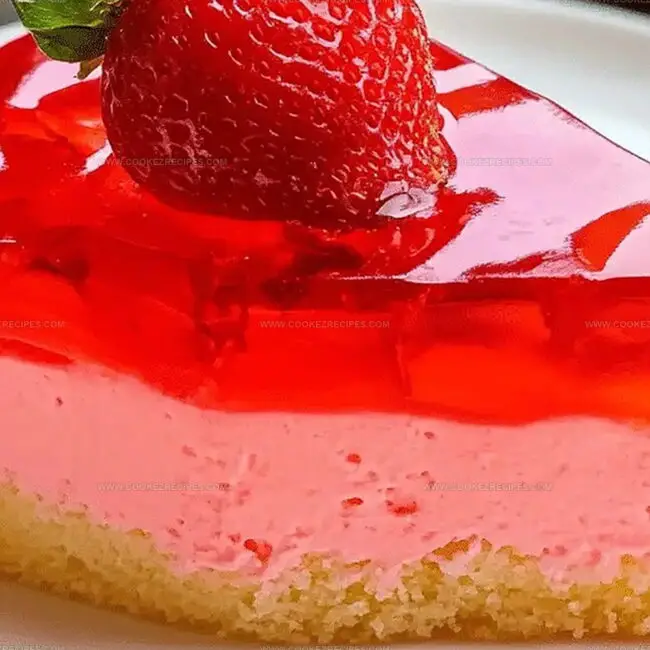
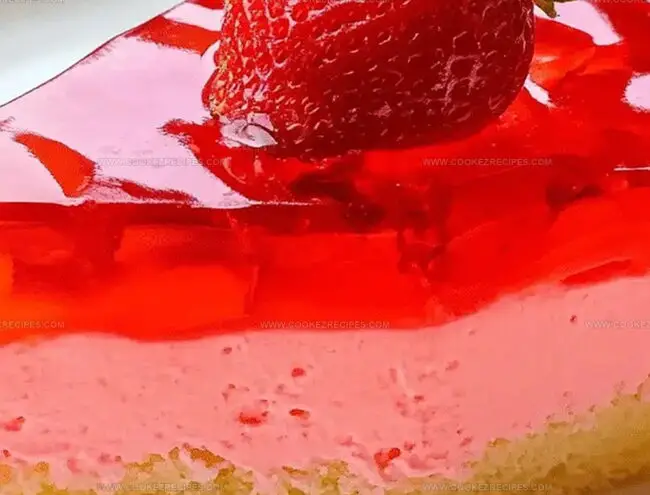
Layers of soft cake infused with ruby-red jello create a dessert that sparkles with unexpected charm.
Delicate strawberry hints weave through each tender crumb, promising pure delight.
Pastel pink hues peek through delicate cake layers, beckoning you to take a bite.
Generations of bakers have cherished this playful recipe that turns simple ingredients into something extraordinary.
Let this cake be your next delicious adventure.
Why Strawberry Jello Cake Stays A Crowd Favorite
Layers of Flavor in Strawberry Jello Cake
Base Ingredients:Gelatin Ingredients:Topping Ingredients:Mix And Bake Strawberry Jello Cake
Step 1: Warm Up the Oven
Fire up your oven to 350°F and grab a 9×13-inch baking dish.
Give the dish a quick spray or butter coating to prevent sticking.
Step 2: Mix the Cake Base
Grab your mixing bowl and toss in:Whip everything together with a hand mixer until the batter looks smooth and creamy.
Step 3: Bake the Cake
Pour the batter into the prepared dish.
Slide it into the oven and bake for 20-25 minutes.
The cake is ready when it springs back after a gentle touch.
Pull it out and let it hang out on a wire rack for 20 minutes to cool down.
Step 4: Create Cake Tunnels
Once the cake has chilled out, grab a wooden spoon handle.
Poke holes across the cake, spacing them about ½-inch apart.
Go halfway into the cake, creating little tunnels for the jello.
Step 5: Prepare Strawberry Jello Magic
In a bowl, combine:Whisk until the powder completely dissolves into a vibrant liquid.
Step 6: Flood the Cake
Gently spoon the strawberry jello over the cake, making sure it seeps into every single hole.
If you have extra liquid, pour it all over the surface.
Step 7: Chill and Set
Slide the cake into the refrigerator.
Let it hang out and cool for 1 hour so the jello can set perfectly.
Step 8: Add the Finishing Touches
Pull the cake from the fridge.
Spread a generous layer of Cool Whip across the top using an offset spatula.
Decorate with fresh sliced strawberries.
Serve and enjoy your stunning strawberry jello cake!
Jello Cake Tips With Strawberry Fun Layers
Jello Cake Keeps Fresh When Covered Tight
Simple Sips For Jello Cake
Flavor Ideas for Strawberry Jello Cake
FAQs
The holes allow the strawberry Jello to seep deep into the cake, creating a moist, flavorful dessert that has pockets of fruity gelatin throughout each slice.
Absolutely! You can swap strawberry Jello for other flavors like raspberry, cherry, or lime to create different variations of this fun cake.
No special equipment is needed. Just a standard 9×13-inch baking dish, a hand mixer, a wooden spoon for poking holes, and basic mixing bowls will work perfectly.
This is an incredibly easy recipe that’s perfect for beginners. The cake mix and simple preparation make it a foolproof dessert that looks impressive but requires minimal baking skills.
Print
Strawberry Jello Cake Recipe
- Total Time: 35 minutes
- Yield: 12 1x
Description
Sweet memories come alive with this strawberry jello cake, blending classic American dessert charm and nostalgic flavor. Creamy layers and fruity gelatin create a delightful treat you’ll crave at every celebration.
Ingredients
Main Ingredients:
- 1 (15.25 ounces / 432 grams) box white cake mix
- 1 (3 ounces / 85 grams) box strawberry gelatin
- 2 cups sliced strawberries
- 8 ounces (226 grams) Cool Whip
Liquid Ingredients:
- 1 cup water
- 1 cup boiling water
- 1/3 cup vegetable oil
Eggs:
- 3 eggs
Instructions
- Prepare the cake foundation by preheating the oven to 350°F and lightly coating a 9×13-inch baking dish with cooking spray.
- Combine cake mix ingredients in a spacious mixing bowl, using an electric mixer to blend until the batter achieves a smooth, consistent texture.
- Transfer the cake mixture into the prepared baking dish, spreading evenly with a spatula, and bake for approximately 22 minutes until the surface springs back when gently pressed.
- Allow the cake to cool on a wire rack for 15-20 minutes, creating a stable base for the next stage of preparation.
- Using the handle of a wooden spoon, carefully create systematic holes across the cake’s surface, ensuring even distribution and depth for gelatin absorption.
- Dissolve strawberry gelatin powder completely in boiling water, whisking until no granules remain visible.
- Gradually pour the liquid gelatin over the cake, directing the mixture into the prepared holes to ensure maximum flavor penetration.
- Refrigerate the cake for 60-75 minutes, allowing the gelatin to set and infuse the dessert with vibrant strawberry essence.
- Once chilled, generously spread a layer of whipped topping across the cake’s surface using smooth, sweeping motions.
- Garnish with freshly sliced strawberries, creating an attractive and appetizing presentation before serving.
Notes
- Ensure cake mix is fresh and not expired for the best texture and rising potential.
- Create consistent holes throughout the cake to guarantee even Jello absorption, using the handle of a wooden spoon or a fork.
- Opt for room temperature eggs to help them blend smoothly with other ingredients and create a more uniform cake batter.
- Use sugar-free gelatin and low-fat Cool Whip for a lighter, diabetic-friendly version of the dessert.
- Prep Time: 10 minutes
- Cook Time: 25 minutes
- Category: Desserts
- Method: Baking
- Cuisine: American
Nutrition
- Serving Size: 12
- Calories: 210
- Sugar: 12 g
- Sodium: 200 mg
- Fat: 7 g
- Saturated Fat: 1 g
- Unsaturated Fat: 5 g
- Trans Fat: 0 g
- Carbohydrates: 33 g
- Fiber: 0 g
- Protein: 2 g
- Cholesterol: 30 mg
Daniel Bruns
Founder & Culinary Innovator
Expertise
Recipe development for home cooks, Nutritional analysis and meal planning, Culinary education and food writing
Education
Auguste Escoffier School of Culinary Arts
Diploma in Culinary Arts and Operations
Focus: Classical and contemporary cooking techniques, Culinary entrepreneurship and kitchen management, Menu development and food cost analysis
Daniel’s story started with flour on his face and a pie in the oven at his grandma’s house. He later sharpened his skills at the Auguste Escoffier School of Culinary Arts.
His goal? Recipes so simple you’ll want to cook every night. When he’s not whipping up one-pan wonders, Daniel’s outside picking herbs, hosting neighborhood cook-offs, or baking chocolate cakes with his kids, messy, sweet, and unforgettable.