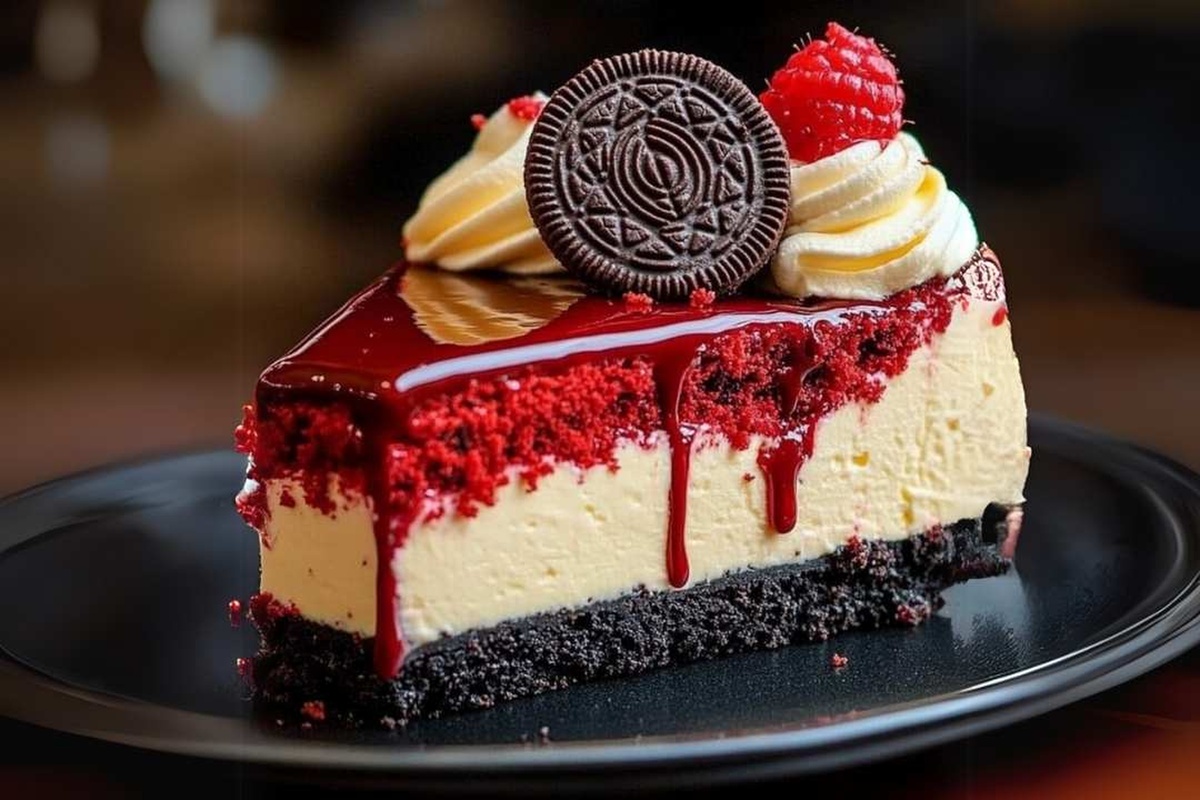
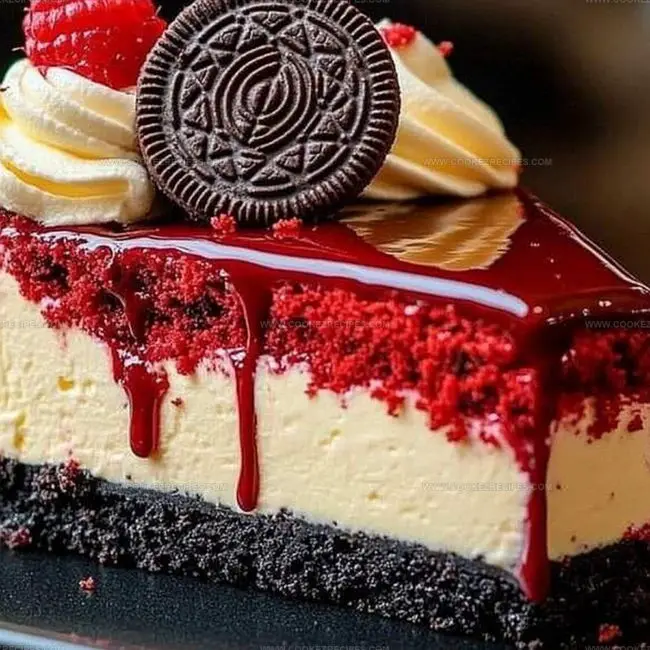
Red Velvet Oreo Cheesecake Recipe for Dessert Lovers
Baking a red velvet oreo cheesecake can deliver an unexpectedly decadent dessert experience that’ll make you swoon.
Creamy layers meld with classic cookie crunch for an irresistible treat.
Rich chocolate undertones complement the vibrant crimson cake base perfectly.
One bite promises pure indulgence that melts across your palate.
Smooth cream cheese creates luxurious textures with every delectable forkful.
oreo crumbles add delightful crunch between silky cheesecake sections.
Prepare to surprise yourself with this showstopping confection that guarantees delighted smiles around your table.
Red Velvet Oreo Cheesecake That’s a Showstopper
Quickest Crowd-Pleaser: Effortlessly impress guests with this showstopping dessert that requires minimal baking skills and maximum deliciousness.
Decadent Texture Explosion: Combines creamy cheesecake, crunchy Oreo cookies, and velvety smooth red velvet flavors in every single bite.
Time-Saving Technique: No complicated steps needed – simple water bath method ensures perfect baking, and make-ahead option allows stress-free preparation up to a day in advance.
Celebration-Ready Dessert: Perfect for birthdays, holidays, or any special occasion that calls for an elegant yet indulgent sweet treat that looks professionally made.
Red Velvet Oreo Cheesecake Ingredients
Crust Ingredients:Cheesecake Filling Ingredients:Topping Ingredients:Red Velvet Oreo Cheesecake Dessert Bake Guide

Step 1: Crush Oreo Cookies
Crush Oreo cookies into fine crumbs using a food processor or by placing them in a sealed plastic bag and rolling with a rolling pin.
Step 2: Create Crust Foundation
Mix crushed Oreo crumbs with melted butter until completely combined and resembles wet sand-like texture.
Step 3: Press Crust into Pan
Press the Oreo butter mixture firmly into the bottom of a springform pan, creating an even and compact base.
Bake the crust for 10 minutes at 325°F, then set aside to cool completely.
Step 4: Whip Cream Cheese
In a large mixing bowl, beat cream cheese and sugar until smooth and creamy, ensuring no lumps remain.
Step 5: Incorporate Wet Ingredients
Gently add eggs one at a time, mixing minimally after each addition.
Stir in sour cream, buttermilk, and vanilla extract until just combined.
Step 6: Create Red Velvet Color
Sift cocoa powder into the mixture and blend until smooth.
Add red food coloring and mix until desired vibrant red color is achieved.
Step 7: Fold in Oreo Pieces
Carefully fold crushed Oreo pieces into the cheesecake batter, distributing evenly without overmixing.
Step 8: Prepare Water Bath
Place springform pan inside a larger baking dish.
Pour hot water into the larger dish, creating a water bath that reaches halfway up the springform pan’s sides.
Step 9: Bake Cheesecake
Bake the cheesecake for 55-65 minutes until the center is set but slightly jiggly.
Turn off the oven and leave the cheesecake inside with the door slightly opened for one hour.
Step 10: Chill and Set
Remove cheesecake from the oven and allow to cool completely at room temperature.
Refrigerate for at least 6 hours or overnight.
Step 11: Prepare Whipped Topping
Whip heavy cream with powdered sugar and vanilla extract until stiff peaks form.
Step 12: Decorate and Serve
Spread or pipe whipped cream over the chilled cheesecake.
Garnish with additional crushed Oreos and red velvet crumbs.
Oreo Cheesecake – Layering Tricks
Save Red Velvet Oreo Cheesecake for Later
Oreo Cheesecake Sweet Bites
Red Velvet Oreo Cheesecake Serving Ideas
FAQs
A water bath helps prevent cracks by creating a moist, gentle heat environment that allows the cheesecake to bake evenly and slowly, reducing the risk of overbaking and surface cracking.
Regular full-fat cream cheese is recommended for the best texture and richness. Low-fat versions might result in a less creamy and less stable cheesecake.
The cheesecake is done when the edges are set but the center is slightly jiggly, similar to a soft pudding. It will continue to set as it cools, so avoid overbaking.
Sifting cocoa powder helps prevent lumps and ensures a smooth, even distribution throughout the cheesecake filling, giving a more consistent flavor and color.
Print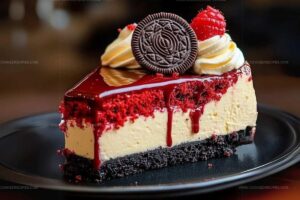
The Best Red Velvet Oreo Cheesecake Recipe
- Total Time: 1 hour 35 minutes
- Yield: 12 1x
Description
Indulgent red velvet oreo cheesecake blends rich chocolate and creamy cheesecake in a divine dessert fusion. Crumbly oreo crust and luscious cream cheese layers promise a heavenly slice that chocolate and cheesecake enthusiasts will absolutely adore.
Ingredients
Main Ingredients:
- 24 ounces (680 grams) cream cheese, softened
- 3 large eggs
- 2 cups (240 grams) Oreo cookie crumbs
- 1 cup (240 milliliters) heavy whipping cream
- 1 cup (200 grams) granulated sugar
Supporting Ingredients:
- 5 tablespoons (75 grams) unsalted butter, melted
- 1/4 cup (60 milliliters) sour cream
- 1/4 cup (60 milliliters) buttermilk
- 1/4 cup (25 grams) cocoa powder
- 1 tablespoon red food coloring (gel preferred)
- 2 tablespoons (15 grams) powdered sugar
Garnish and Mix-ins:
- 1 cup (100 grams) crushed Oreos
- 2 teaspoons vanilla extract
- 1/2 teaspoon vanilla extract
- Red velvet cake crumbs (for garnish)
Instructions
- Meticulously crush Oreo cookies into fine, uniform crumbs, ensuring no large chunks remain.
- Melt butter and thoroughly incorporate with cookie crumbs, creating a cohesive, compact mixture.
- Transfer the crumb blend into a springform pan, pressing firmly and evenly across the bottom to form a solid foundation.
- Briefly bake the crust at 325°F for 10 minutes to enhance structural integrity, then allow to cool completely.
- In a spacious mixing bowl, cream together cream cheese and sugar until silky and free of lumps.
- Introduce eggs individually, gently blending after each addition to maintain a smooth consistency.
- Incorporate sour cream, buttermilk, and vanilla extract, stirring until fully integrated.
- Delicately sift cocoa powder into the mixture, whisking until achieving a uniform chocolate tone.
- Gradually add red food coloring, adjusting to create a rich, vibrant crimson hue.
- Gently fold crushed Oreos through the cheesecake batter, distributing evenly without deflating the mixture.
- Carefully pour the filling over the prepared crust, using a spatula to create a level surface.
- Create a water bath by placing the springform pan inside a larger baking dish, filling with hot water halfway up the pan’s exterior.
- Bake for approximately 60 minutes, monitoring until the center remains slightly wobbly but structurally set.
- Switch off the oven, leaving the cheesecake inside with the door slightly ajar, allowing gradual temperature equalization for 60 minutes.
- Remove from oven and permit complete cooling at room temperature.
- Refrigerate the cheesecake for a minimum of 6 hours, preferably overnight, to achieve optimal texture and flavor melding.
- Whip heavy cream with powdered sugar and vanilla until forming stiff, peaks that hold their shape.
- Artfully spread or pipe the whipped cream across the chilled cheesecake’s surface.
- Garnish with additional crushed Oreos and red velvet crumbs for a visually stunning presentation.
Notes
- Prevent Cracking: Use room temperature ingredients and avoid overmixing to keep the cheesecake smooth and crack-free.
- Water Bath Technique: Wrap the springform pan in aluminum foil to prevent water seepage and ensure even baking.
- Color Control: Start with a small amount of red food coloring and gradually add more to achieve the perfect red velvet shade without an artificial taste.
- Gluten-Free Adaptation: Swap regular Oreos with gluten-free chocolate sandwich cookies and use gluten-free flour for the crust to make the dessert celiac-friendly.
- Prep Time: 20 minutes
- Cook Time: 1 hour 15 minutes
- Category: Desserts
- Method: Baking
- Cuisine: American
Nutrition
- Serving Size: 12
- Calories: 450
- Sugar: 30 g
- Sodium: 300 mg
- Fat: 30 g
- Saturated Fat: 18 g
- Unsaturated Fat: 10 g
- Trans Fat: 0 g
- Carbohydrates: 40 g
- Fiber: 1 g
- Protein: 6 g
- Cholesterol: 100 mg
Katherine Pierce
Recipe Curator & Food Educator
Expertise
Education
Boston University Metropolitan College
Certificate Program in the Culinary Arts
Focus: French and international cuisine techniques, Hands-on culinary training with industry professionals, Food industry insights and operations
Katherine grew up believing every dish has a story. She studied the art of food at Boston University and explored the history behind it. She loves pulling easy recipes from every corner of the world and putting them at your fingertips.
When Katherine’s not writing or testing new flavors, she’s teaching cooking classes, baking colorful mooncakes, or dreaming up new ways to mix old favorites with new twists.