
Fluffy Cloud Whipped Kool-Aid Recipe: Sweet Summer Refreshment
Wild whispers about whipped kool-aid have been sweeping social media platforms lately.
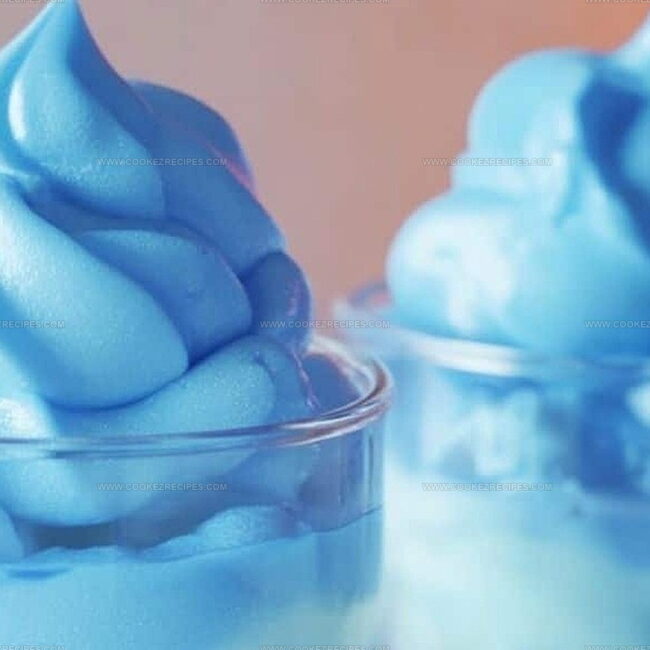
Colorful clouds of fruity sweetness now capture everyone’s attention with their playful appearance.
Curious cooks can easily create this trendy dessert using minimal ingredients.
Vibrant mixtures promise a delightful twist on traditional whipped cream.
Kids and adults alike will love the unexpected burst of nostalgic flavor.
Simple techniques turn this childhood drink into an Instagram-worthy treat.
Let’s transform an ordinary snack into something extraordinary and fun.
Whipped Kool-Aid Frothy Sweet And Colorful
Whipped Kool-Aid Ingredient Blend
Main Ingredients:Liquid Ingredients:Garnish and Optional Toppings:The Process Behind Whipping Up Kool-Aid

Step 1: Prepare Mixing Station
Grab a spacious mixing bowl and set up your electric mixer nearby.
Make sure all your ingredients are room temperature for optimal blending.
Step 2: Combine Dry Ingredients
Pour Kool-Aid powder and sugar into the mixing bowl.
Mix these ingredients briefly to create a uniform base for your whipped treat.
Step 3: Add Whipping Cream
Carefully pour heavy whipping cream into the bowl with the dry ingredients.
The creamy liquid will transform your mixture into a fluffy delight.
Step 4: Whip to Perfection
Turn on the electric mixer and begin whipping the ingredients.
Beat the mixture at medium-high speed for 3-4 minutes until soft, billowy peaks start to form.
Watch for a light and airy texture that holds its shape.
Step 5: Prepare Serving Glass
Select a tall glass and fill it with ice cubes.
The cold base will create a refreshing foundation for your whipped drink.
Step 6: Pour Cold Milk
Slowly pour chilled milk over the ice, filling the glass about two-thirds full.
The milk provides a smooth, cool backdrop for the whipped topping.
Step 7: Top with Whipped Kool-Aid
Gently spoon the whipped Kool-Aid mixture on top of the milk, creating a beautiful layered effect.
Allow the fluffy topping to sit delicately on the surface.
Step 8: Final Garnish
For an extra touch of excitement, add a dollop of whipped cream and sprinkle a pinch of Kool-Aid powder on top.
This adds visual appeal and an extra burst of flavor.
Kool-Aid Tips For Whipped Drink Fun
Kool-Aid Whip Keeps Its Fluff in Storage
Sweet Picks With Whipped Kool-Aid
Whipped Kool-Aid Serving Ideas
FAQs
A trendy dessert drink that combines Kool-Aid powder with whipped cream, creating a fluffy, colorful topping served over cold milk.
Bright, fruity flavors like strawberry, cherry, and blue raspberry are most popular because they create vibrant colors and intense taste.
An electric mixer is recommended to achieve the right whipped texture, but you can also use a hand whisk with some extra arm strength.
Absolutely! Kids love the fun colors, sweet taste, and interactive preparation of Whipped Kool-Aid. It’s a playful, easy-to-make treat that children can help create.
Print
Whipped Kool-Aid Recipe
- Total Time: 5 minutes
- Yield: 1 1x
Description
Cool whipped Kool-Aid creates a playful twist on classic desserts, blending nostalgic childhood memories with modern culinary creativity. Creamy, colorful, and surprisingly simple, this treat offers a quick escape into sweet comfort that delights both kids and adults.
Ingredients
Main Ingredients:
- 4 oz (120 ml) cold milk
- 2 tablespoons heavy whipping cream
- 2 tablespoons Kool-Aid powder (any flavor)
Sweeteners:
- 2 tablespoons sugar (adjust to taste)
Garnish and Optional Additions:
- Ice cubes
- Optional: Whipped cream for topping
- Optional: Matching Kool-Aid powder for rim garnish
Instructions
- Blend Kool-Aid powder and sugar into heavy whipping cream using an electric mixer, creating a vibrant and fluffy base with intense flavor.
- Continue whipping the mixture for several minutes until soft, airy peaks develop, indicating the perfect creamy consistency.
- Select a tall serving glass and layer with crisp, chilled ice cubes to provide a refreshing foundation for the beverage.
- Stream cold milk over the ice, ensuring a smooth, chilled liquid base that will complement the whipped topping.
- Carefully dollop the brightly colored Kool-Aid whipped cream onto the milk, allowing it to float gracefully on the surface.
- For an extra indulgent touch, crown the drink with a generous swirl of additional whipped cream and a delicate dusting of Kool-Aid powder, enhancing both visual appeal and flavor intensity.
Notes
- Experiment with different Kool-Aid flavors to create unique color and taste combinations for a personalized treat.
- Use cold heavy whipping cream straight from the refrigerator to help achieve faster and more stable whipped peaks.
- Reduce sugar content by using alternative sweeteners like stevia or monk fruit for a lower-calorie version that still maintains delicious flavor.
- Serve immediately after preparing to enjoy the best texture and prevent separation of the whipped topping from the milk.
- Prep Time: 5 minutes
- Cook Time: 0 minutes
- Category: Snacks, Desserts
- Method: Blending
- Cuisine: American
Nutrition
- Serving Size: 1
- Calories: 200
- Sugar: 20 g
- Sodium: 50 mg
- Fat: 10 g
- Saturated Fat: 6 g
- Unsaturated Fat: 4 g
- Trans Fat: 0 g
- Carbohydrates: 24 g
- Fiber: 0 g
- Protein: 2 g
- Cholesterol: 40 mg
Daniel Bruns
Founder & Culinary Innovator
Expertise
Recipe development for home cooks, Nutritional analysis and meal planning, Culinary education and food writing
Education
Auguste Escoffier School of Culinary Arts
Diploma in Culinary Arts and Operations
Focus: Classical and contemporary cooking techniques, Culinary entrepreneurship and kitchen management, Menu development and food cost analysis
Daniel’s story started with flour on his face and a pie in the oven at his grandma’s house. He later sharpened his skills at the Auguste Escoffier School of Culinary Arts.
His goal? Recipes so simple you’ll want to cook every night. When he’s not whipping up one-pan wonders, Daniel’s outside picking herbs, hosting neighborhood cook-offs, or baking chocolate cakes with his kids, messy, sweet, and unforgettable.